Contact Us

Use the form on the right to contact us.

You can edit the text in this area, and change where the contact form on the right submits to, by entering edit mode using the modes on the bottom right. 


123 Street Avenue, City Town, 99999

(123) 555-6789

email@address.com


You can set your address, phone number, email and site description in the settings tab.
Link to read me page with more information.

Blog

Calm Down Time

Montessori in Real Life

As a mom of a 1-year-old and 3-year-old, I can tell you that our days are filled with many waves of emotions. Young children experience every feeling wholeheartedly. They are working through how to navigate and regulate these big emotions. How we respond to these big feelings in the first few years plays an important role in how they express and manage emotions later in life, so I take my job very seriously. I want my chlidren to know that there are no bad emotions. Every single one of us experiences the whole spectrum of emotions, and they each serve a purpose. So rather than “fix” emotions, I want my children to embrace their emotions while also having the skills to calm themselves down. My role is to listen, acknowledge, confidently lead by example, offer comfort, and the tools to self-regulate.

For tips on navigating early toddler behaviors and emotions, see this post from when D was 14 months old, 18 months old, and two years old. In this post, I’ll be focusing on D, at 3 years old.

Calm Down Time - Montessori in Real Life

As someone who has lived with anxiety my whole life, I have learned the importance of the body and brain connection. If I can calm my body, I can calm my brain. The same is true for children. One of the best things we can do for our child is to give them the tools to calm their body and therefore their mind. Breathing exercises, movement, visual aids, and finding something peaceful to focus on are all useful tools. “Finding calmness” via mindfulness and relaxation techniques isn’t just for managing anxiety; it is useful for moments we feel excited, angry, hurt, happy, tired, or any other emotion.

Calm Down Time - Montessori in Real Life

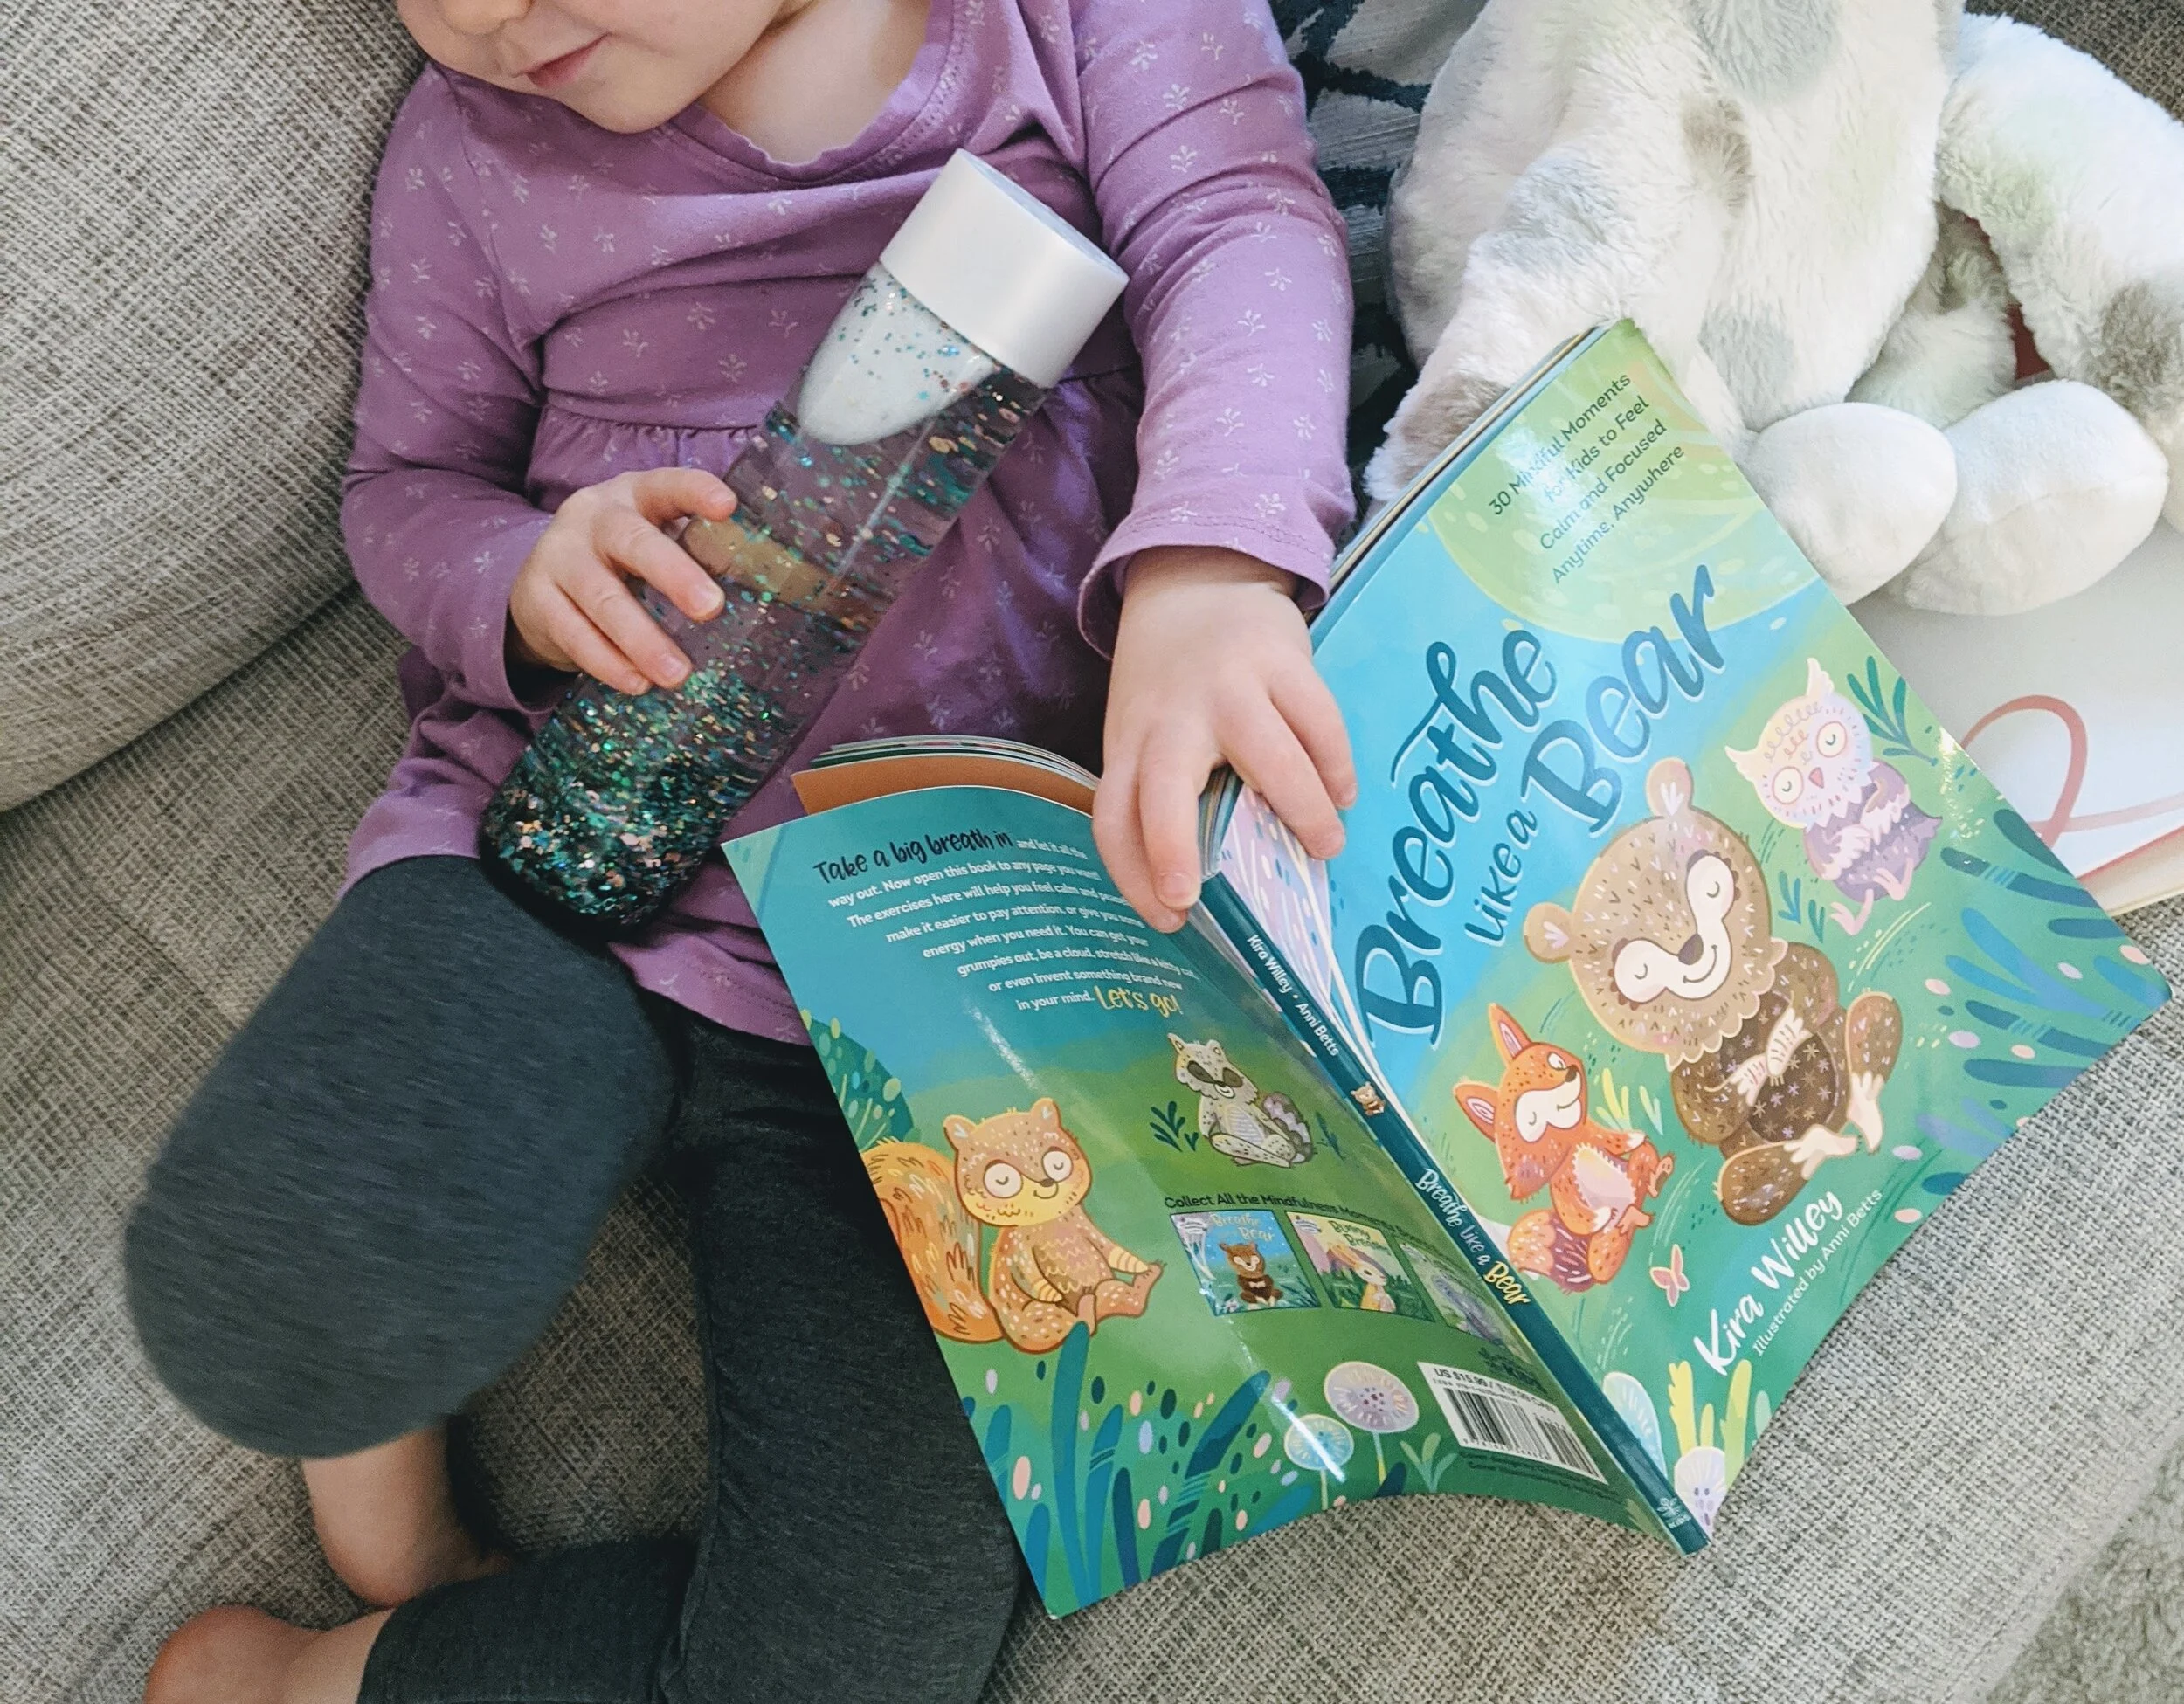
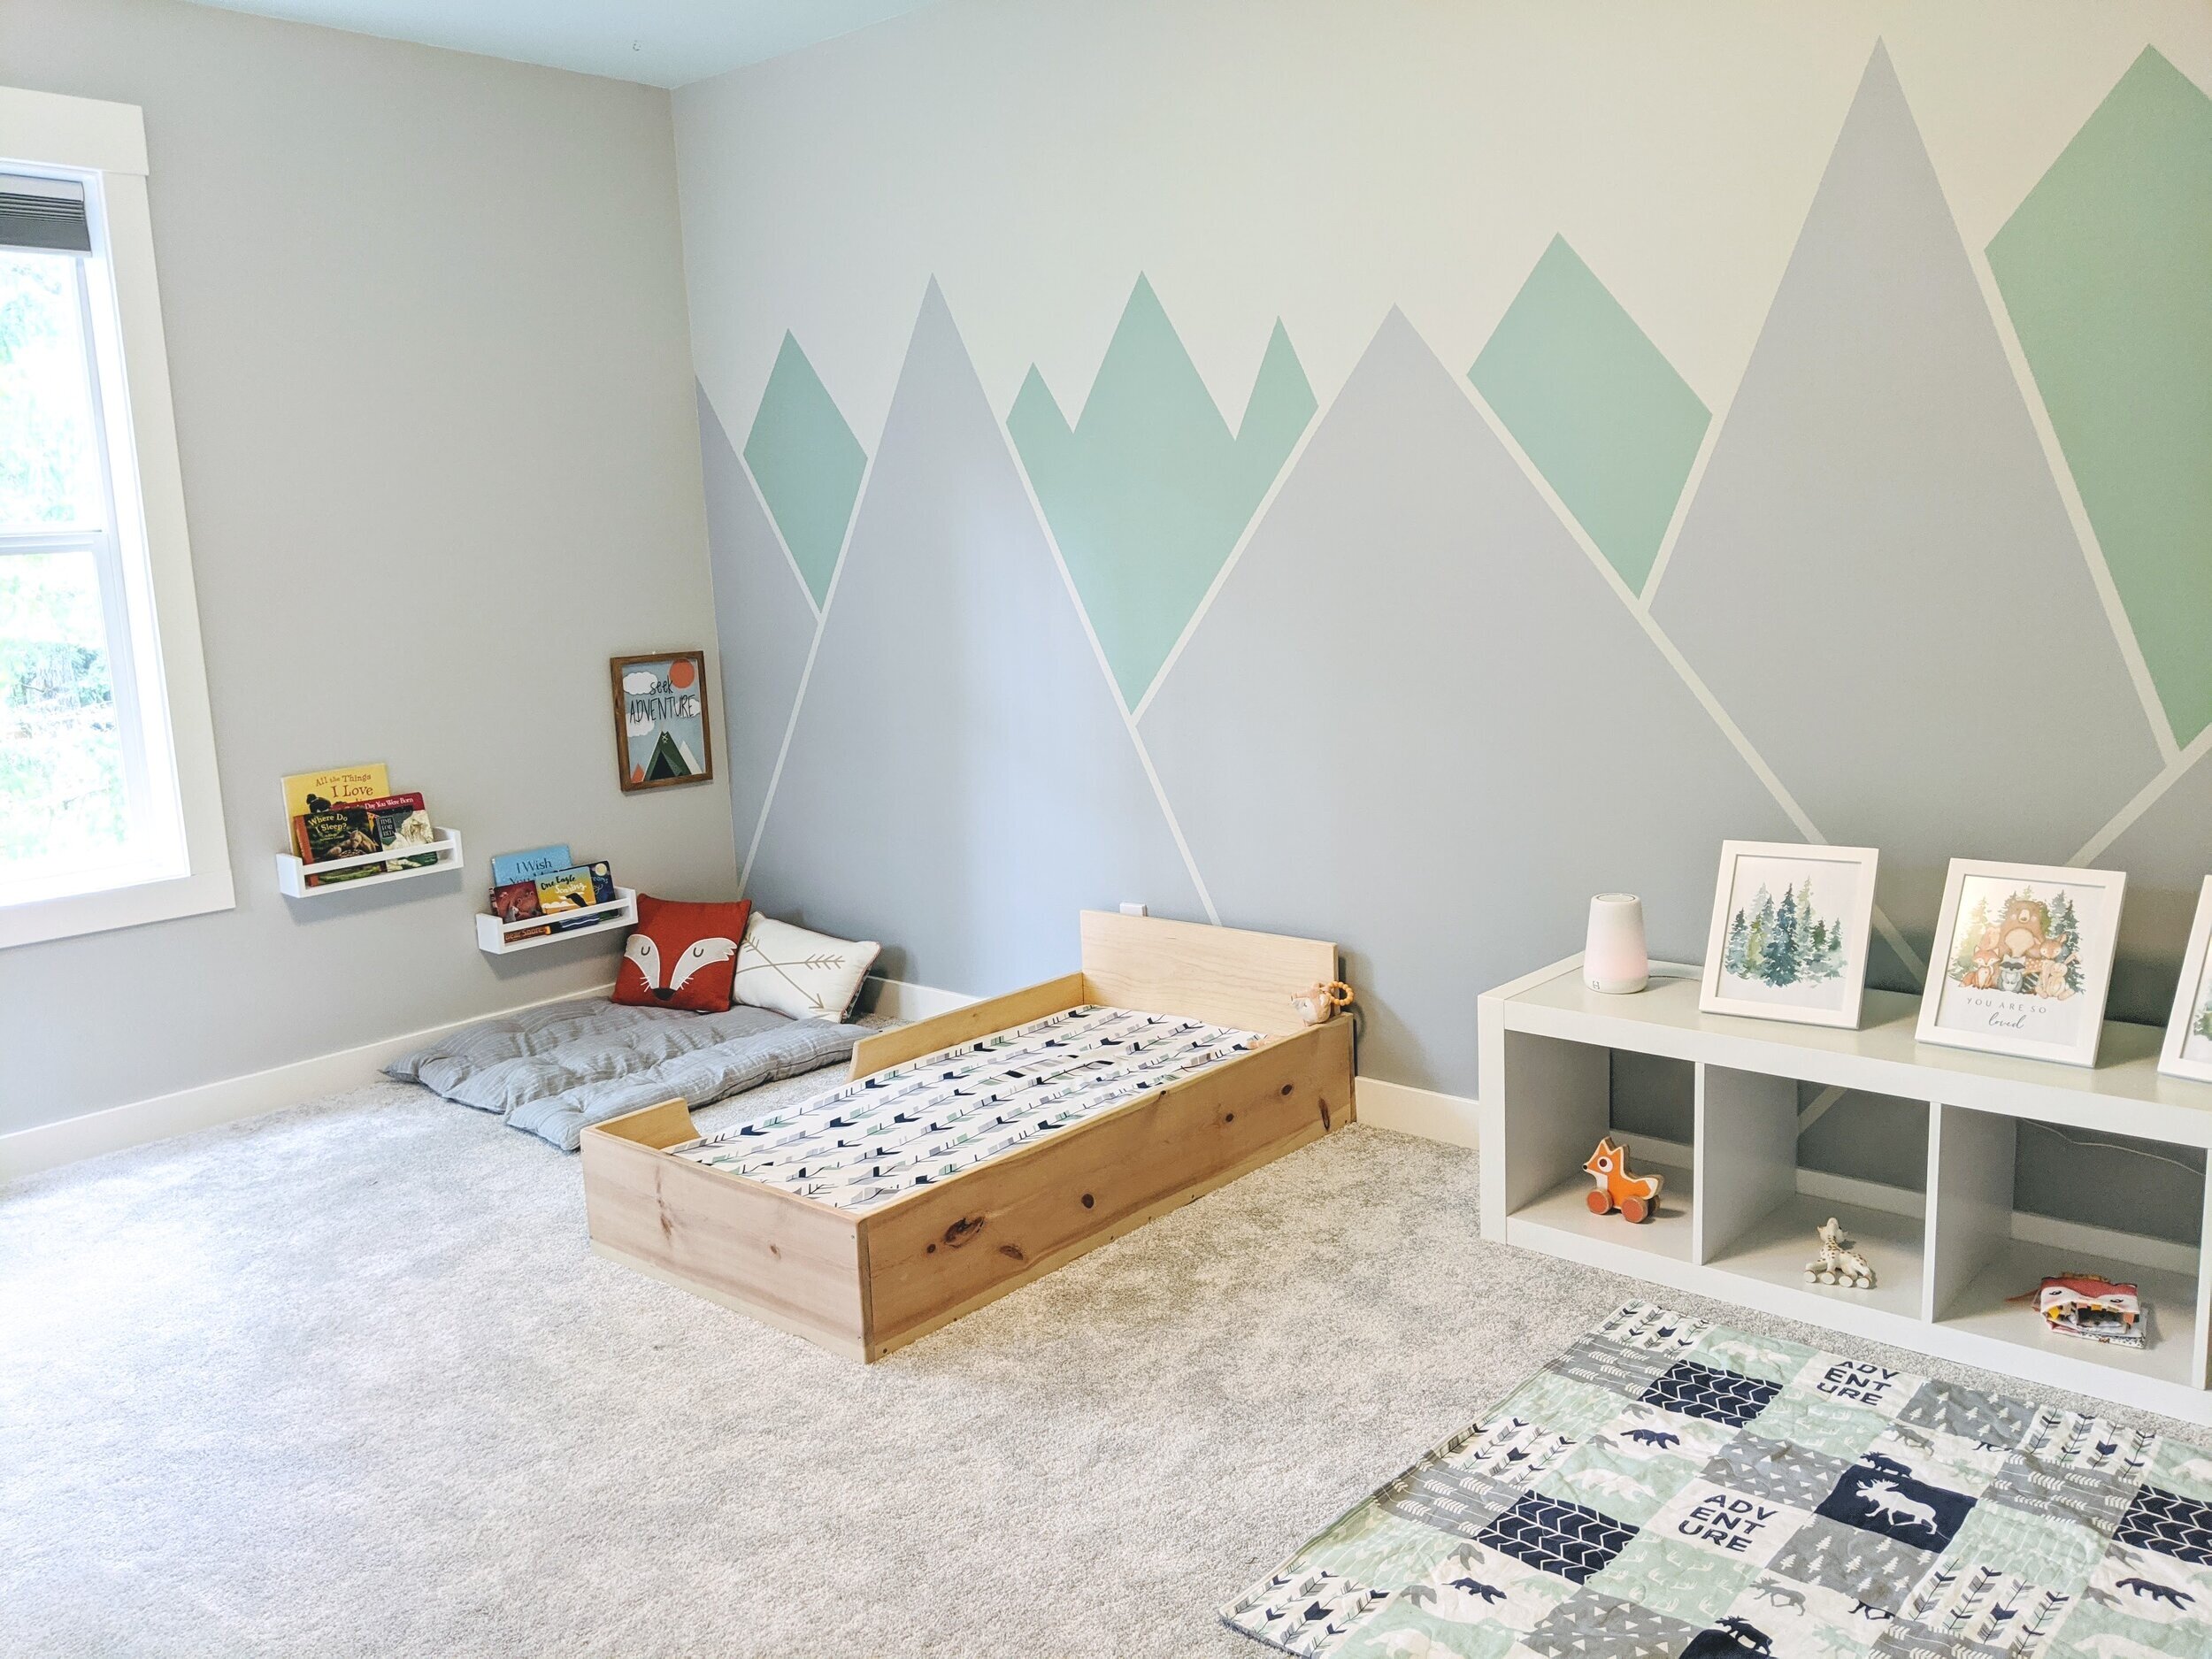
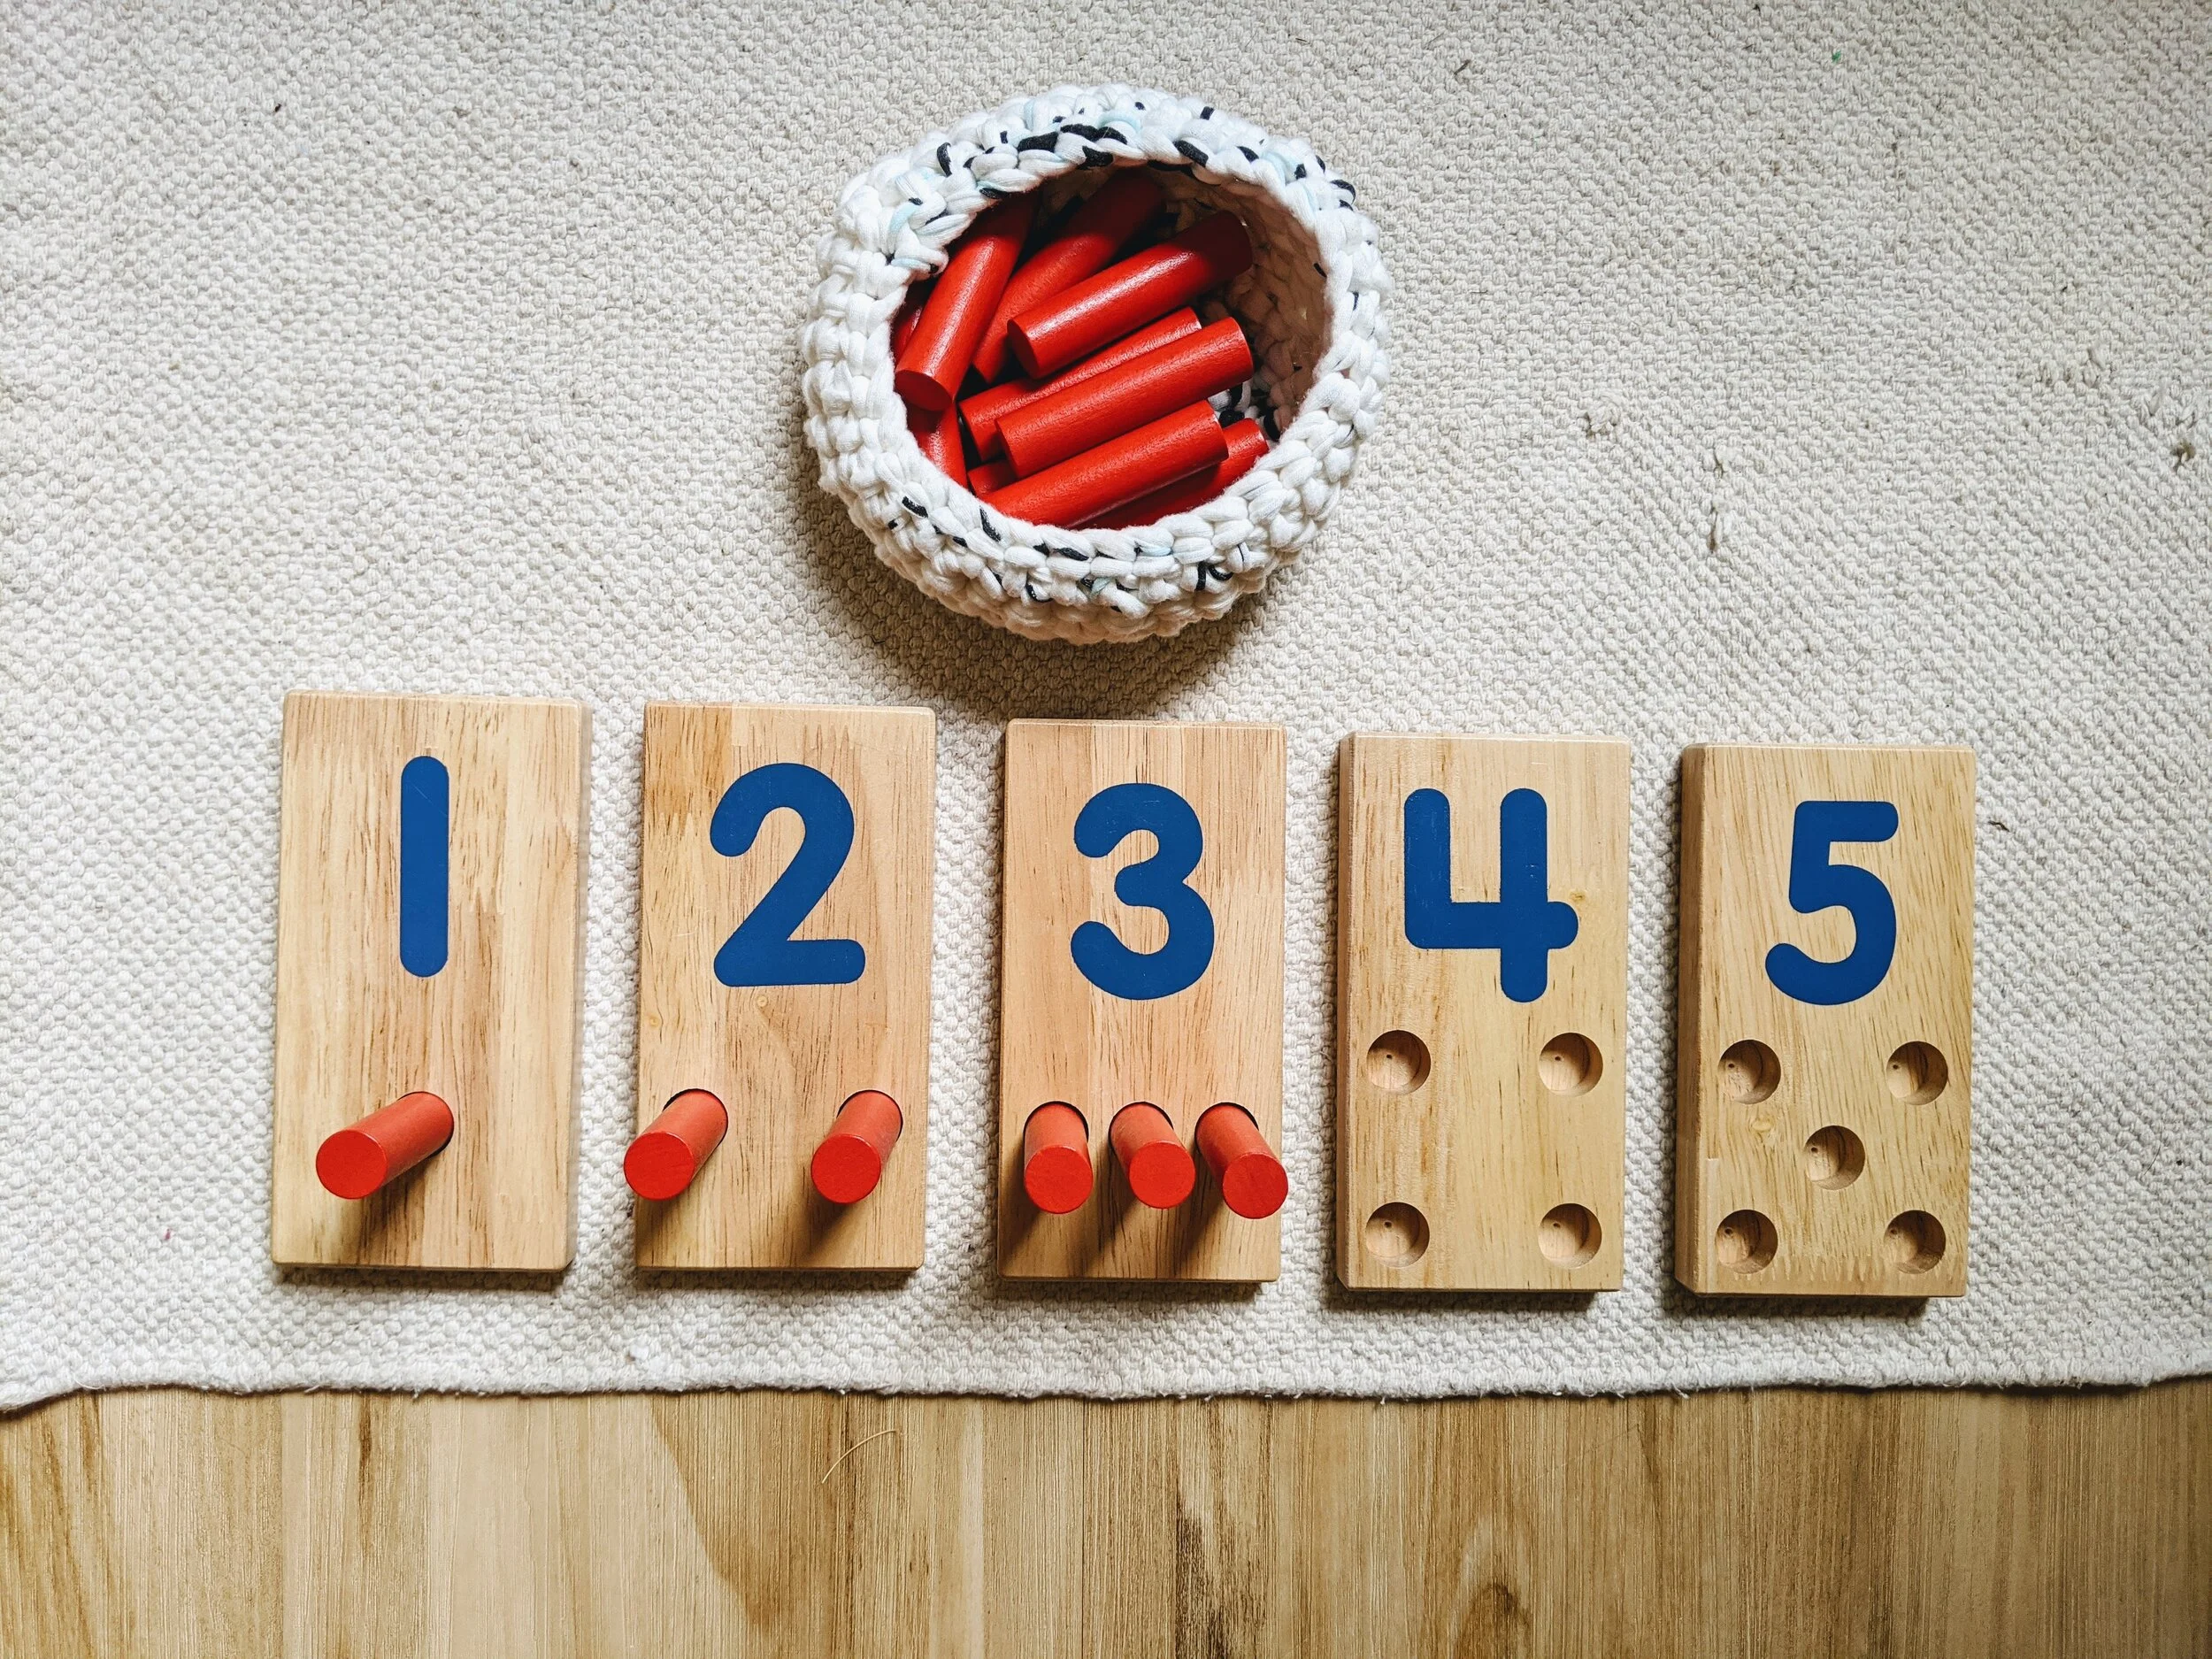
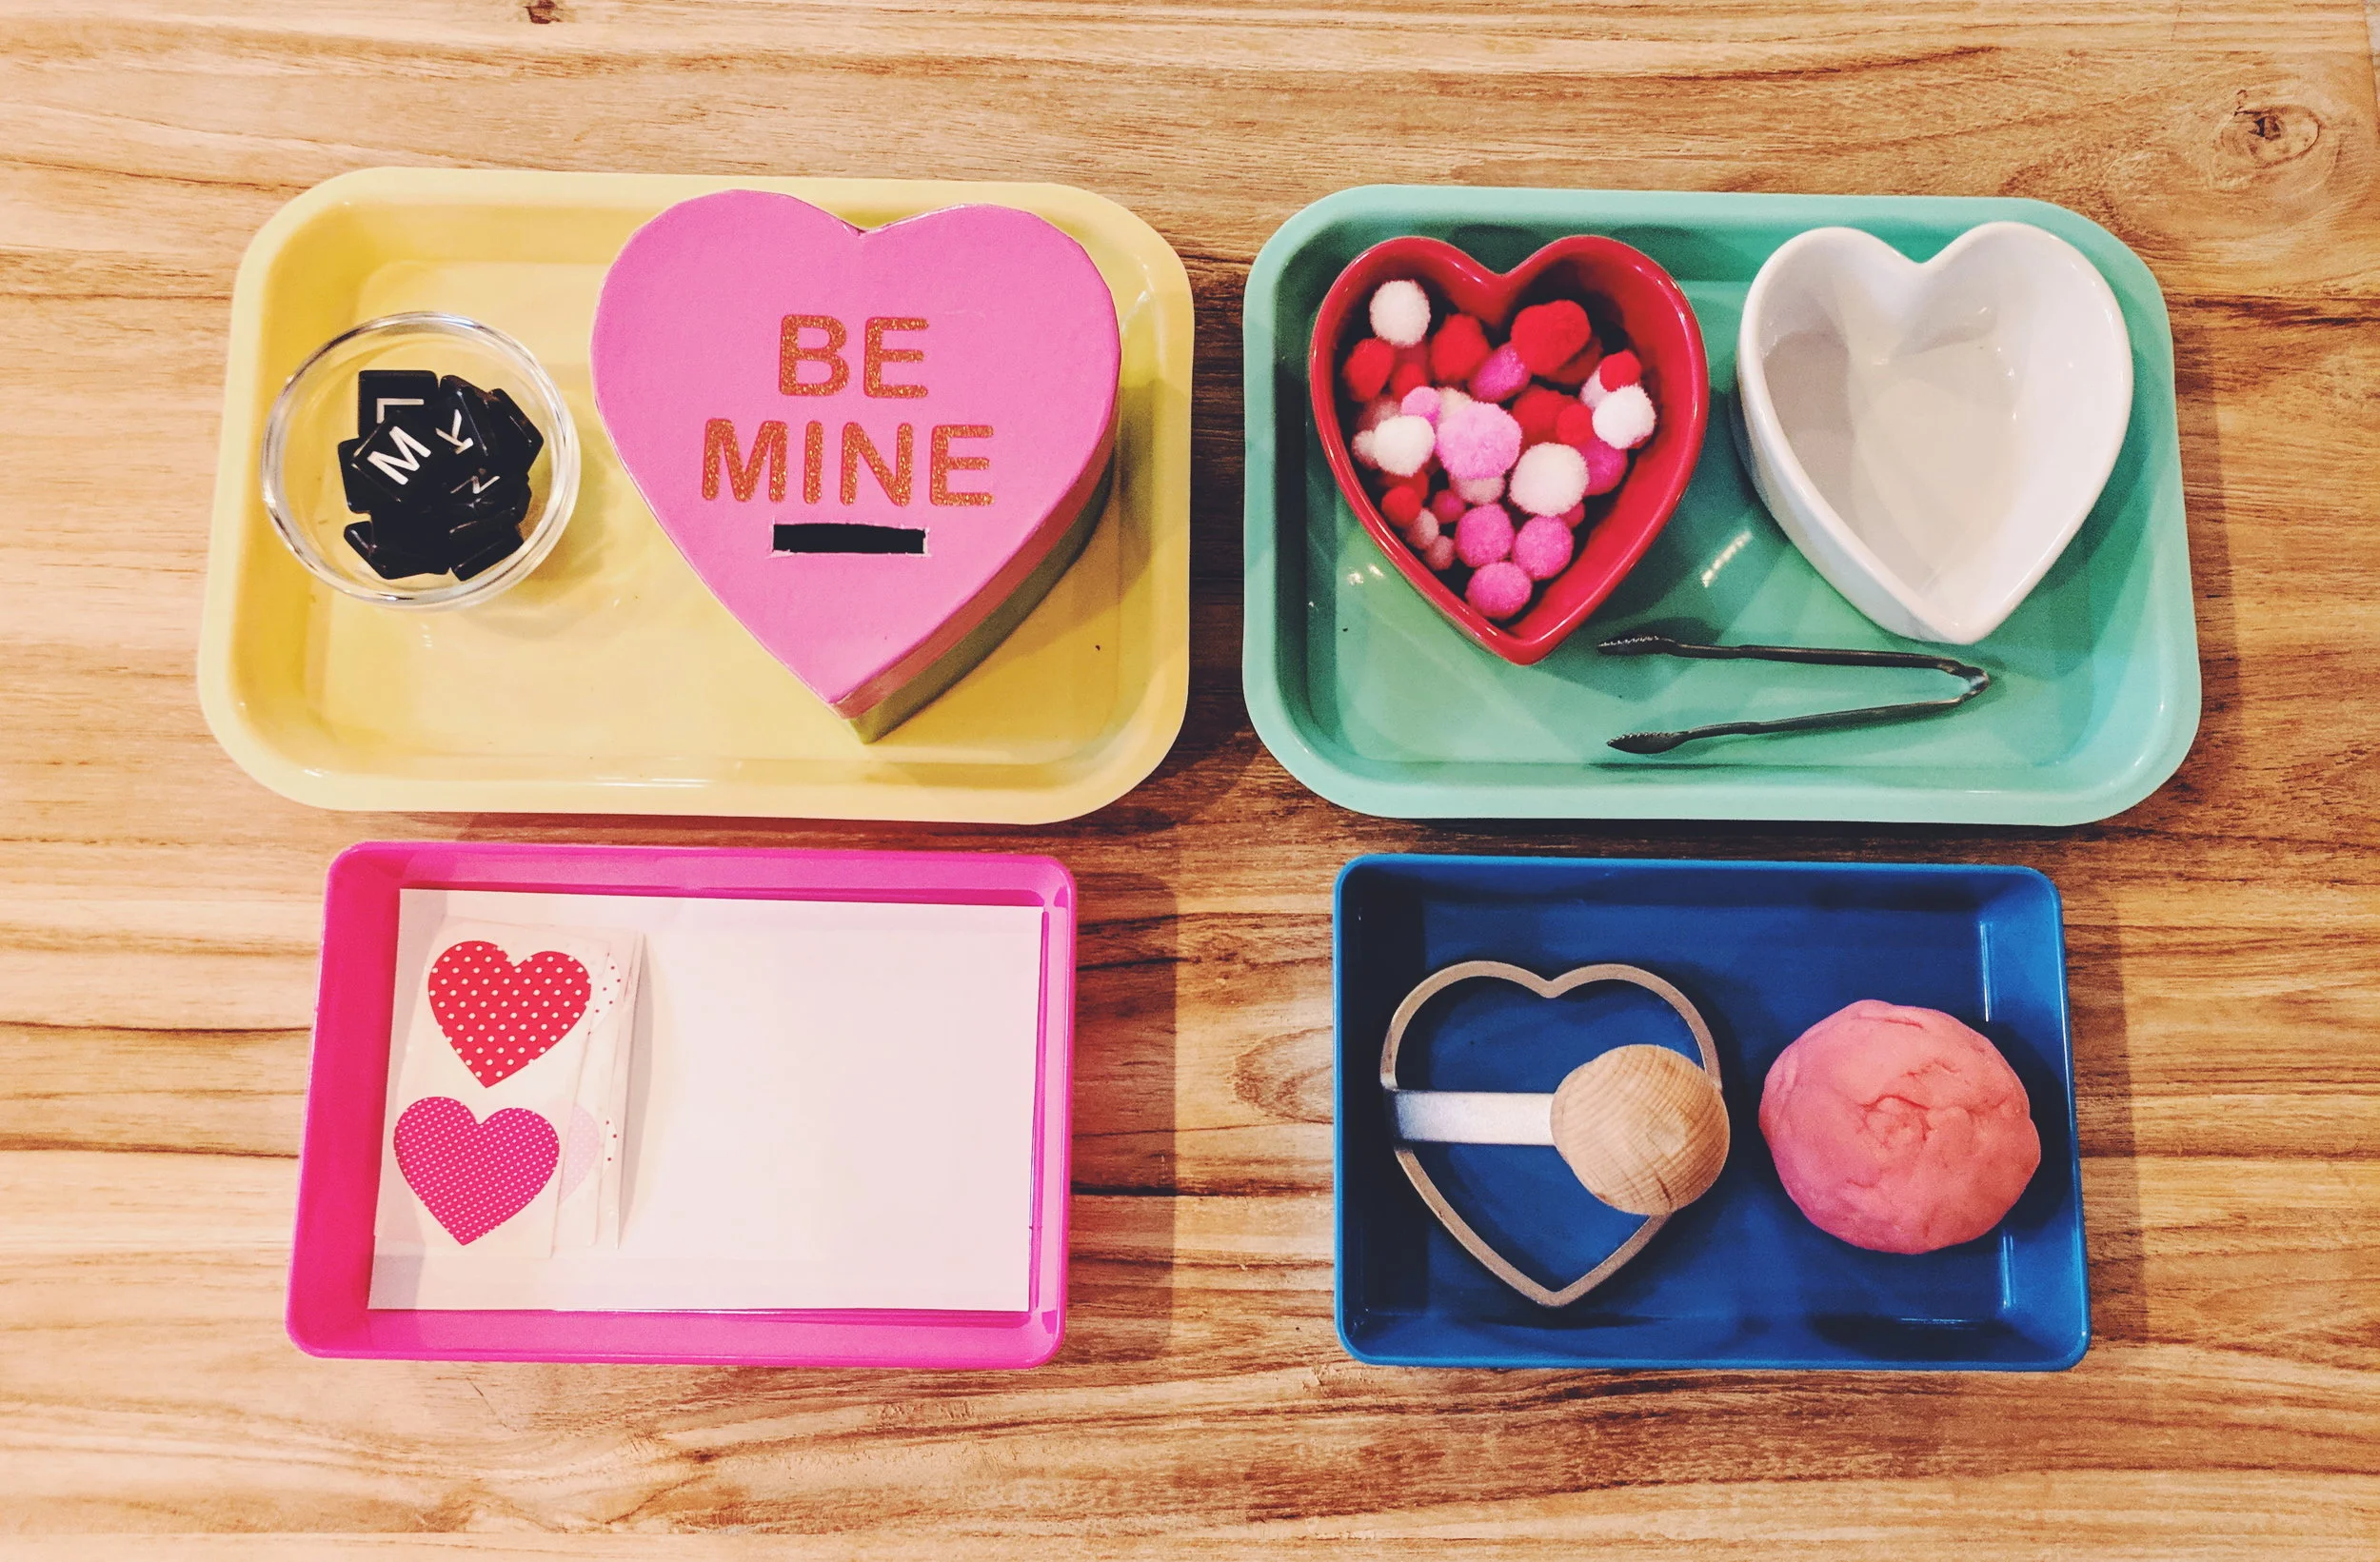
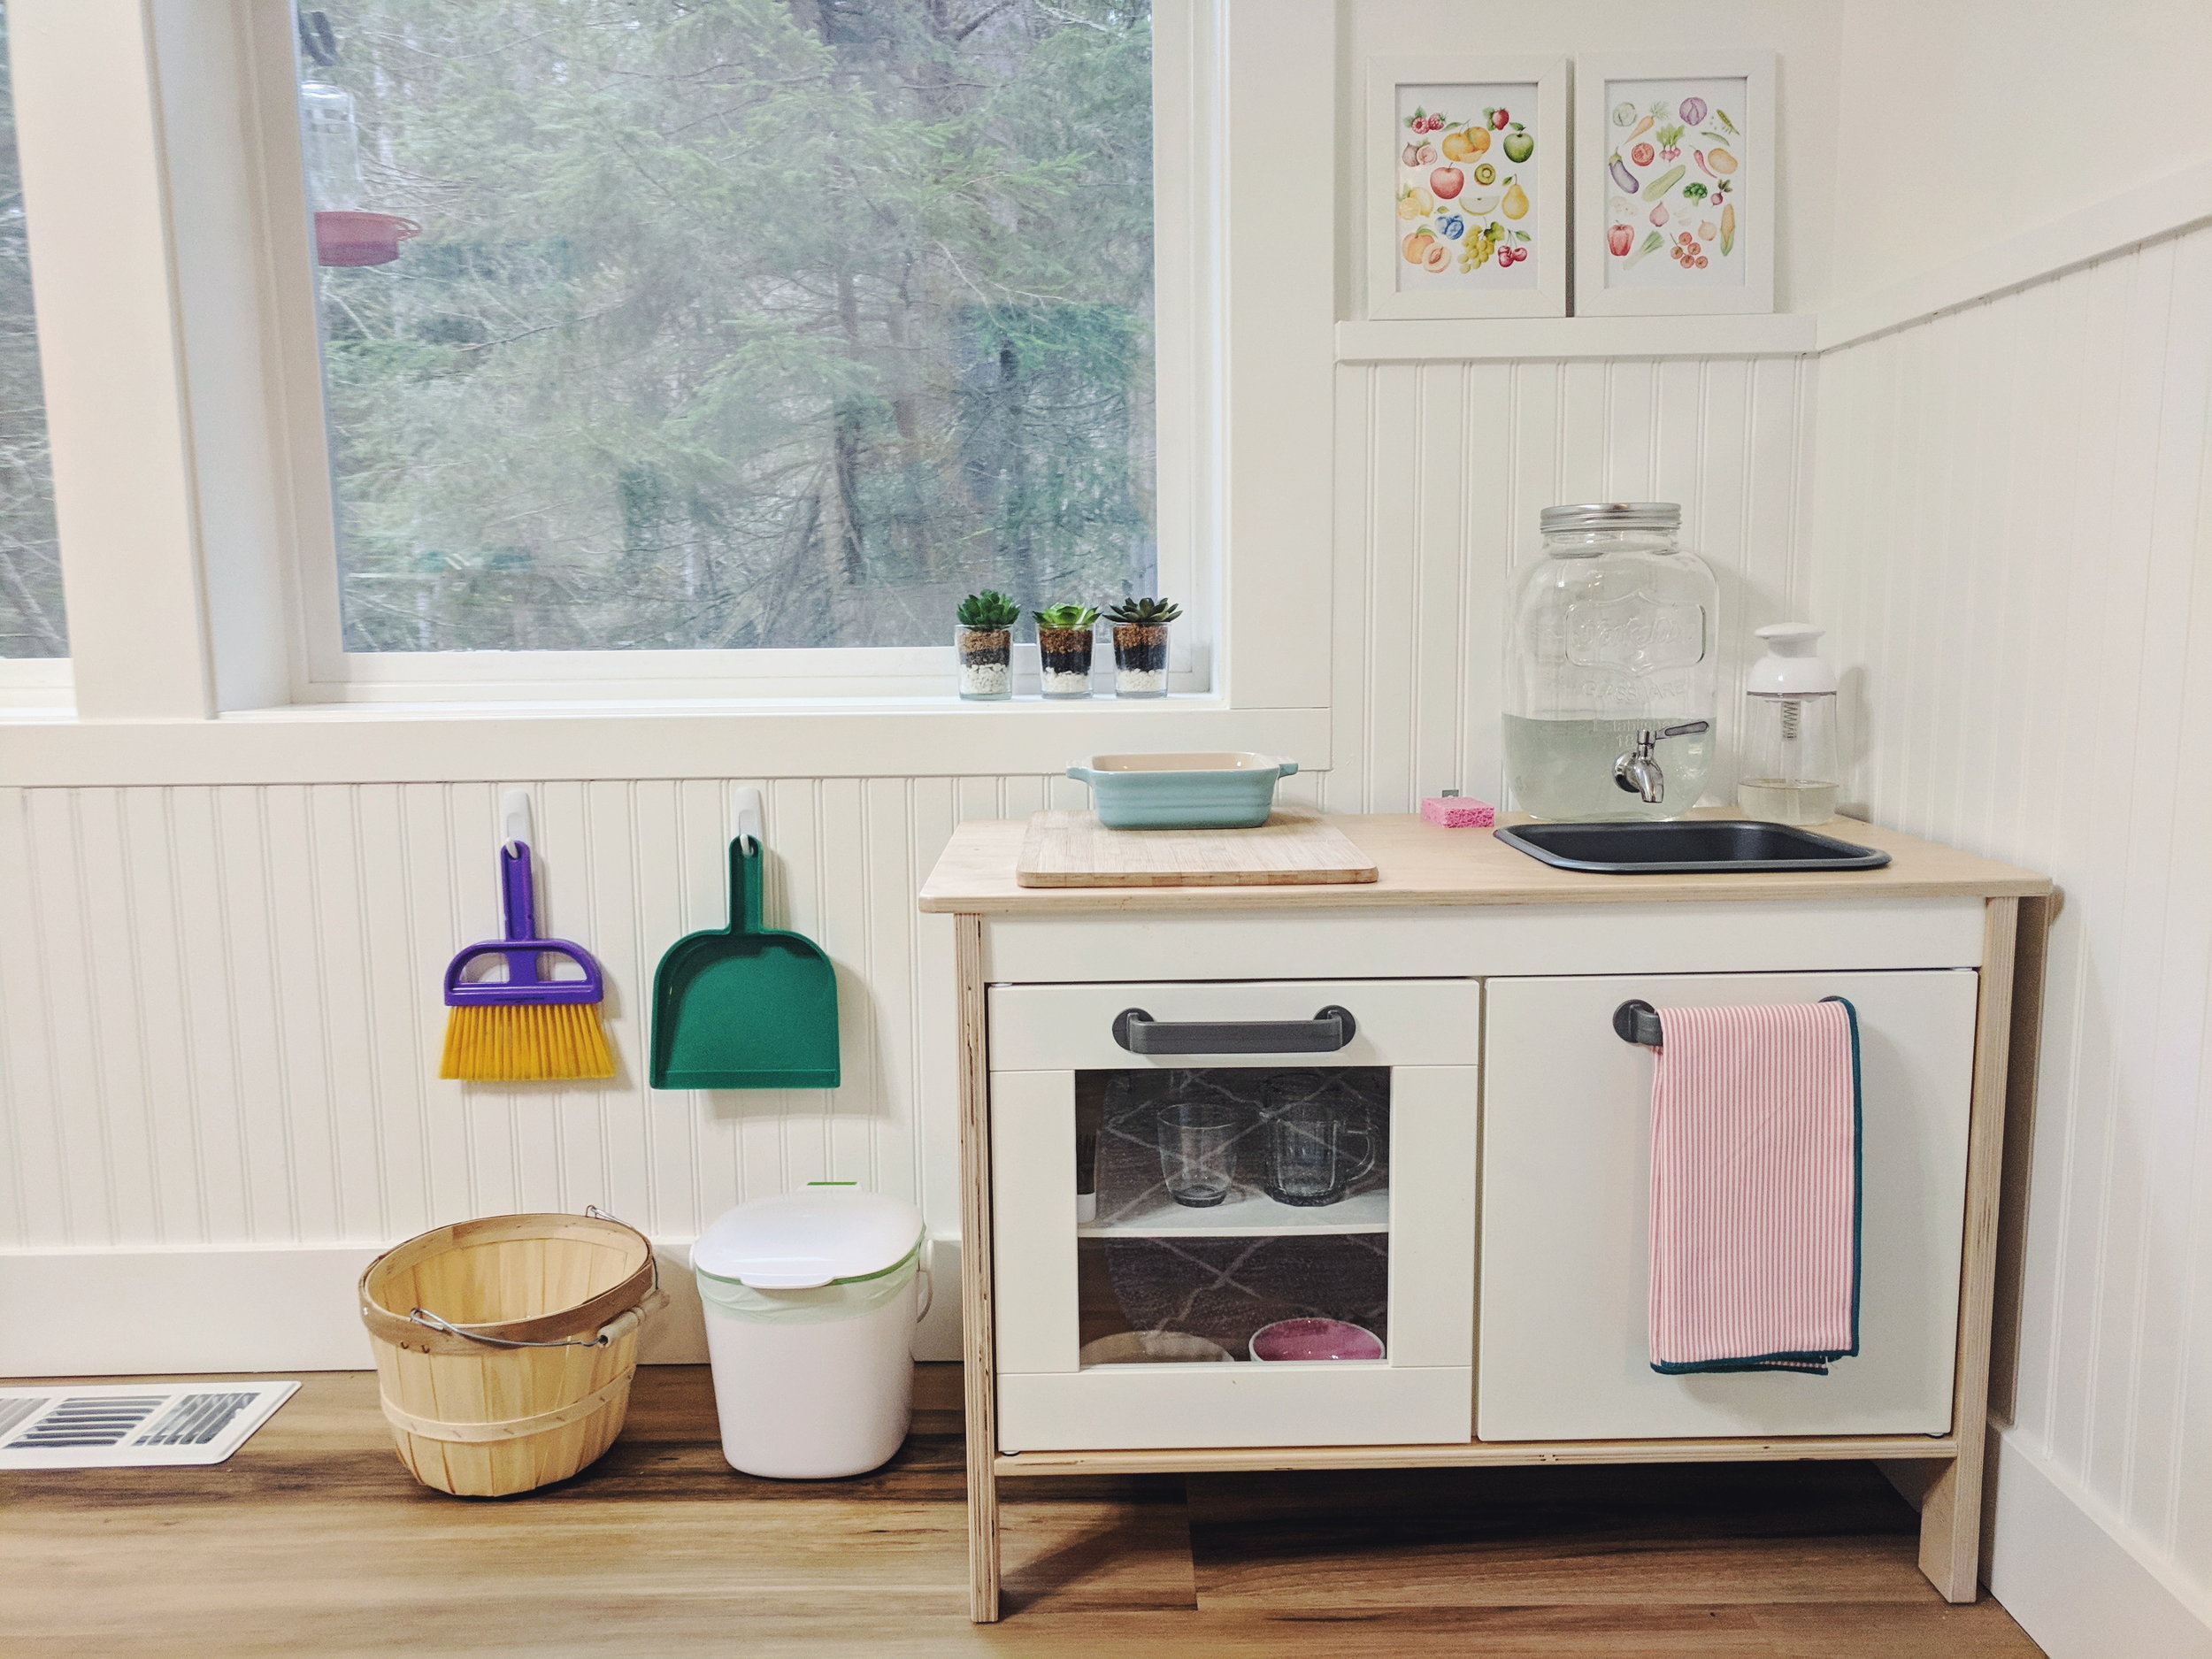
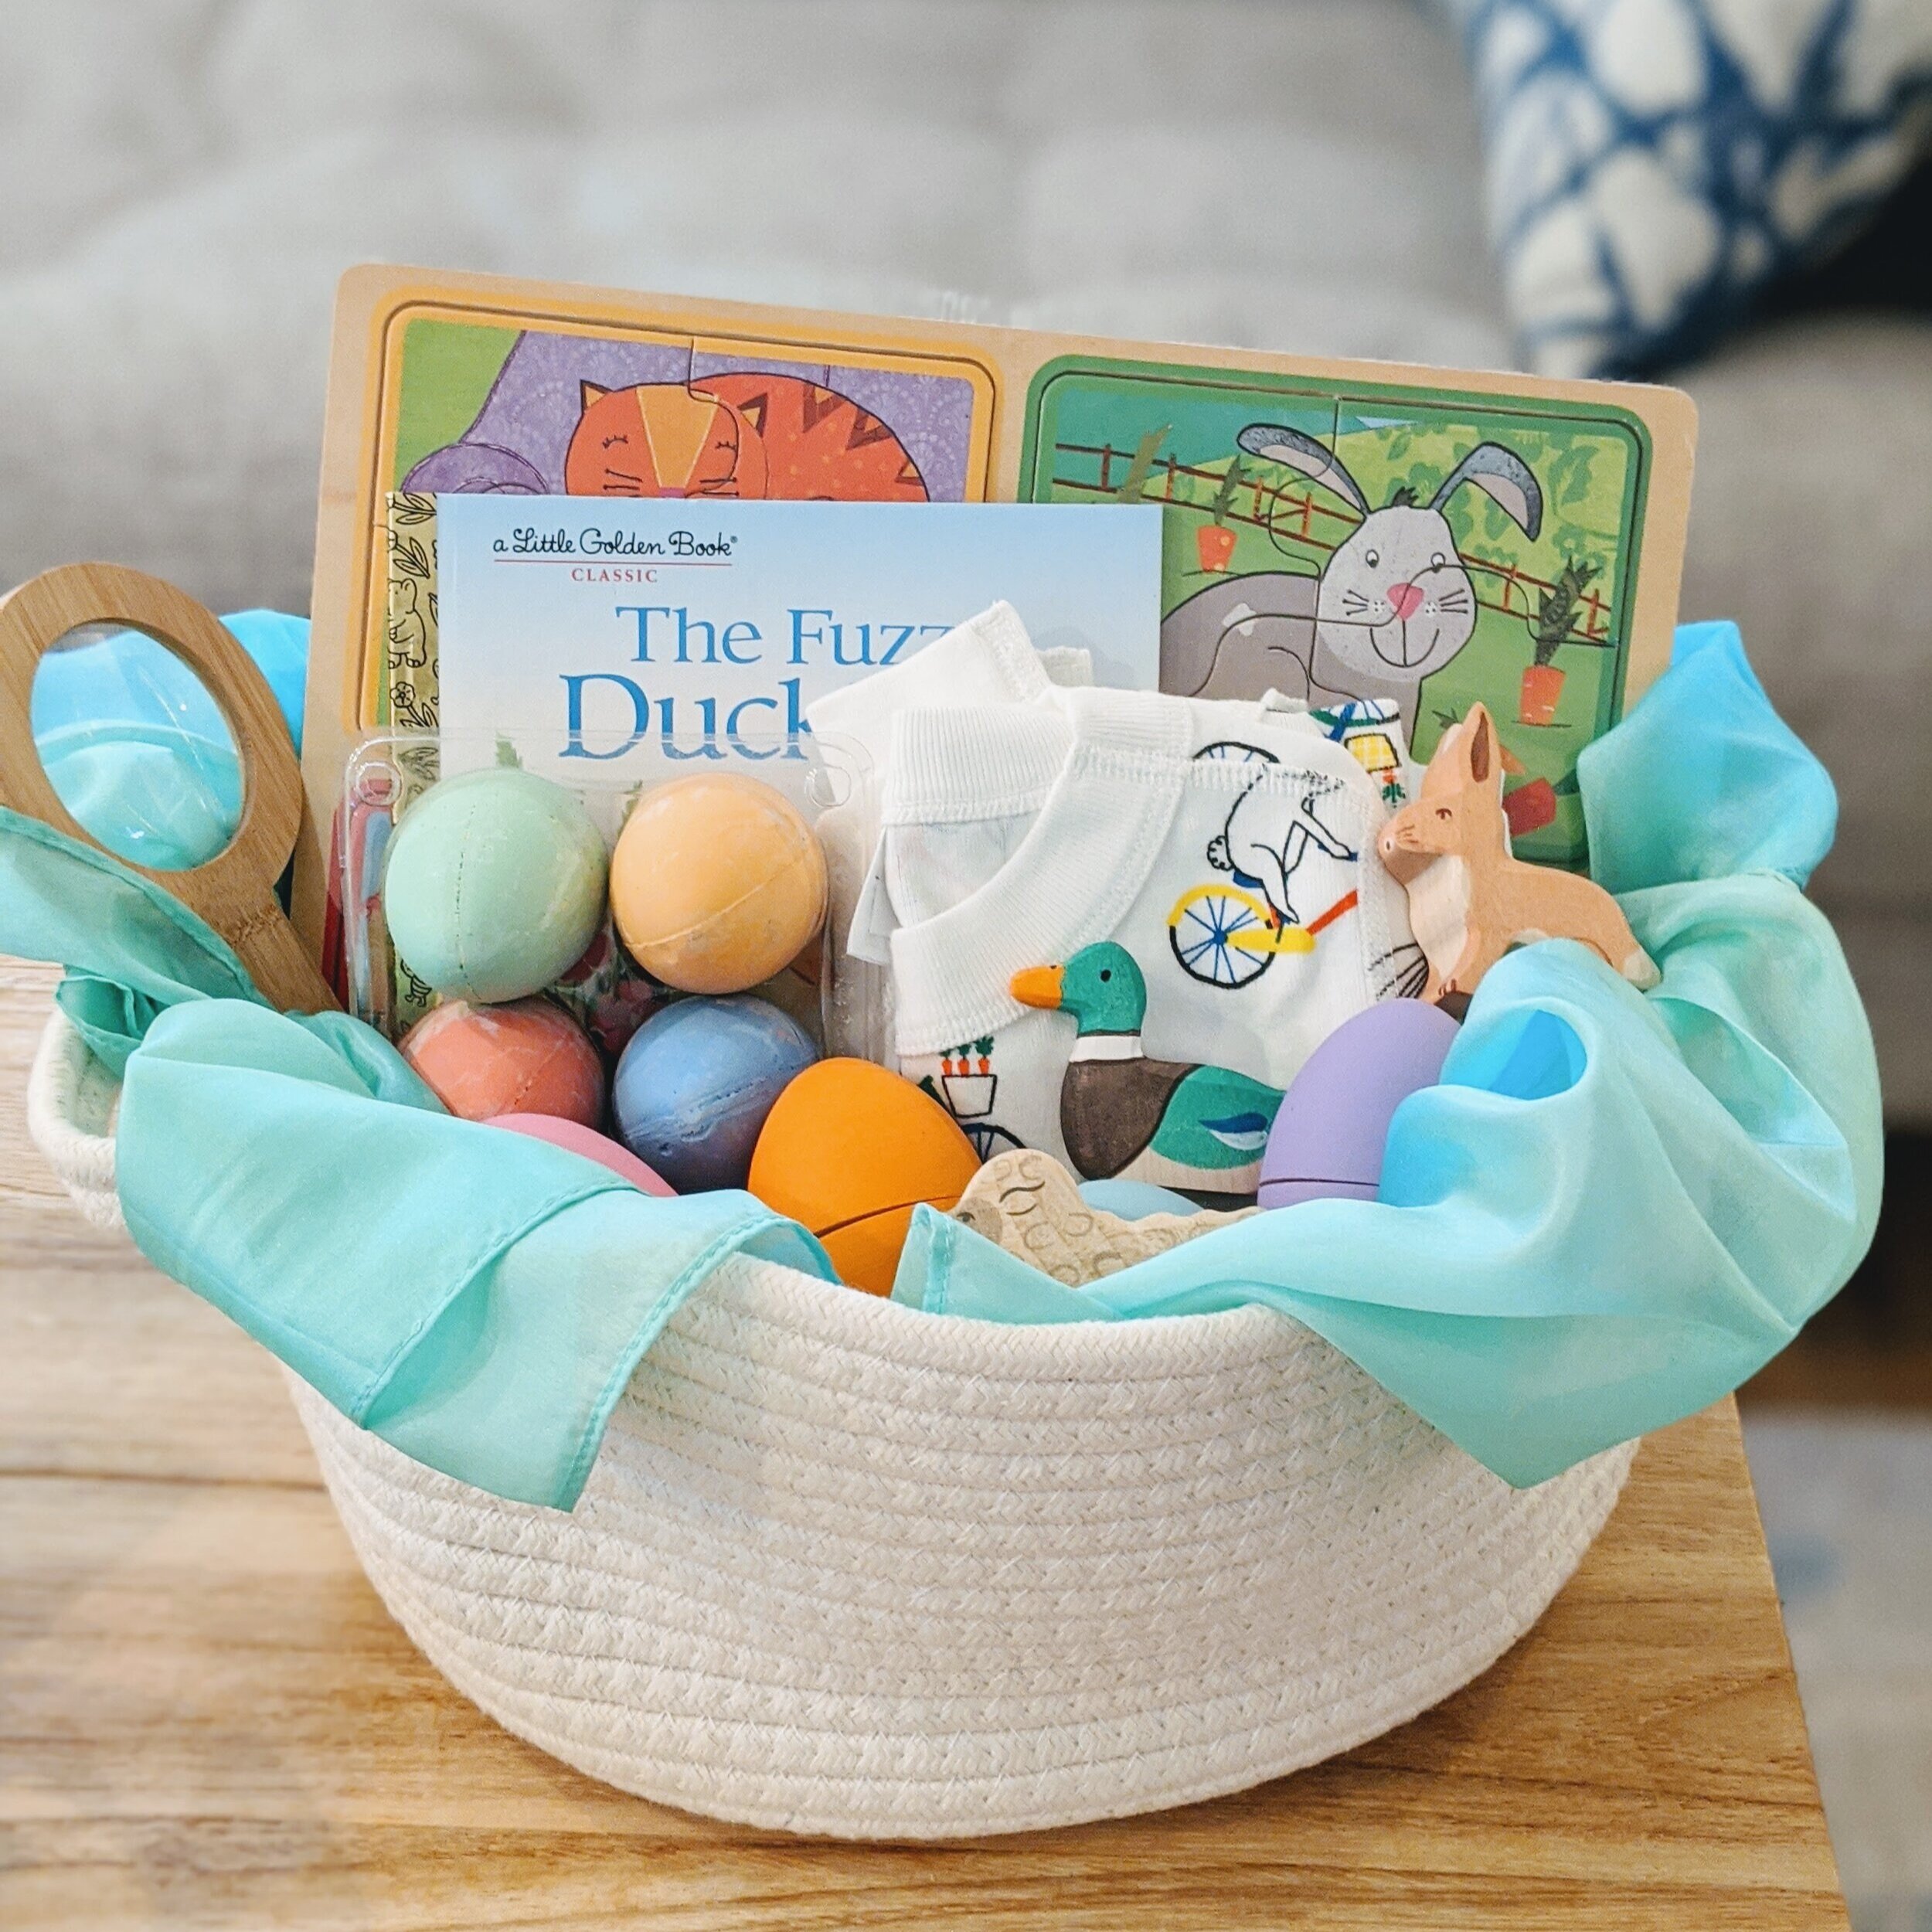
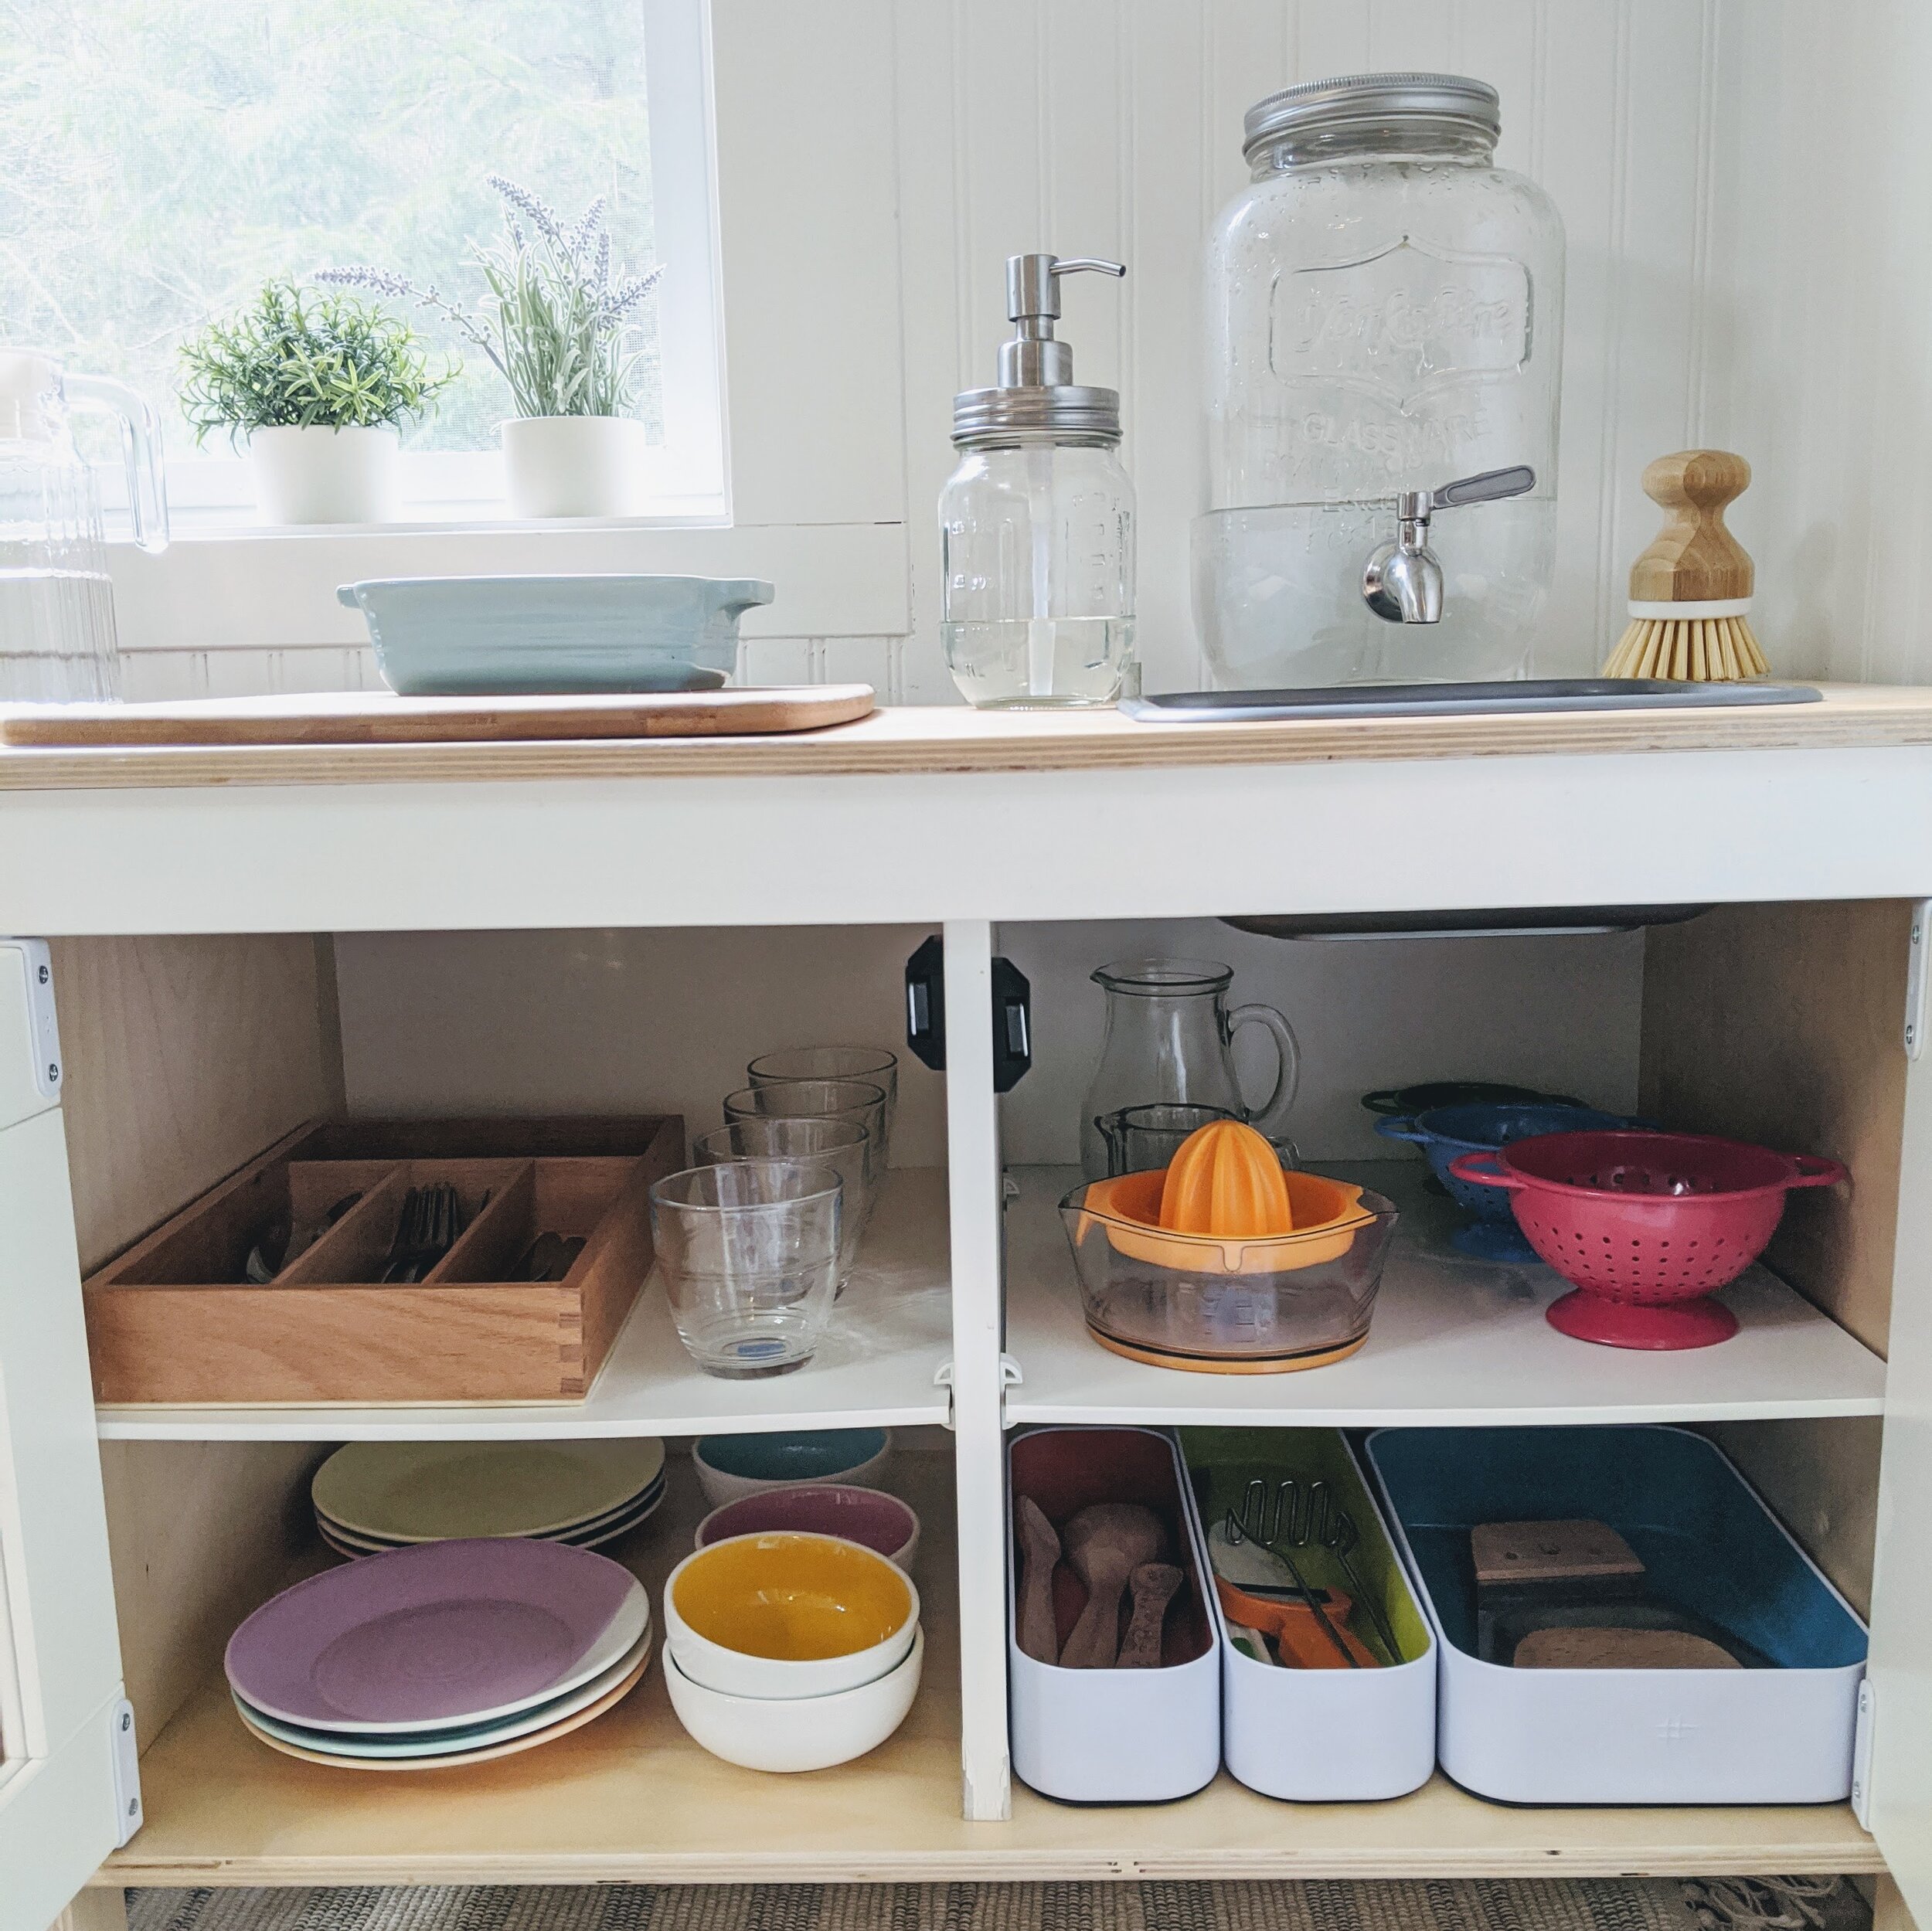
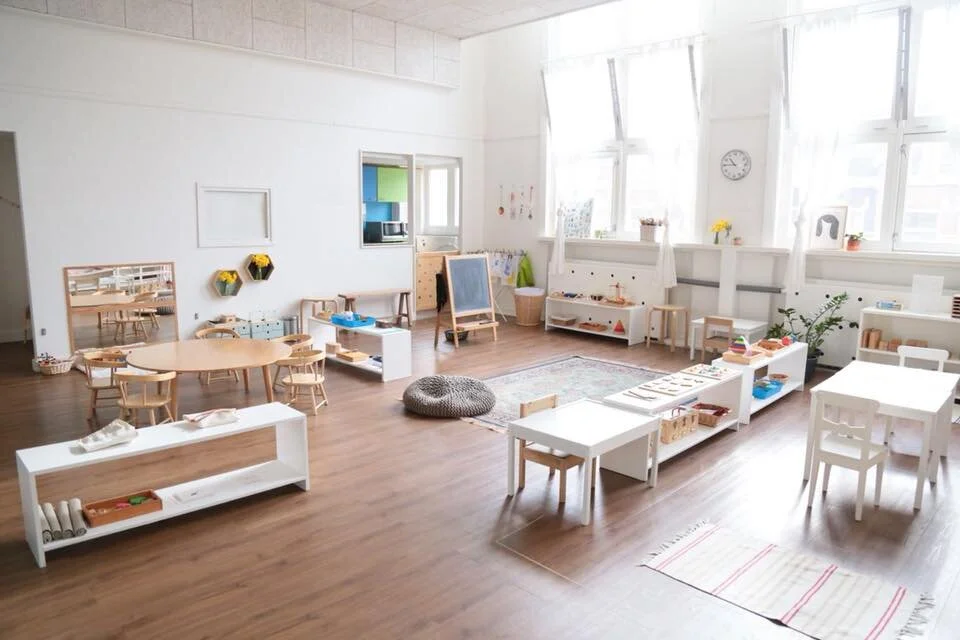
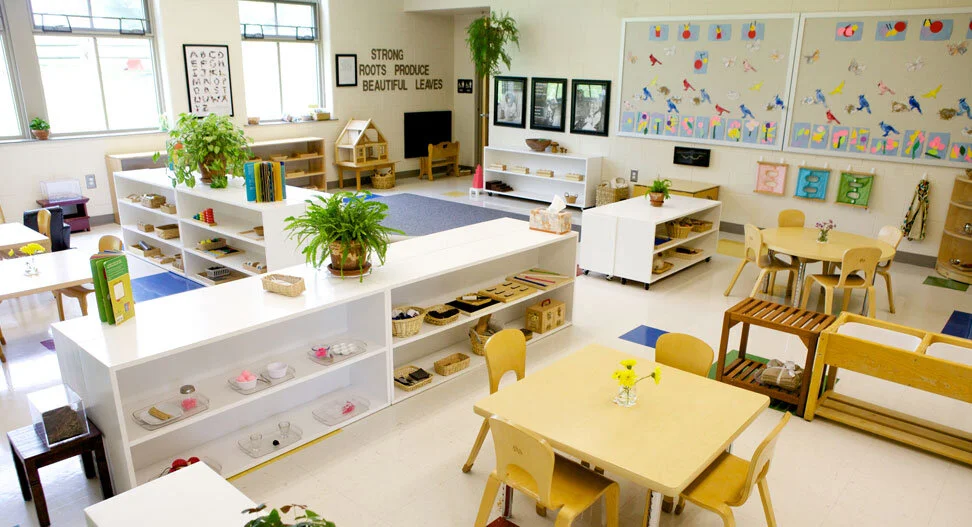
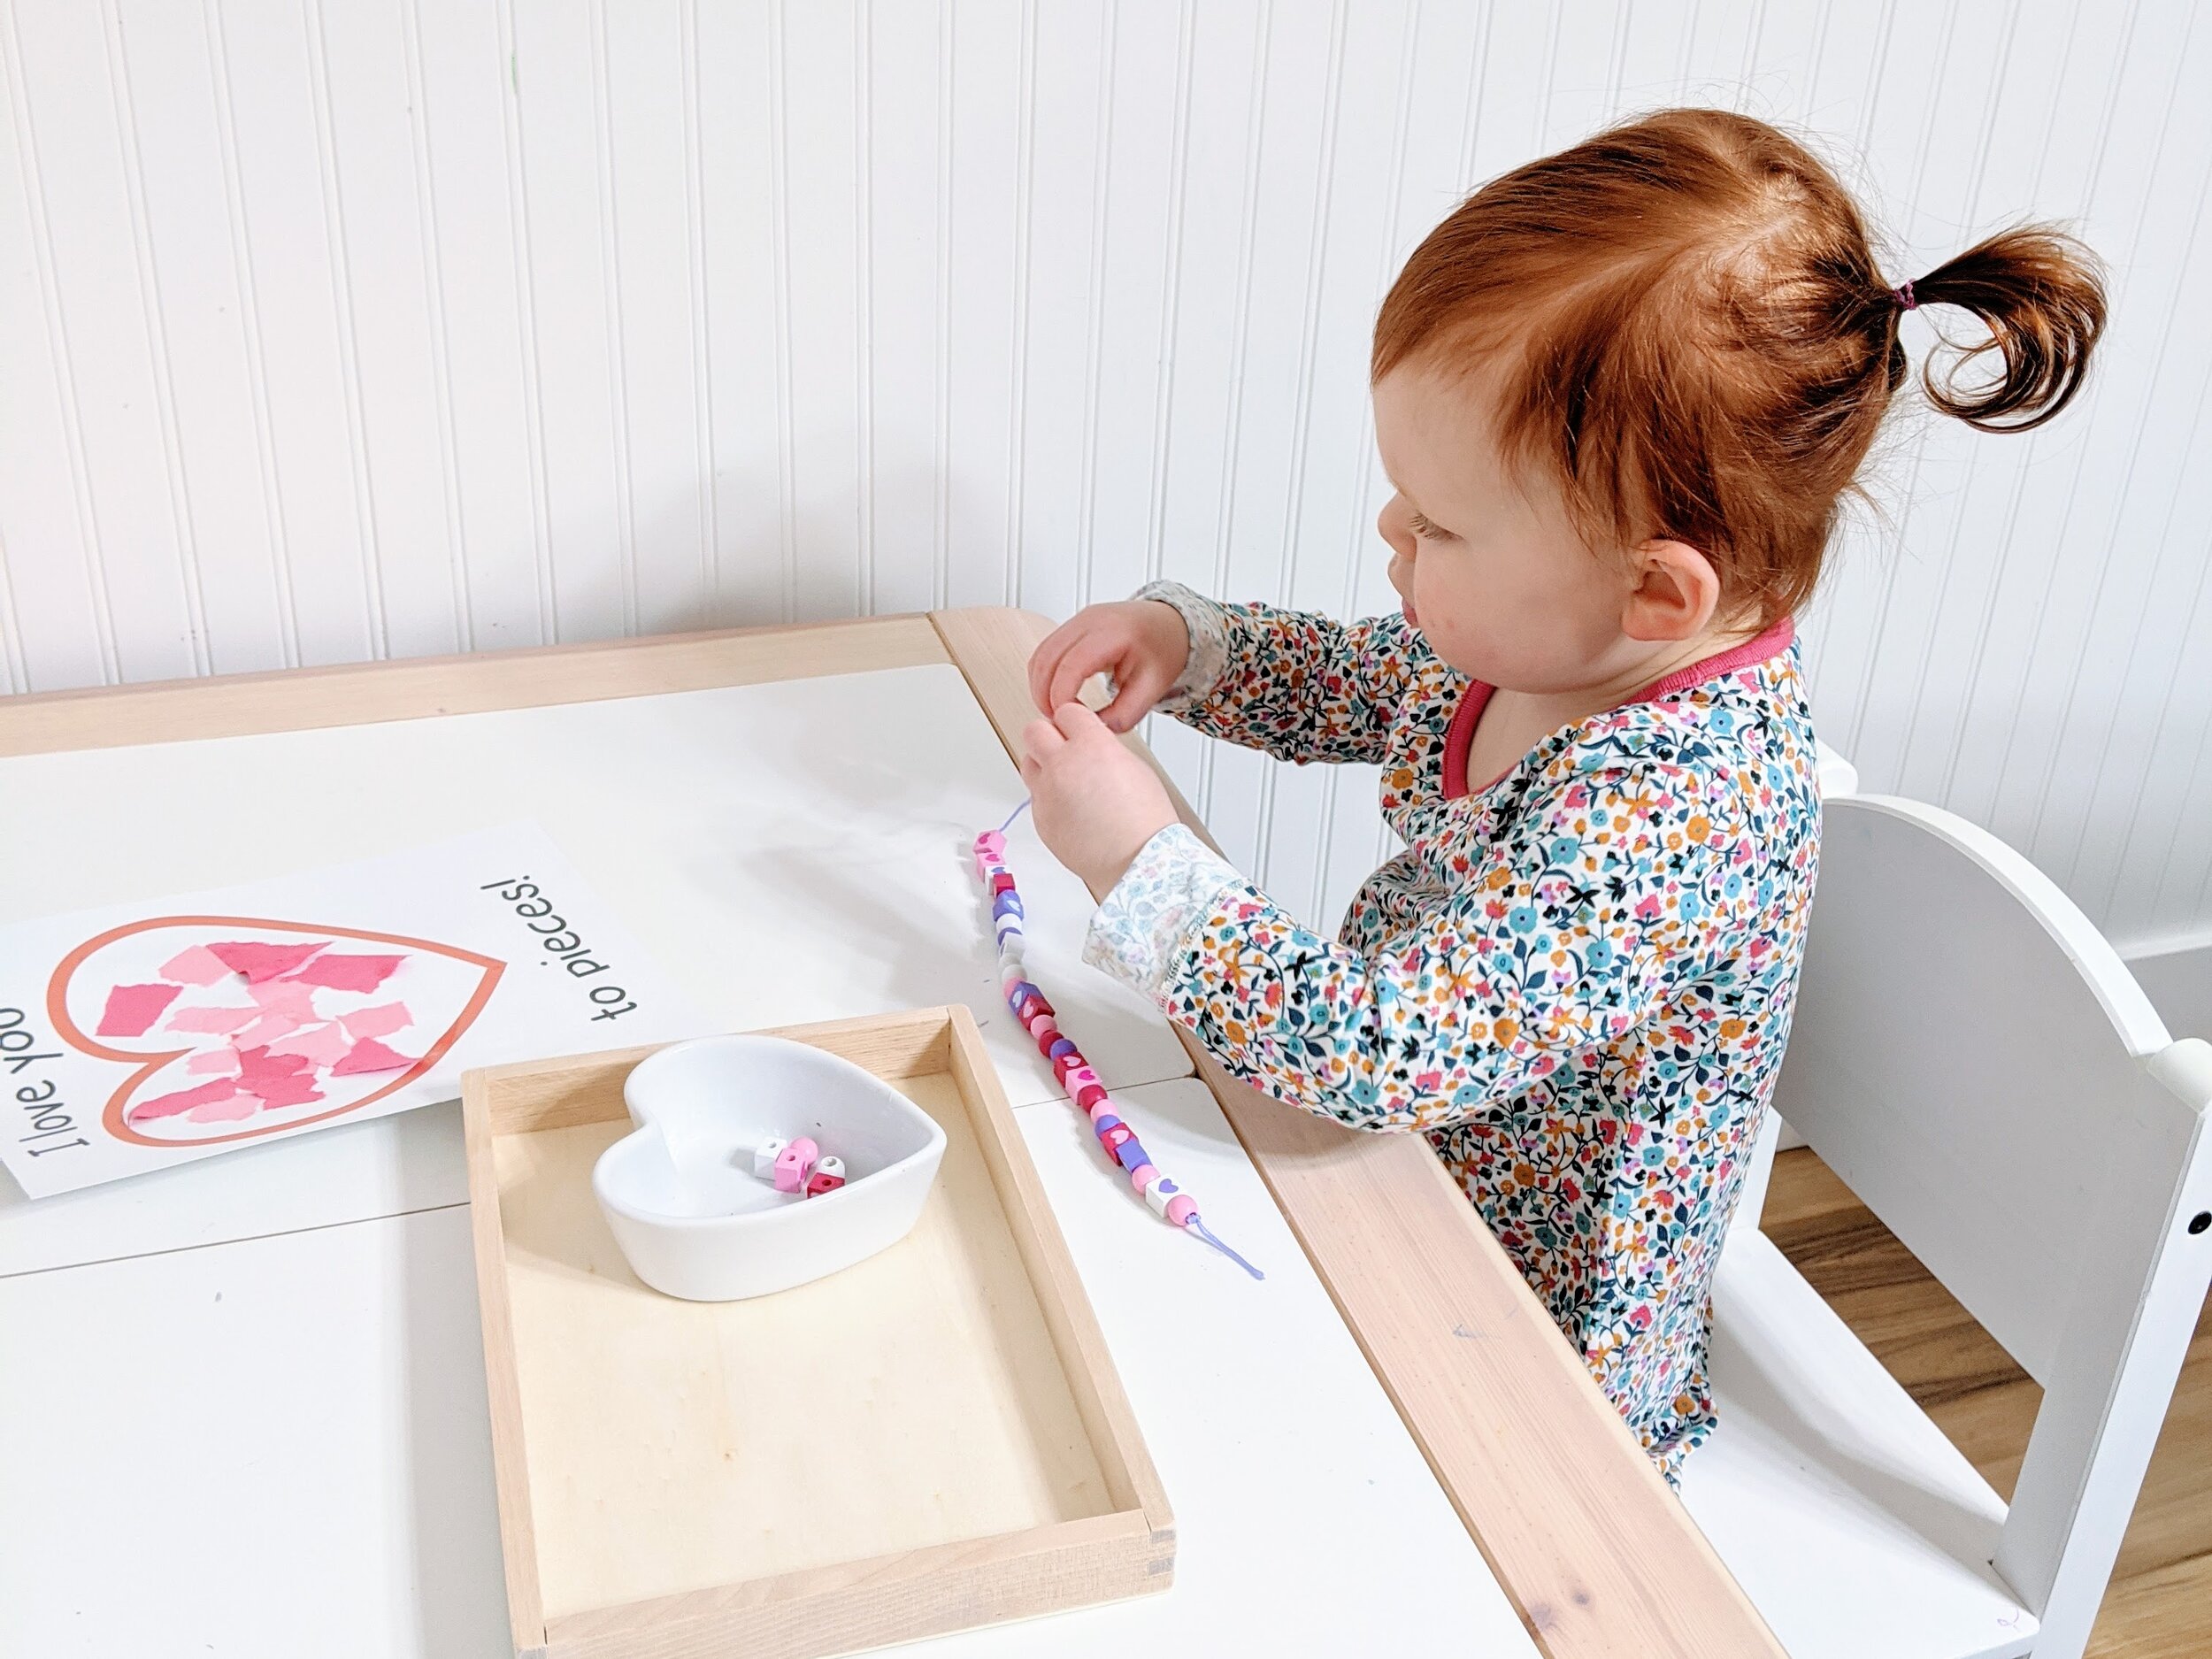
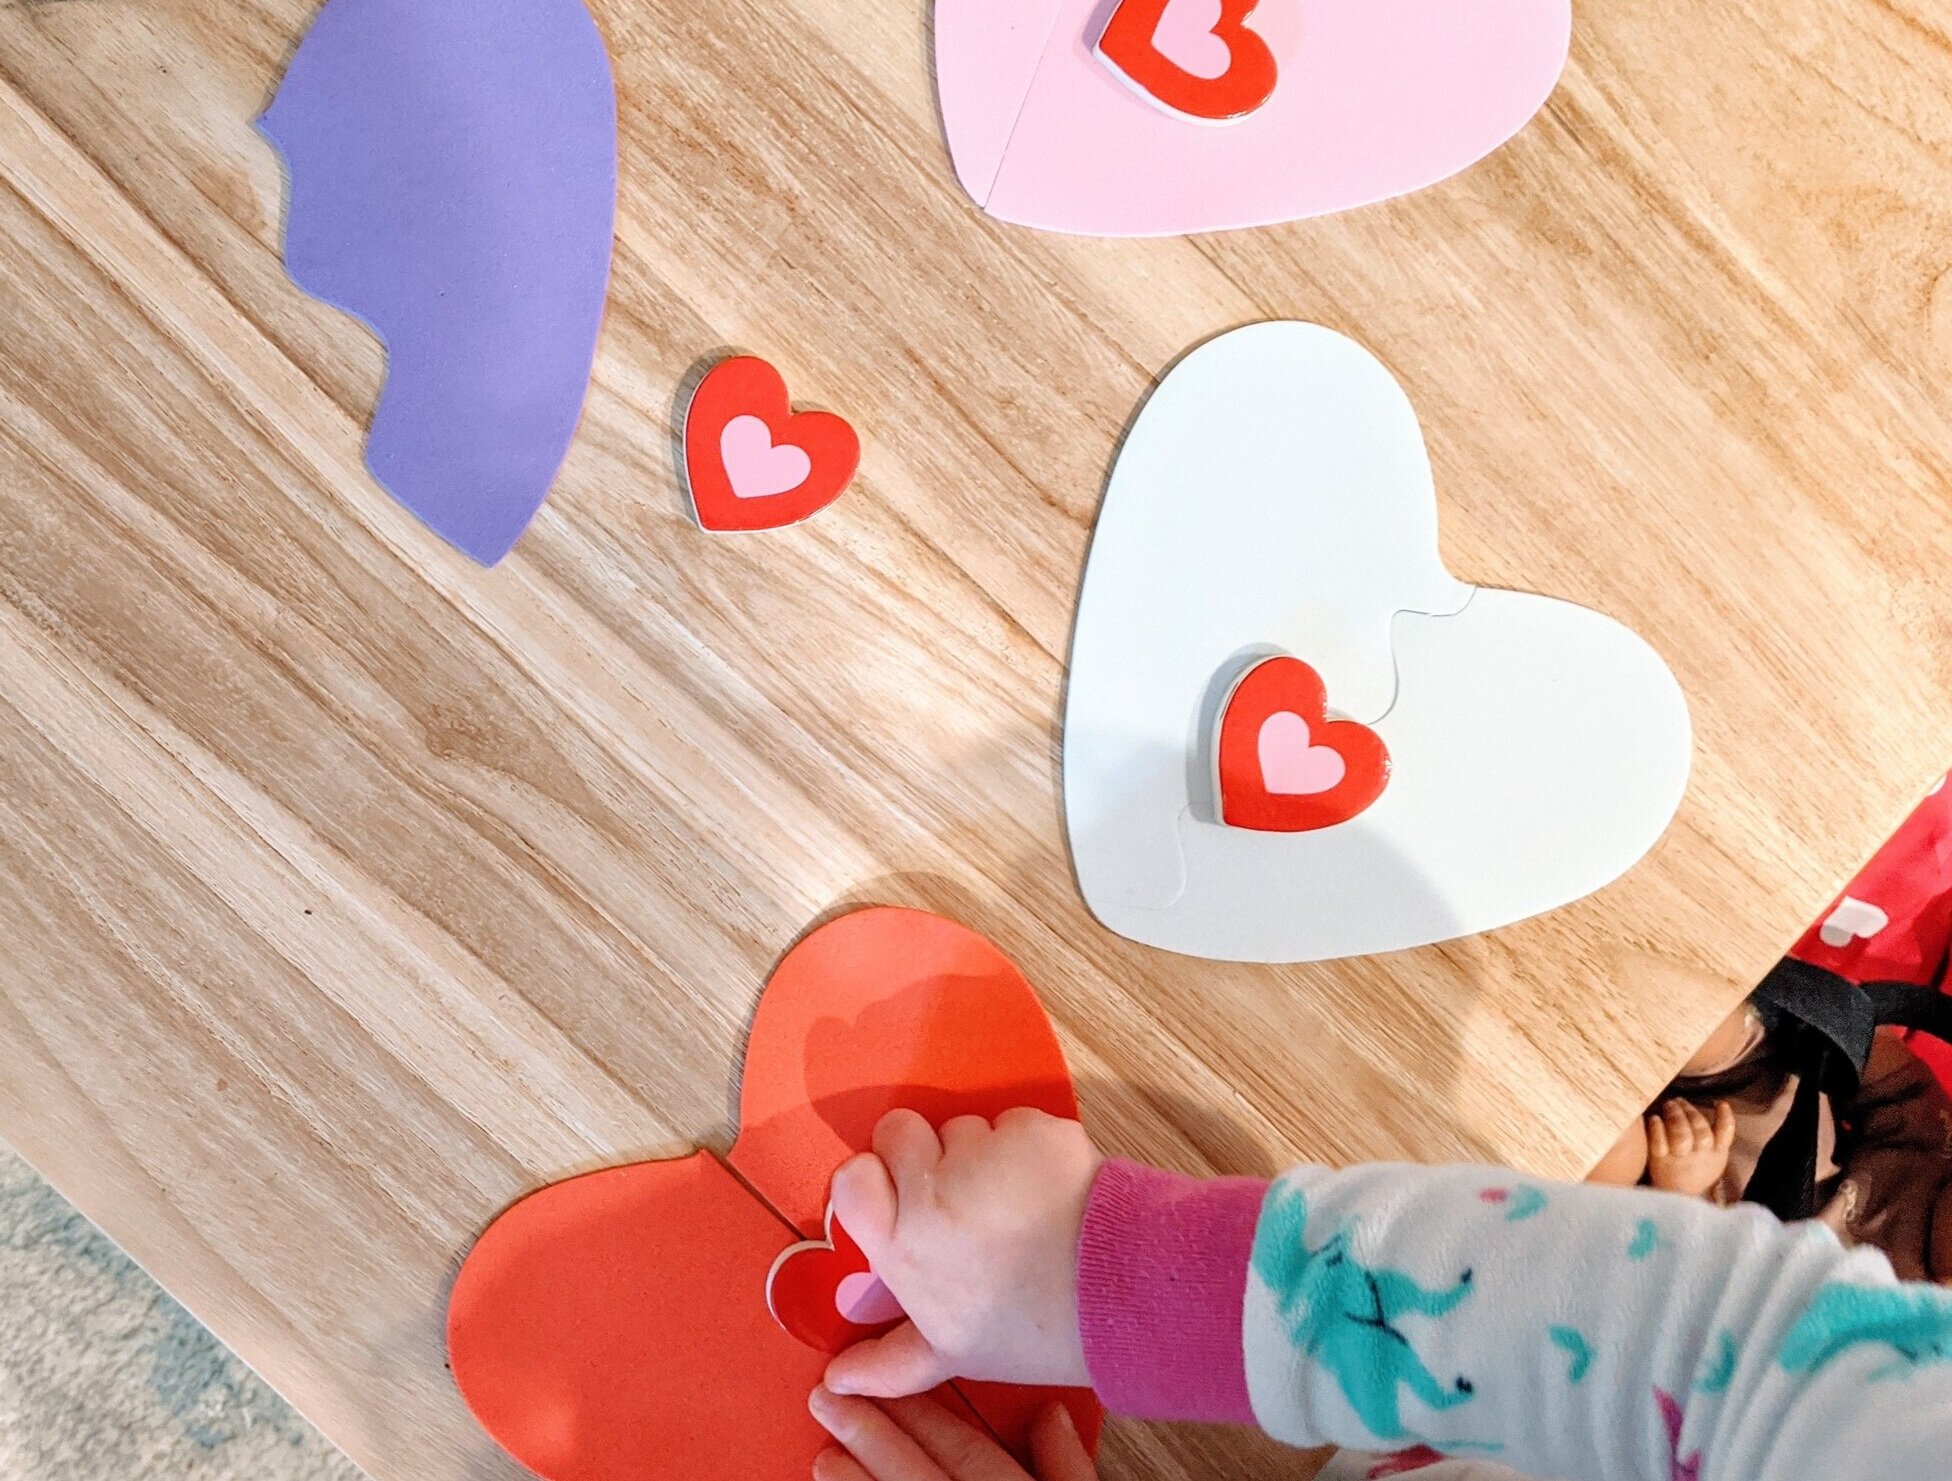
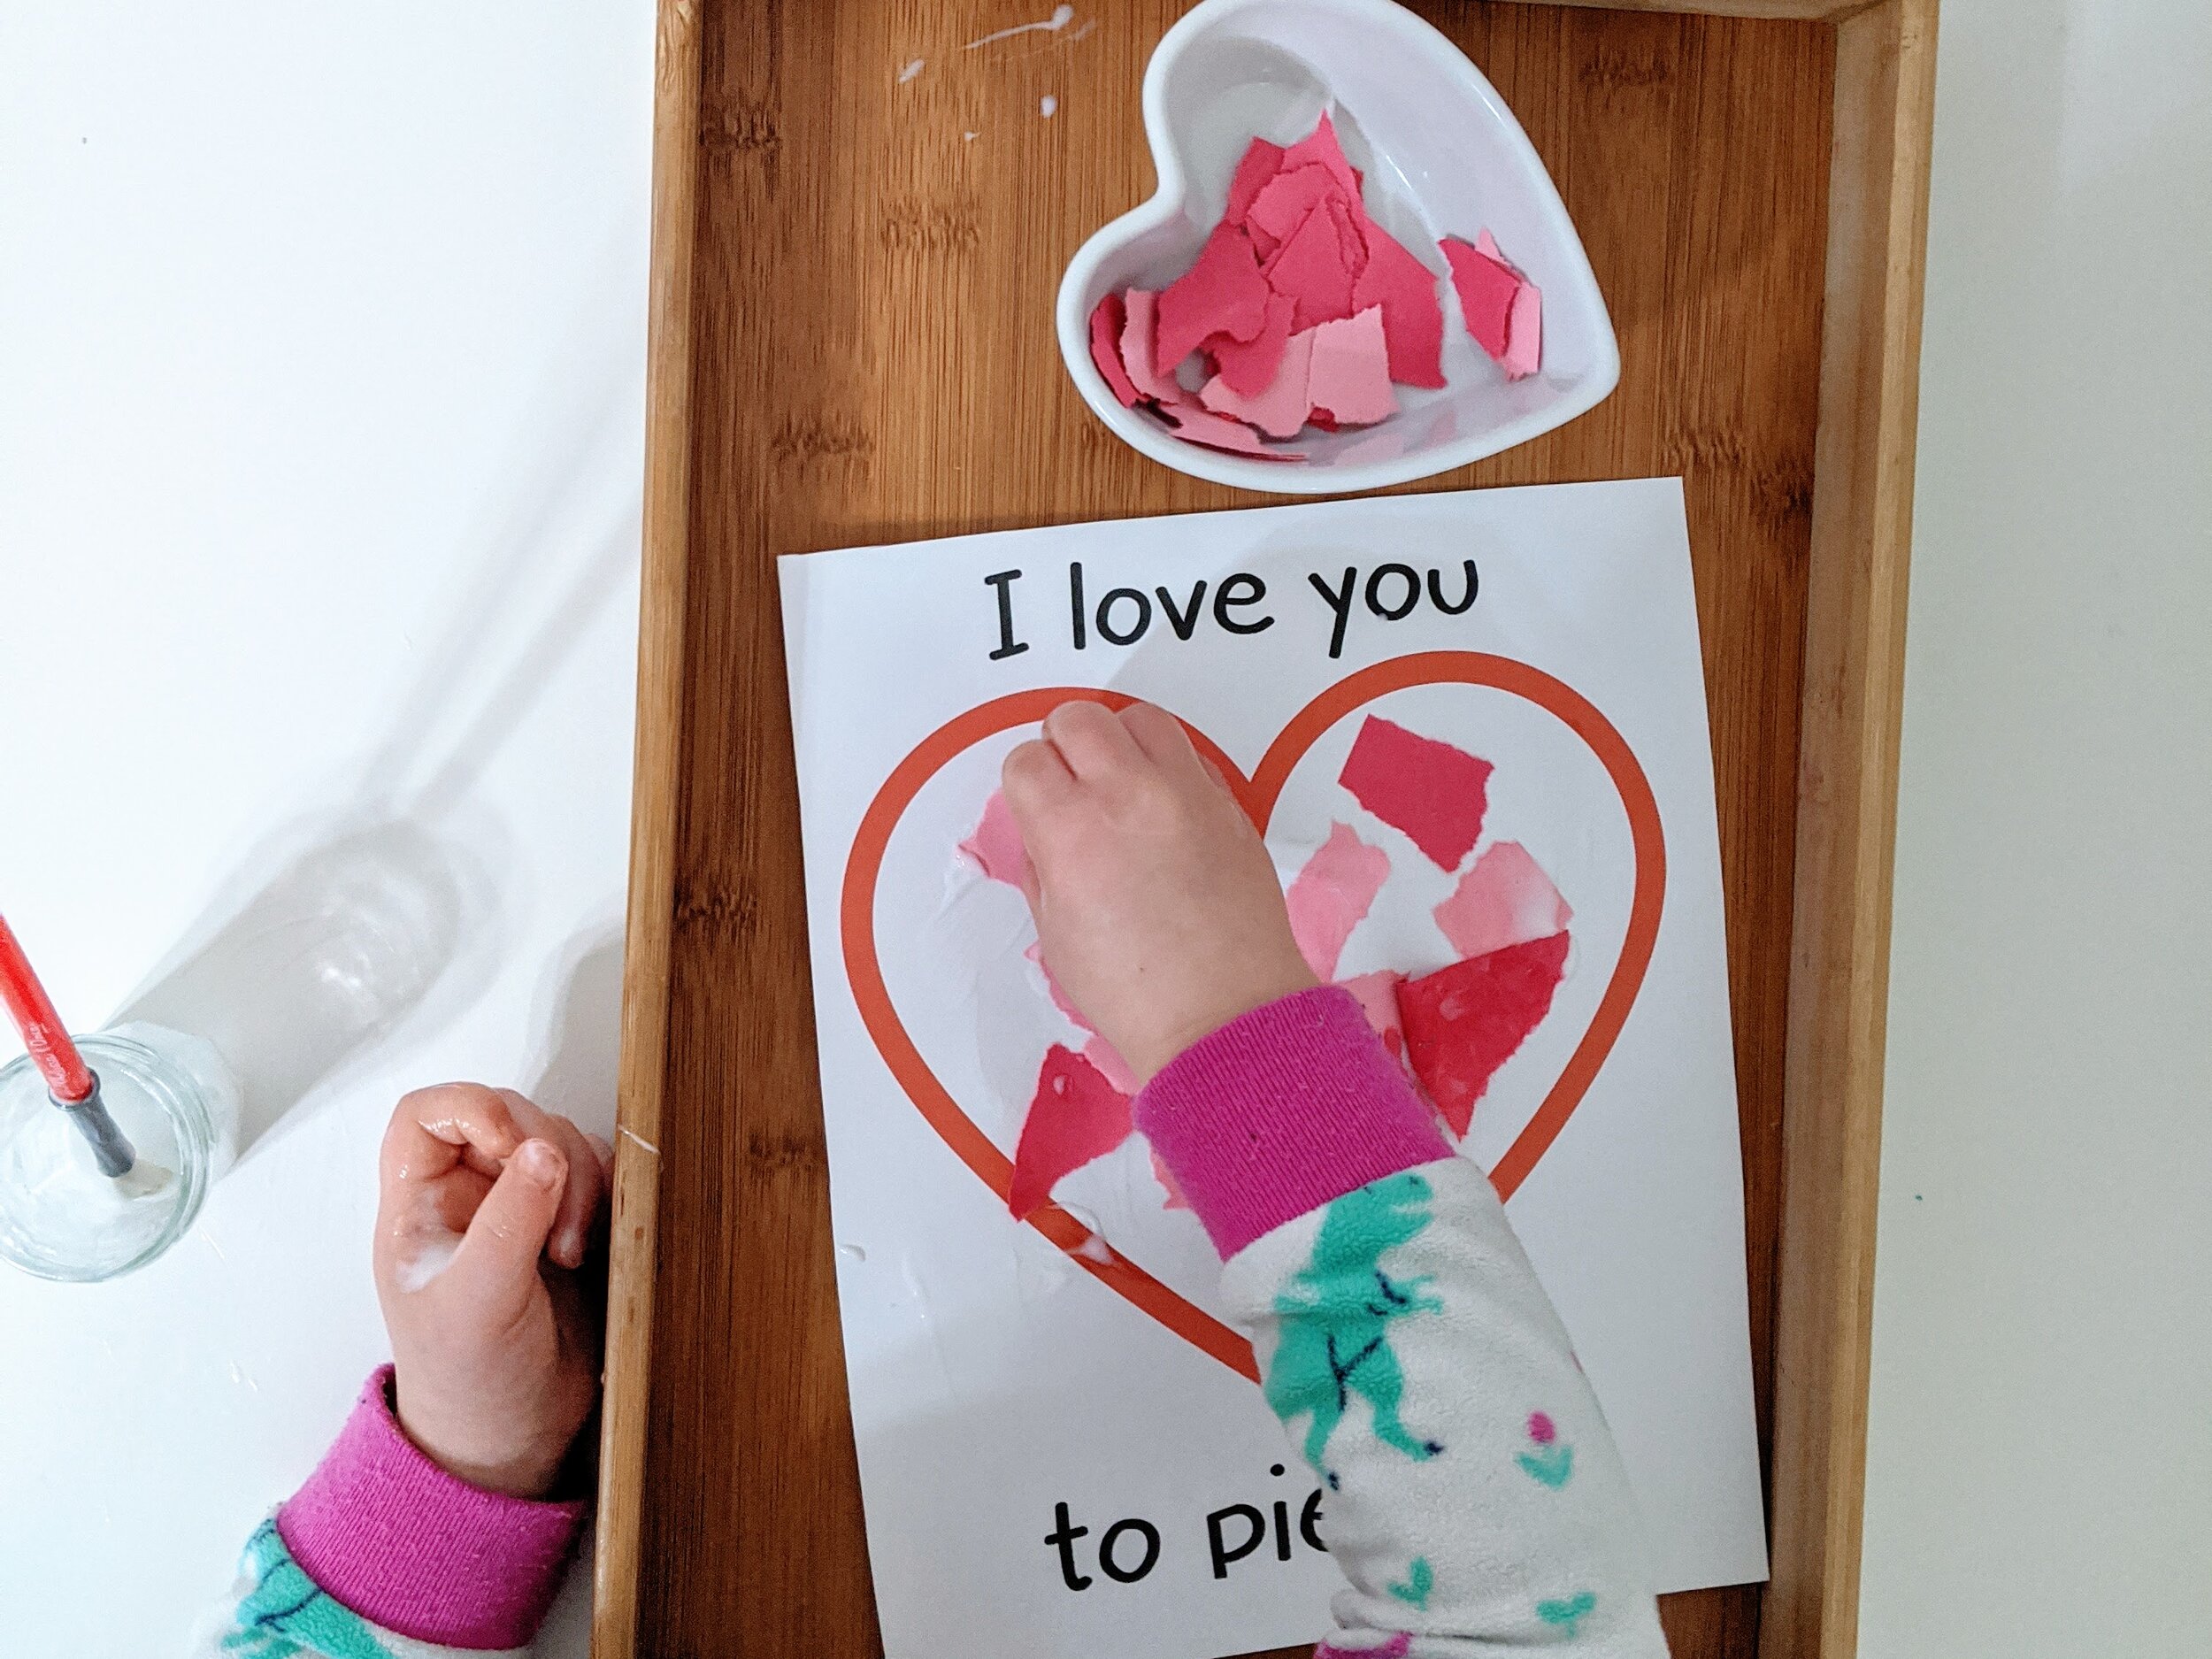
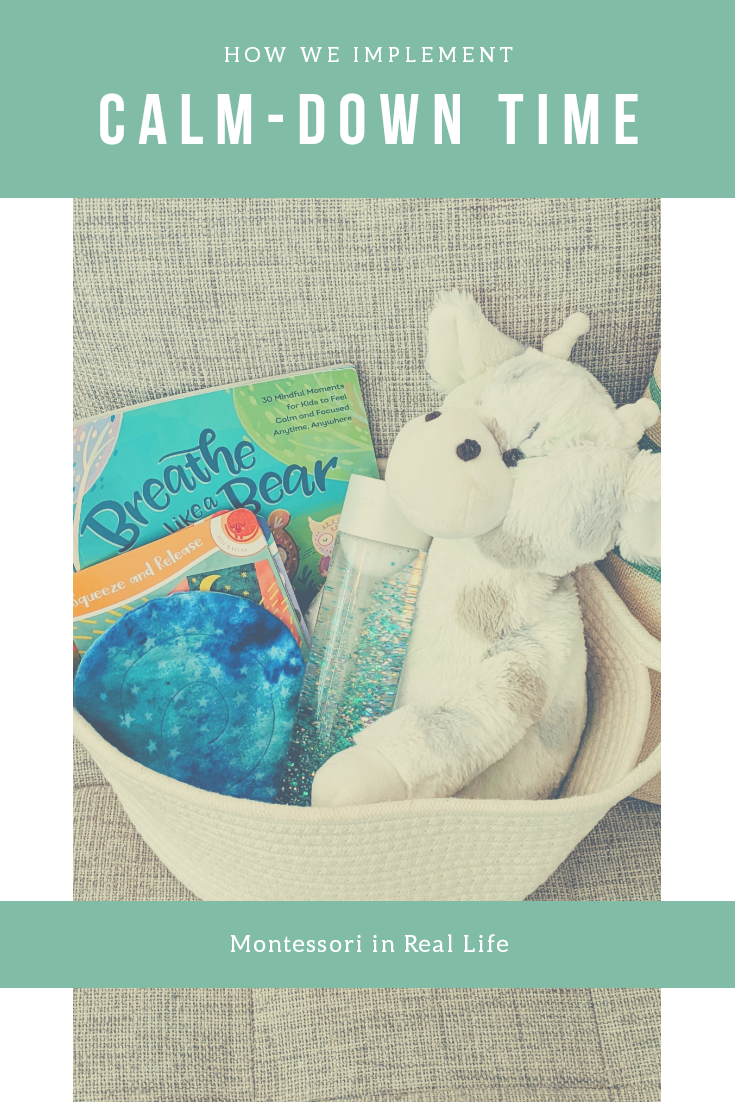
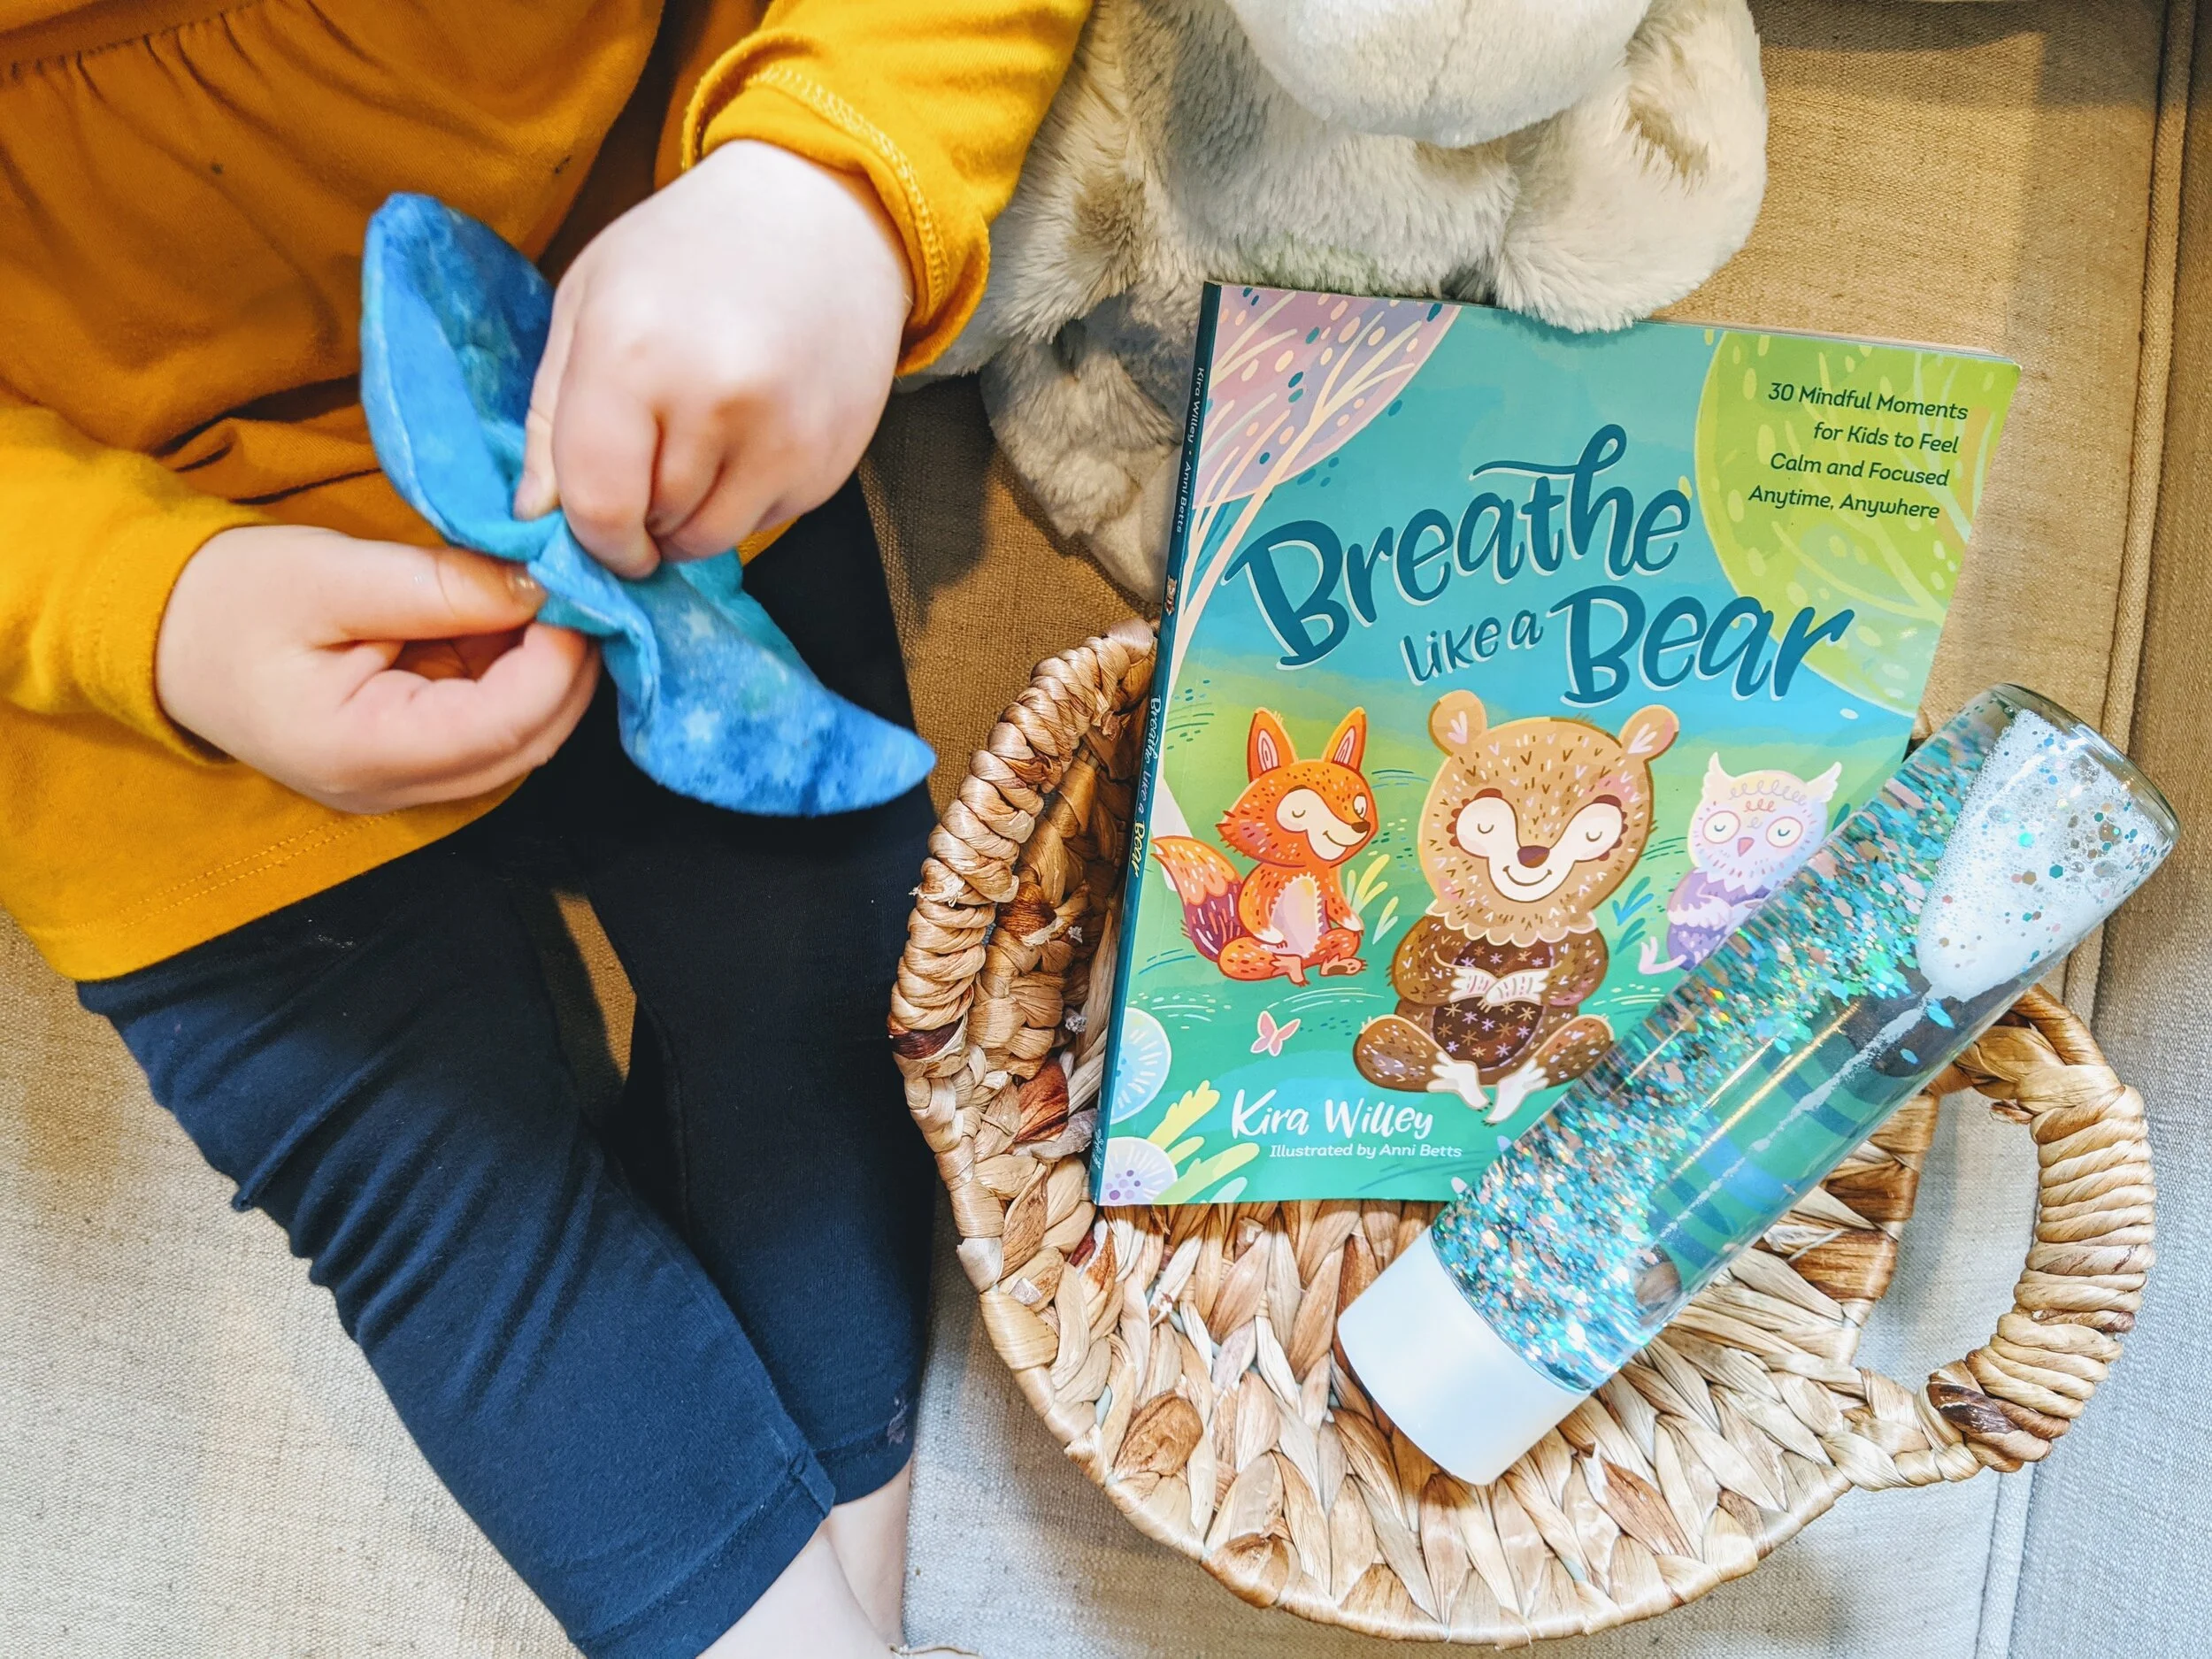
Since D was two, we have practiced “calm down time” when she’s feeling big emotions and needing a breather. More recently, we have begun to implement a calm down basket. Currently, this basket includes:

Other ideas include weighted blankets, bean bags, yoga, and sand timers. When D was two, her favorite calm-down board book was this one. We keep this basket in our living room for whenever she needs a little break, or “time in”. This is not somewhere I force D to go, but rather a place she can choose to go or I can invite her to join me in. There are plenty of times we sit and do breathing exercises just for fun! It has become a ritual before rest time as well. I have reaped the benefits of mindfulness through these activites myself.

Calm Down Time - Montessori in Real Life

Examples of Situations this might be used in:

Tantrums

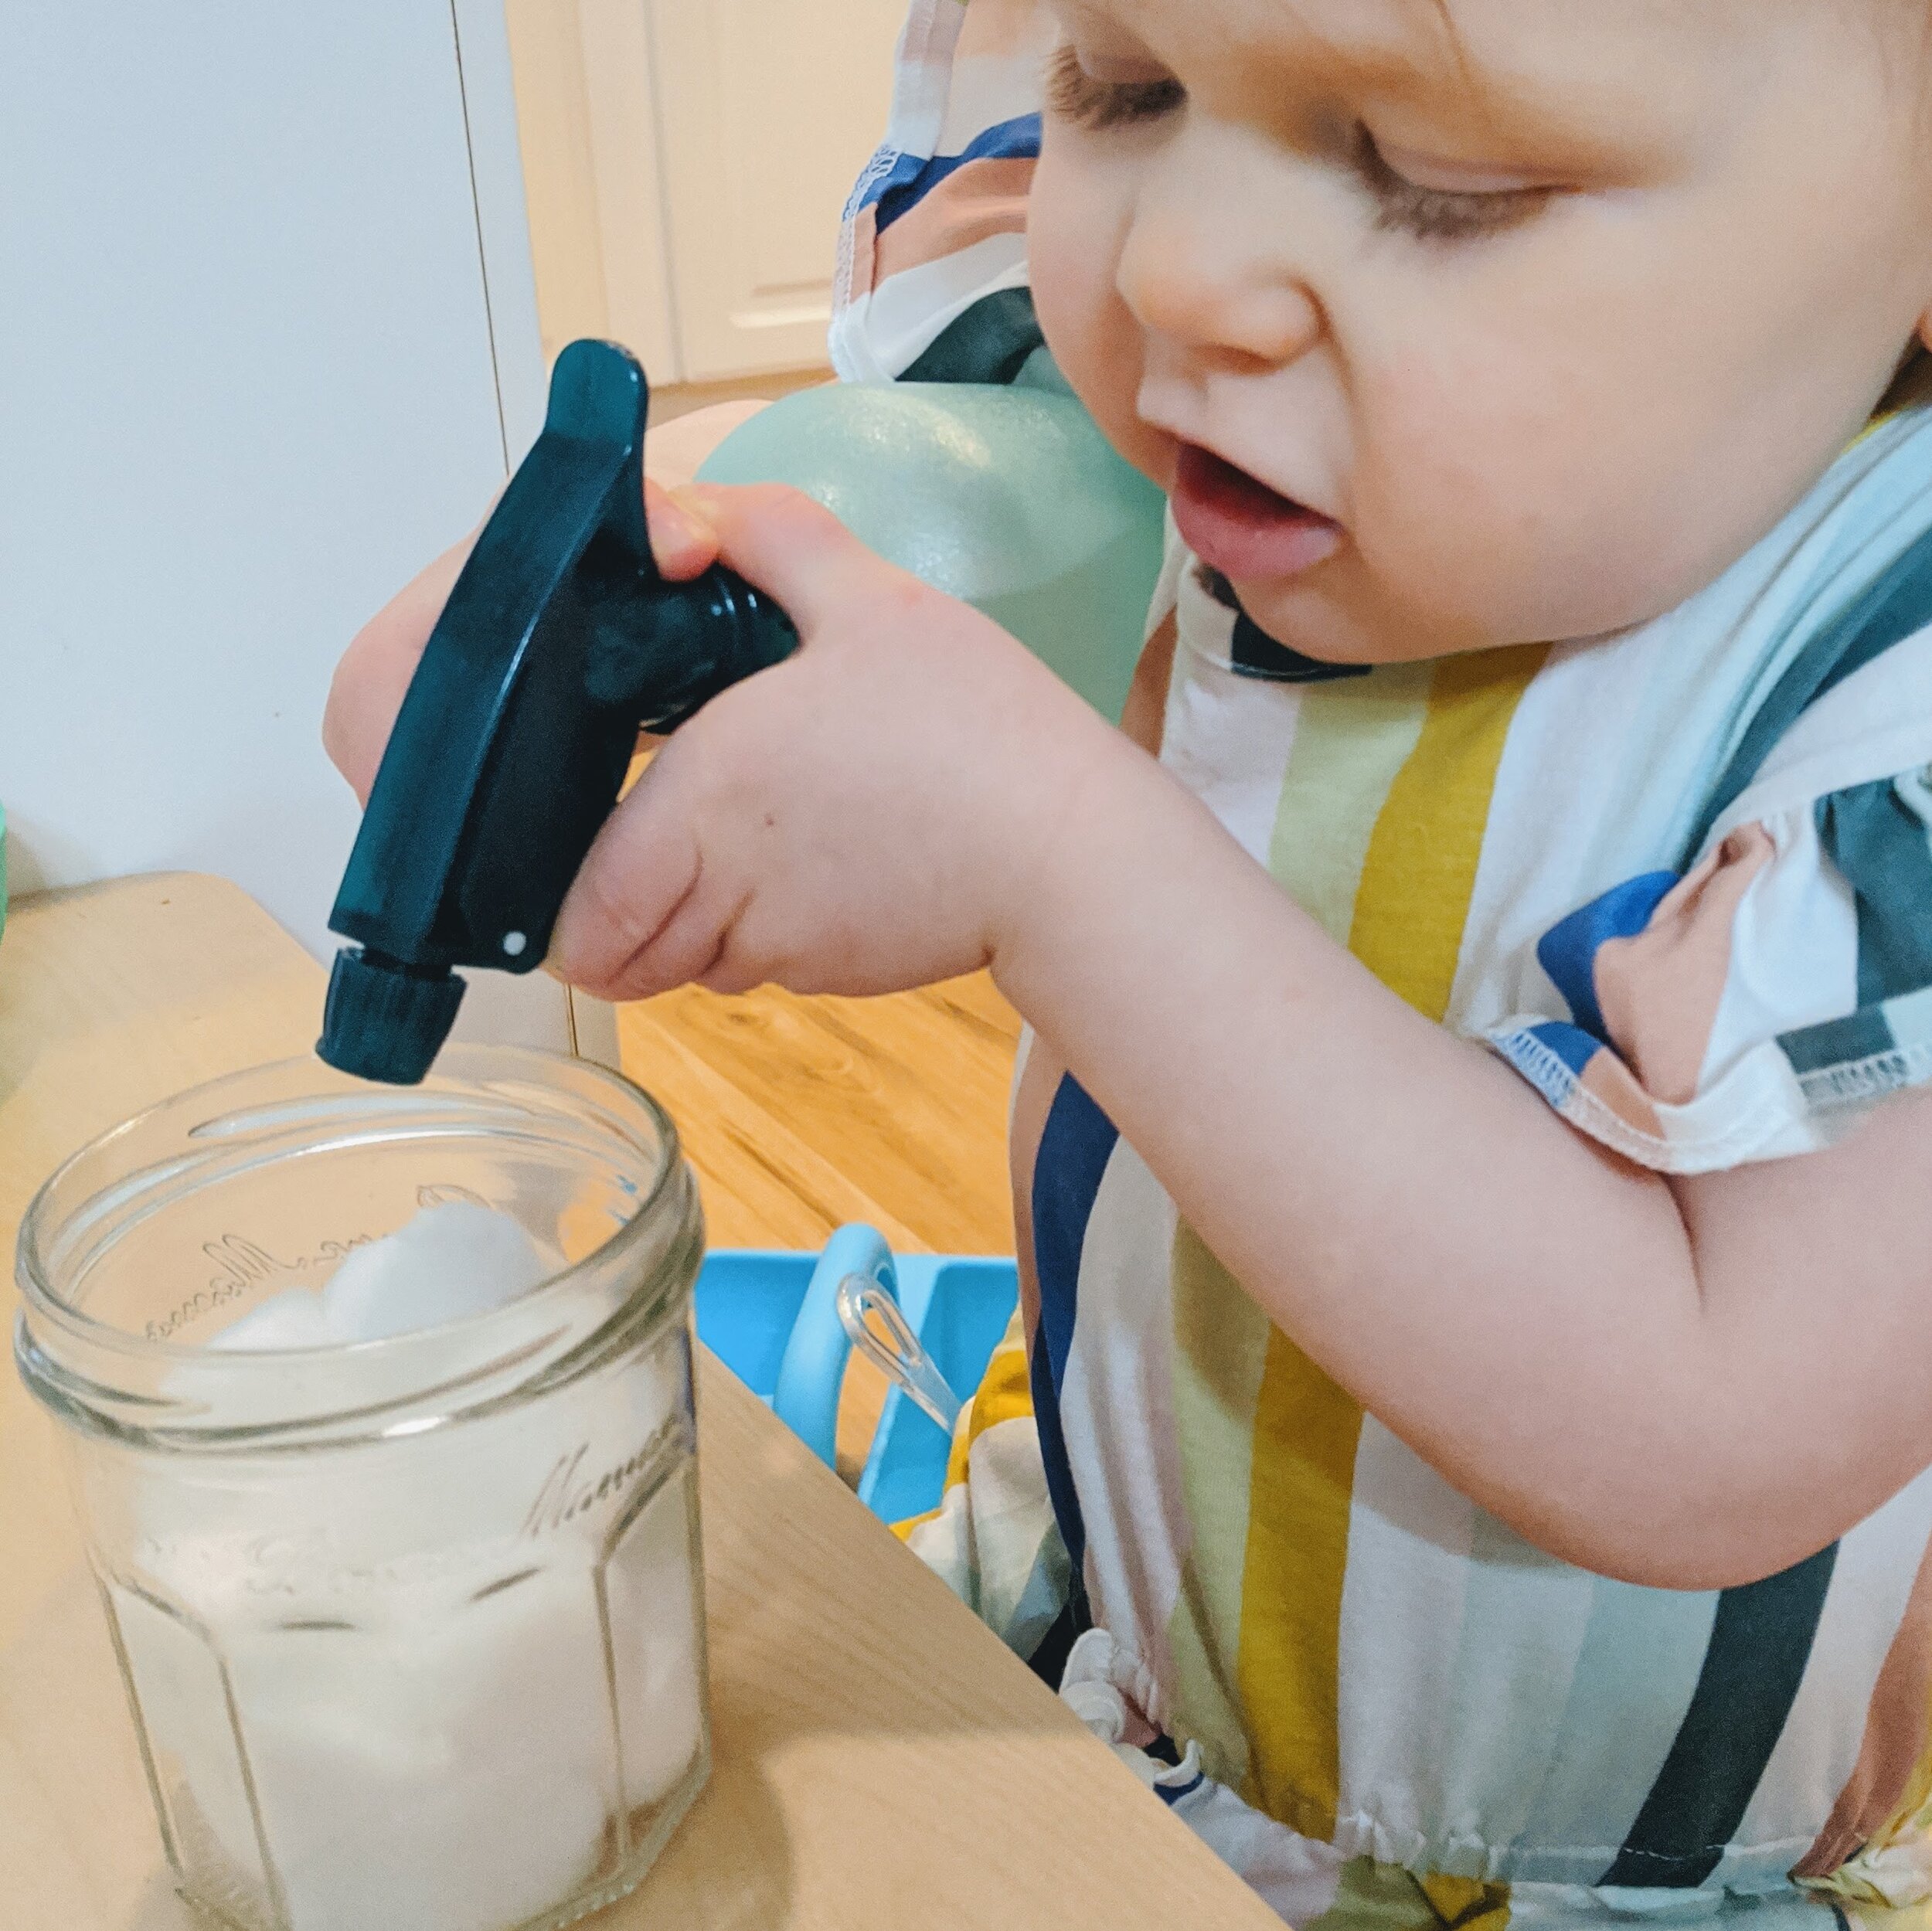
When D throws a tantrum (usually over not getting something she wants), my first step is listening and acknowledging her words and feelings. “I hear you. You really want to eat snack. We had our snack and we are having dinner very soon. I know it’s very hard to wait sometimes.” Even if I could give her snack, I don’t because we already set our limits (which she knows ahead of time.) It’s really important to stay firm on whatever limit has been set, but to listen to her and be there while she feels her feels. I try to stay close and not say much after my first acknoweldgement, besides repeating “I hear you”. I let her know I’m available for a hug. I make sure her body is safe, and if needed, I take her to our "calm-down spot” or I invite her there as she is beginning to calm down. There we can practice our breathing together or she can just sit with her glitter jar or stuffed animal. If she doesn’t want to, that’s okay too.

Hurting Someone or Something

All children have moments of frustration which can lead to physical behaviors. These days, D is pretty good at telling S “That’s my work!” and if that doesn’t work, “Mommy, I need help!” But there are still times when S pushes D’s buttons and she pushes him away from her toys. In these moments I first make sure everyone is safe. I say “stop” and separate them if needed. I first check on S and make sure he’s okay. “Are you okay, S? I’m sorry that happened to you.” I offer him comfort. Then I turn to D and let her know I need to keep them both safe so I separate them or remove the item that was not being used safely.

I then ask if she’d like to check on him. I also ask her what she thinks we could do to make him feel better. “Do you think he would like a hug or something soft to hold?” Sometimes I hold her hand while she checks on him or brings him a toy. When everyone is calm again, I remind D that we don’t hurt each other. “If we are frustrated, we can use our words and ask for help.” Either before or after this, I invite D to the calm-down spot with me. Again, this is not at all a “time-out”, but rather a place to find calm and be alone or together depending on what she’s needing.

Anxiety

When D is feeling nervous about something, I listen to her concerns and nod. I acknowledge her feelings. “You are nervous to ride your bike on the pump track.” or “You feel worried about me leaving right now.” In the bike example, I don’t force her to ride. I let her sit out and watch other kids if she’s not ready, and offer to go next to her if she wants to try. In the example of me needing to leave, I do leave but I confidently tell her I love her and I’ll be back in 30 minutes (usually it’s just a trip to the grocery store these days!). I always say goodbye and I always come back. If we are home, she can choose a comfort from the calm-down basket. I also try to keep something of comfort in our backpack, such as the marble mover or her baby doll (she takes her everywhere).

Calm Down Time - Montessori in Real Life

Note: This post contains affiliate links. If you purchase a product through one of these links, you won’t pay anything extra, but I will get a small commission, which helps keep this blog going. Thanks for supporting Montessori in Real Life!

Respectful Responses to "WHY??"

Montessori in Real Life

"WHY?" For at least the past 6 months, this question has been a constant. D, like many 3-year-olds, is wonderfully curious about the world. She wants to know why that boy is feeling sad, why the ocean has bubbles, and why green means go. Toddlers and young children observe and absorb everything they hear, see, and touch, and have an endless desire for information. So the short answer to why all the “why’s” is that they genuinely want to know. We, as their parents, are the experts. I learned this the hard way when I responded with an “I’m not sure” and was met with an alarmed “But you know EVERYTHING!”. This reminded me just how much weight my words hold, and the importance of how I respond.. Though she will soon learn that I do not indeed know everything, I want my answers to match the authenticity of the questions she asks.

Respectful Responses to "WHY?" - Montessori in Real Life

So when D asks me "why", I give her answers. I respond in the best way I know how, and try to make sure my answers are appropriate for her level of understanding. There are times I don’t have the answers, but as mentioned above, saying “I don’t know” causes her to be upset and uncomfortable. I realized this response upsets her because when she senses I am uncertain about something, she feels nervous and insecure. In a world so big, young children see us as their safe harbor; their confident protectors. So instead, when I don’t know the answer to her “Why” I say “Give me a minute to look that up” or I suggest that we look up the answer together. This satisfies her curiosity while being honest that I don’t have every answer immediately.

One of the most interesting things I’ve found about the “why’s” is that she so often asks questions she already knows the answers to. After I thought about this, I realized she isn’t actually doing this to annoy me, but rather because she thrives on repetition. Just as young children love to sing the same song or read the same story again and again, asking the same question and hearing the same answer gives them a sense of comfort in knowing what to expect. Once again, they are looking for reassurance from us, their parents.

Respectful Responses to "WHY?" - Montessori in Real Life

That doesn’t mean I always answer the same question on repeat. Rather, I put the ball back in her court and ask, "Why do you think?". My tone of voice is so important here. We want to ask them questions in the same voice we want them to ask us questions: in an authentic and curious voice rather than sarcastic or exasperated. When it's a familiar question, she usually enjoys answering the question herself. Sometimes instead of “Why do you think”, I get better responses by rephrasing the question with choices she knows the answer to. “Do you think that ____ or ____?” Often switching from open-ended questions to choice questions gets a young child to answer because they don’t feel put on the spot. Sometimes I’ll even give a silly response that she knows is wrong and then she will laugh and correct me. Being playful can be a great response too!

That being said, sometimes the "why's" turns into a test or game. The tone of voice of her "why" changes from curious to repetitive and demanding. Often children do this when they want our attention or to get us a little fired up. Again, toddlers test to make sure we are in control, and they so want us to be. So I offer an answer to D’s "why’s", but if she starts into the "why spiral", I let her know I've already answered and I don't have anything else to say about it right now. I then change the subject or ask her a question instead. I say this kindly but with confidence. This helps to avoid the spiral while also not ignoring or diminishing her questioning. After all, I want her to continue to be curious and inquisitive, but respectful as well.


Sleep and Floor Bed Tips with Sleep Consultant Megan Kumpf

Montessori in Real Life

I am really excited to do something new here and share an interview with a fellow mama and pediatric sleep consultant, Megan Kumpf. Megan is a mom of three young children, so she knows just how tough (but important) sleep is! She has worked with all kinds of families, including those who have chosen floor beds for their toddlers. If you’d like to know more about Megan, you can read about her bio on the Sleepwise Consulting website. She generously offers a FREE 15-minute evaluation call so go ahead and schedule your call with her!

S’ room at 12 months old

S’ room at 12 months old

My own children have slept on floor beds since 6 months old. (They are now 12 months and almost 3 years) We chose to use floor beds for a few reasons. A big one is that they promote independence and freedom within limits (read more about that principle here). While the children do have more space to explore, they also learn appropriate boundaries of that freedom. We set clear, consistent expectations around bedtime and sleep. With this, the children feel secure, capable of putting themselves to sleep, trusted, and respected (not to mention they allow for a few extra cuddles at their level before tucking them in for the night!) That being said, floor beds are not a necessity for independent sleep. I believe every family needs to do what works for them, and allows them to get the rest they need while ensuring the children are sleeping safely.

With both of our children, we started setting up healthy sleep habits very early on so they have been comfortable putting themselves to sleep since young babies. As Megan talks about, this doesn’t mean abandoning them to cry on end. It is a gradual process that involves routines, consistency, wake times, a conducive sleep environment. More than anything, it’s having confidence in our children and giving the chance they deserve to learn how to sleep well, and independently.

Sleep and Floor Bed Tips - Montessori in Real Life

Whether you have a newborn, toddler, or preschooler, Megan has tips for you on how to help your child get the sleep they (and you!) need, floor bed or not. If you would like a personalized sleep plan or have further questions for her, I highly recommend scheduling your FREE 15-minute evaluation call and going from there! Without further ado, here is our interview:

D’s room at almost 3 years old

D’s room at almost 3 years old


Hi Megan! What would you say your mission is?

At Sleep Wise, as a group of Certified Pediatric Sleep Consultants, our mission is to give tired parents the tools they need to teach their children how to sleep 11-12 hours through the night. Sleep is not a luxury. Sleep is a necessity for healthy growth and development and I love being able to coach people through that. 

 Why have you chosen to help families get the rest they need? What would you say are the biggest benefits to a well-rested family?

I became a Certified Pediatric Sleep Consultant because I love to help people and I saw the benefits first hand, of being a well-rested family. My first baby was a unicorn sleeper, he just got it! My second baby was not and it took some digging with Sleep Wise to find the answers. When given the missing pieces to the sleep puzzle, it was a wonderful turn around. Being a well-rested family benefits all areas of life- play, school, and work. A well-rested family is happier. Research shows sleep brings happiness, because your brain is ready to focus, learn and explore. When our bodies miss the sleep they need we often become angry, stressed and unhappy. I love the predictability that independent sleep skills bring a family, you know your child will sleep and rest well. Lastly, the time in the evening after my kids are in bed is so valuable. When I lay my kids down and kiss them goodnight I know they will wake up in the morning from a full night’s sleep ready to enjoy the day. This also gives me time without the kids to recharge, spend time with my husband, or work with my clients.

 How much sleep do babies and children need at different ages? Does this vary widely from child to child?

 Sleep does vary a bit child to child. Some little ones have lower sleep needs and some have higher and that’s ok! They just need their own perfect routine. Below, are some average times to help you find where your baby fits. The times shown below are guidelines for daytime sleep by age. The average night time sleep needed for most kids up to age 5 is 11-12 hours per night.

Here is a great sleep chart for ages and times

DAYTIME SLEEP.png

 Do babies and children just instinctively rest when they need to rest or do they need our assistance?

 I believe that some babies are born good sleepers, however most are not and need to be taught how to sleep well. Sleep is learned skill just like getting dressed, tying your shoes, or riding a bike. However, I do believe once your baby has that beautifully built foundation for independent sleep it only takes a little encouragement and the proper wake times for them to know that it’s time for rest and even be eager to go to sleep.

Can you define sleep training in the context of self-soothing? What do you think are the biggest misconceptions about sleep training?

 Self-soothing is just one part of learning how to sleep, but it is the main part of independent sleep. When your child learns to self soothe it usually means they can calm their own body and drift off to sleep on their own without relying on something external. When a child is capable of falling asleep independently, you’re going to see more consistent sleep patterns come about. We all have our own self soothing strategies – pillow position, window cracked open, favorite blanket, no socks etc. Helping your child find theirs is such a gift. Some children suck a finger, twirl their hair, or hold a blanket if at the appropriate age to have one. A few of the biggest misconceptions I hear are you have to use cry it out, it’s stressful for your child, or they won’t feel attached anymore. I want to take a minute to debunk each one of those. Our method at Sleep Wise is not traditional “cry it out”. While there may be some tears, you can absolutely comfort your child and work with them on these new sleep skills. Remember that it’s never too late to start. The second thing I often hear is that sleep training is too stressful for children, but I would argue that not sleeping enough or fighting sleep is equally or more stressful (and research backs me on this) and finding what’s right for your family is the best choice. Lastly, I often hear, “my child won’t love me as much or feel as attached to me if they are sleeping on their own.” I get it!! I’m a mom of 3 and I love those sweet snuggles and individual times with each of my children, but I promise seeing them wake up each morning well rested and happy is a win. Check out our blog on sleep training and attachment parenting if you want more information here: https://sleepwiseconsulting.com/attachment-parenting-sleeptraining/


How can parents set up healthy sleep habits from birth? When does routine become important?

 Yes, you can absolutely start from the very beginning and lay a great sleep foundation. In the newborn days it’s just a gentle repetitive process. If you were to choose a newborn plan with us there is no crying involved at all with sleep. They are just too tiny and need to still eat quite often. Starting right from the beginning allows you to encourage self-soothing skills and by 12 weeks little ones are peacefully drifting off to sleep on their own and sleeping 10-12 hours at night with feeds as needed. Around 4 weeks is a great time to gently start thinking about a loose routine. Using an eat, play, sleep routine will help your baby learn to fall asleep without feeding which is a great start. Don’t be afraid to try laying your baby down drowsy and see what happens.  A dark room, sound machine on, and soothing as needed is a great way to start! Often babies will surprise us and fall asleep on their own.

Could you give us a sample bedtime routine for an infant? How about a toddler?

Bedtime routines are so beneficial in teaching your child that sleep is coming. I like a routine to be simple and predictable. For most children about 20-30 minutes is good, maybe a bit longer on bath nights. For a baby birth to three months I would aim for something like this – bath, lotion, jammies, a book, feed, kisses, goodnight. Once a child is older than 3 months of age it’s important to move the feed to the beginning of the bedtime routine. This helps ensure your little one is fully using those independent sleep skills and not drifting to sleep while eating. For an older child you would want to include brushing their teeth and going potty if they are to that point. To help create predictably, choosing a number of books helps older kids know what’s expected, usually I recommend about 3 books pending the length. With my older kids I love to talk about something that made them happy that day or something they were grateful for, ending the day on a positive note always does the heart good.


Let's talk a bit about floor beds. Would you say that floor beds can work for any family or child? Are there any safety considerations?" 

I feel that floor beds can be successful for a younger child if he or she is used to having freedom within limits. Some examples being, if your child has too much freedom or no limits during the day, but you want them to stay on their bed all night, that’s going to be challenging because your child won’t understand the why behind it. In order for a floor bed to be the most successful, there has to be a foundation built during the day with your child of healthy boundaries and expectations. There are some safety considerations to pay close attention to. I would recommend waiting until 6 months and up to introduce a floor bed. That way your baby has a chance to work on those independent sleep skills. If your child is under the age of 2 years old your floor bed should be a firm crib mattress per AAP recommendations. A regular twin or full size mattress is too soft and can cause suffocation risks. The floor bed should be just a flat fitted sheet and away from the walls so that your baby can’t become trapped. Making sure your little one's room is safe, checking furniture anchors, outlets, small objects, window curtains, blankets, doors, etc. Safe sleep is always most important for your child.

If parents are interested in introducing a floor bed to an infant, how would you suggest they begin? Is it possible to teach an infant to self-soothe on a floor bed?

When introducing a floor bed it’s super beneficial to already have those independent sleep skills mastered. If you can start at a younger age teaching those self-soothing strategies in a bassinet or crib, it will make the transition more smooth. When introducing a floor bed, starting with nap time can be a good option so you can see your child and know what they are doing. However, if you find this to be tricky, opting for bedtime might work better since their natural sleep drive is higher at night. You can teach a baby to self soothe on a floor bed, just know it may be a little more challenging. If you’re willing to be consistent you will get the results you’re looking for. Just make sure to consider all safety components first.

What tips would you give parents who are making the switch from a crib to a floor or toddler bed?

 My top tip is always to be 100% consistent. There may be some bumps in the road when you transition to something new, but the consistency is key. Again, as I mentioned above, if your child is already in a crib and you’re thinking about this transition, solidifying those independent skills first will make a world of difference. If you’ve already jumped a step ahead to more space with a floor bed that’s ok but, have a plan in mind for setting boundaries and expectations so it can go as smoothly as possible. There are a lot of sleep methods out there! If you’re not sure which one is right for your family you’re welcome to reach out to me anytime for a free evaluation call. 

How do parents help their child to stay in their room (and sleep!) with a floor bed or toddler bed?

 I would first say the same as above, CONSISTENCY! Are you seeing a pattern build?! For younger children ages 6 months – 2 years having proper wake times and independent sleep skills already established will help. Proper wake times will make it so your baby/child is ready for sleep. Patience and returning them to bed as needed will help them learn those expectations. For older children ages 2+ finding something that motivates them to stay in bed is key. Positive praise, reassurance, and a “you can do it” attitude really help. Celebrating with a fun experience the next day always reminds little ones they are doing well, a visit to the park or special picnic lunch are some favorites. At this age being black and white with your expectations is crucial. For example, you have to have boundaries and expectations during the day with your child if you want it to smoothly translate over to bedtime. Using an ok to wake clock is a wonderful visual learning tool for sleep. If your child comes out when it’s sleeping time, you will consistently take them back and remind them of the boundaries and the clock. Practice makes perfect! All of these big changes take time.

Is it ever too late to help a child sleep independently? What are some tips to help a 3+ year old fall asleep and stay asleep on their own? 

 It is NEVER too late to establish healthy, independent sleep skills. I work with ages 0-10 years. Sleep is the gift that keeps on giving. We all have to sleep! For older kids ages 3+ it has to be clear and consistent. Making it positive and finding a sleep method you feel comfortable with is key. Remember, at this age your child has been sleeping a “different” way for a long time. Do not expect results overnight, it can absolutely take a few weeks to see the new changes happen. At this age carving out some special one on one time during the day can really help your child feel more confident sleeping independently at night. Little ones crave that attention and filling that cup during the day will help them settle in quickly for the night. Talking during the day about how sleep is good for your body and it will give them super power energy to play well is a great start too. You’ve got this!!!

Thank you, Megan!


Note: These photos are from S’ room at 12 months old. My husband built the frame when D was 9 months or so with an opening to be able to get in and out. It has worked well for both of our children. More recently, the AAP has come up with some guidelines for floor beds. The Sprout Floor Bed Frame is acceptable, as long as the mattress is firm and flat with no soft or loose bedding. A crib sized mattress should be used until the age of two. The bed also should not be against a wall, as this could lead to entrapment between the mattress and the wall. In short, the sleep environment should align with the recommendations in the policy statement SIDS and Other Sleep-Related Infant Deaths: Updated 2016 Recommendations for a Safe Infant Sleeping Environment.

Image from Sprout Kids - use code MREALLIFE for 10% off your floor bed purchase

Image from Sprout Kids - use code MREALLIFE for 10% off your floor bed purchase

Some tips on baby/child proofing the room:

  • Anchor furniture

  • If your child is a climber, remove furniture that they could climb and fall from

  • Move dresser to the closet (keep doors closed and locked)

  • For babies: option to place changing mat on the floor and place a floating shelf on the wall to store changing supplies

  • For toddlers: consider doing diaper changes in the bathroom

  • Use a video monitor that can scan the whole room

  • Use self-closing outlet covers and hide cords or use cord covers

  • Avoid lamps or heavy items that could fall

  • Remove any small items/choking hazards from the floor

  • Use cordless blinds or curtains

  • Secure a gate at the top of the stairs

We use self-closing outlets but if/when he gets interested in cords, we’ll use cord covers

We use self-closing outlets but if/when he gets interested in cords, we’ll use cord covers

You can find links to our favorite sleep furniture/gear/decor in this post!

Note: This post contains affiliate links. If you purchase a product through one of these links, you won’t pay anything extra, but I will get a small commission, which helps keep this blog going. Thanks for supporting Montessori in Real Life!

Learning to Count: One-to-One Correspondence

Montessori in Real Life

The first step in introducing the concept of counting and numbers is one-to-one correspondence. One-to-one correspondence is the ability to count while pointing to one object at a time. It is assigning a number to one and only one object at a time. This is not rote counting or memorization but rather truly understanding the meaning of numbers. Memorizing how to count to ten doesn’t help a child unless they know what those numbers represent.

As with all Montessori learning, we introduce counting/one-to-one correspondence in the concrete first, using tangible objects. It is much easier for young children to grasp new concepts when they can touch, see, and experience them with physical counters. Only once they grasp the concept in the concrete (e.g. they count three objects one by one) do we introduce the abstract number symbols.

Learning to Count: 1 to 1 Correspondence - Montessori in Real Life

I try to avoid assigning ages to these activities, as all toddlers and preschoolers learn one-to-one correspondence and recognize numbers on different timelines. I will say that basic one-to-one correspondence activities can begin around 2 years, while counting cards and number hunt activities are best for ages 3 and up. Typically children don’t have a true understanding of what number symbols represent until after 3 or even 4 years old.

Keep in mind that children learn so much of what they know organically, without us really “teaching” them at all. When you are on walks, having conversations, or reading books, you probably already naturally count objects you see. Keep it up! Pointing as you count makes it more concrete for children. I also want to note that this is not necessarily how every Montessori parent or teacher would introduce numbers. These ideas are a mix of traditional Montessori and Montessori-inspired, and have worked well in our home!


Transferring and Matching - 1 to 1

This is one of the first activities you can do with your young toddler that teaches one-to-one correspondence. They are learning that one object corresponds to one space, and as they get older, are learning how to count the total objects. It is easy to set up with any kind of household object or object from nature, such as rocks or shells. When possible, we always start with objects or counters that are identical to each other. This helps to isolate the number from other variables such as color or shape. You can introduce more variety in the counters once they grasp the concept of the activity.

You can model for your toddler how you take one object from the bowl or basket and put it into one space on the tray. You want to be sure to have only the number of counters as the number of spaces in the tray, so that none are leftover (this enables toddlers to self-correct). It’s completely normal for young toddlers to place more than one counter in one space, or skip spaces. You don’t need to correct. You can model again sometime, and count up as you drop one counter in each space. It’s best to start small, with only three objects, and gradually use a full ice tray with 9 or more spaces. You can also add a fine motor challenge to this work with older toddlers by adding tongs for transferring.

Learning to Count: 1 to 1 Correspondence - Montessori in Real Life

Counting Cards

Once your toddler has mastered basic transferring/one-to-one correspondence as described above, you could introduce counting boards or cards. As explained above, it’s important when introducing this type of activity to keep the counters uniform and to only have the number of counters as spaces to fill. These peg boards, counting boards, or printable counting cards, allow your toddler to practice one-to-one correspondence while also seeing the corresponding number symbol. This helps them to recognize numbers and learn that each symbol represents a specific number of objects.

Learning to Count: 1 to 1 Correspondence - Montessori in Real Life

Number and Object Matching

Once D could master one-to-one correspondence with the same type of object (e.g. the pegs or the peas), we started to play a number/object matching game with these printable cards. This is a bit more complicated becuase each number corresponds to a differnet kind of object. These would be simple to make or draw with whatever objects you have around! More recently we did a version with nature objects. I always start with three or four, and then add on if and when she’s ready for more challenge.

Learning to Count: 1 to 1 Correspondence - Montessori in Real Life

Number Hunt Activity

Now that D has a pretty good idea of numbers (1-10) and their associated quantity, her favorite game to play is I-Spy with these polka dot number cards. Before she recognized the symbol, I would just say the number out loud or we’d count the dots together. So for example, I’d say “Can you go find three peg dolls?” If she comes back with a different number I’ll say “Oh you brought back two peg dolls!” I would ask her to pick one more and then we’d count together. I try not to say “that’s wrong”, but rather work together to find the right number, or just let it go and show her another time if she isn’t quite ready. Now that she recognizes number symbols up to five, we do the same number hunt with the number cards. It’s always more fun when we are outside!

Note: there is NO rush to learn number symbols and there are ONLY meaningful if a child truly understands that the symbol represents a quantity. Always start with counting. True number symbol recognition and understanding will emerge naturally through these activities, often around 3 or 4.

Learning to Count: 1 to 1 Correspondence - Montessori in Real Life

Note: This post contains affiliate links. If you purchase a product through one of these links, you won’t pay anything extra, but I will get a small commission, which helps keep this blog going. Thanks for supporting Montessori in Real Life!

Montessori-Inspired Third Birthday Gift Ideas

Montessori in Real Life

As D’s third birthday approaches next month, I feel all kinds of emotions. Turning three is a big one in the Montessori world, as she transitions from the unconscious to the conscious mind (more on that soon). I can see such a shift already in how she thinks, plays, communicates, and asks questions. This birthday list was really fun to put together as I imagine all the joy she will find in new kinds of materials, games, and toys. I hope these ideas are helpful for those of you with a soon-to-be three-year-old in your life! I imagine many of these toys will be enjoyed throughout the next few years!

For more ideas or for those with younger siblings, don’t miss these Second Birthday Gift Ideas and First Birthday Gift Ideas!

Third Birthday Gift Ideas - Montessori in Real Life

Birthday Gifts

Marble Run Construction or Marble Tree - We have a musical rainbow tree and it is completely mesmerizing for both me and D. It is fun to experiment with different kinds of marbles and balls which affect the sound and speed. The beautiful marble run construction set reminds me of a favorite toy I had as a child, but this version is definitely a level up!

Face Memory Game - I love this set of wonderfully diverse face cards. These are perfect simply as a matching and discussion activity, but even more fun as your child learns how to play the game of Memory with you!

Pizza Kit with Pizza Day Book - Who doesn’t love pizza? This little set is great for young children who enjoy helping out in the kitchen. Your child can now make their very own pizza and even slice it themselves! Pizza Day is a favorite book to go along with it.

Hand Bells - As far as musical instruments go, these are on the end of least difficult to hear at home. :) Not only are these fun for preschoolers to play, but they can learn about scales and even play songs eventually! If you have two sets, they can match the notes to each other.

Sneaky Squirrel Game or Count Your Chickens Game - This is the age when your child might really start to get the hang of “board” games. I’ve heard wonderful things about both of these games, which incorporate turn-taking, colors, numbers, and a lot of fun.

Layered Puzzle - Layered puzzles are always popular with toddlers, and this multi-layered puzzle takes it up a notch for preschoolers. With 22 pieces and four layers (one for each season), it will be a nice challenge for this age group.

Flower Press - This is a beautiful gift for children with spring and summer birthdays and those who love to collect flowers! Not only is the act of pressing flowers fun for children in and of itself, but the pressed flowers can be used for all kinds of arts and crafts projects.

Fort Building Silk and Clips - This is such a fun set to take your child’s fort-building to the next level. Children can use the large clips to buld a fort anywhere (even outside), and the large silk adds beauty wherever it goes.

Scooter - This is one of D’s favorite new activities, both indoors and out. While the balance bike is a necessity, the scooter is a fun and speedy alternative to mix it up on your many neighborhood and park adventures!

Third Birthday Gift Ideas - Montessori in Real Life

Grimm’s Rainbow - Like all Grimm’s wooden toys, this is worth it. We have had our rainbow for over a year and it is used in so many ways - as tunnels, bridges, or slides, for color matching and nesting, and whatever else your child imagines. This beautiful classic toy never leaves our shelf.

Geoboard - The geoboard is fun for children and adults alike. As your child gets more practice with it, they can follow patterns and make shapes. I love that this one is entirely made of Birch. Pulling the rubber bands over the geoboard is wonderful fine motor practice (especially for putting on socks and shoes!)

Jigsaw Puzzle - Depending on your chid’s puzzle experience, this might be their first “real” puzzle and a nice challenge for them at this age. It is a puzzle that you might start out doing together as they gradually master it on their own. I love the beautiful scenes that these Petit Collage puzzles make.

Imagination Magnets - Did anyone else love tangrams as a kid? These are similar to that, but with a magnetic board for creating. I love that these little shapes allow for creativity as well as following the patterns provided.

Dollhouse with Wooden Dolls - This is the age when pretend play really takes off, and this dollhouse is perfect for children who enjoy “playing house”. I picked this one for D for it’s size, aesthetic, and open concept. A variety of dolls could work in this house, but we picked the Hape wooden dolls as they are bendable, wooden, and have details in their faces and clothes.

Measuring Tape and Toolbox Book - This real wooden measuring tape will provide endless possibilities for your tool-loving preschooler. Children at this age love to measure and it’s a great pre-math exercise! This is one of our favorite books about tools to go along with it.

Birthday Books

(click pictures for links)

Happy Birthday to the special three-year-old in your life!

Note: This post contains affiliate links. If you purchase a product through one of these links, you won’t pay anything extra, but I will get a small commission, which helps keep this blog going. Thanks for supporting Montessori in Real Life!

Montessori-Inspired Second Birthday Gift Ideas

Montessori in Real Life

After posting my First Birthday Gift Idea post, I received many requests for a second and third birthday gift list as well, and I’m happy to help! You can expect the third birthday gift idea post in the next couple of weeks. I know how hard it is to shop for little ones, even your own! I hope this helps consolidate the choices for those of you with a soon-to-be two-year-old in your life. These gifts are almost all toys and tools that have been well-loved between the ages of two and three in our home. Many of them will be enjoyed well past the age of three!

Second Birthday Gift Ideas - Montessori in Real Life

Wheelbarrow - Toddlers love “maximum effort” activities, which allow them to put forth their whole body and energy into something with purpose. Your toddler will enjoy filling the wheelbarrow with all kinds of nature treasures and helping out with the outdoor chores you do!

Grimms Blocks - Grimms wooden toys are pricey, but they will last through the years. There are endless ways to use these open-ended blocks. It doesn’t hurt that they look beautiful in your home too! These are great for birthdays of any age.

Mini Cooking Set and Rolling Pins - These are D’s most-used kitchen utensils for real baking and cooking projects with me. Though these can be used for pretend play or play dough, they are completely functional too. Either of these would pair well with The Montessori Guide’s picture recipe ebook!

Sensory Bin Wooden Tools - This is a beautiful set of tools and bowls for sensory play. D loves the wooden scoopers and box with a lid for scooping and pouring rainbow rice and sand. The tongs are great for picking out hidden objects or transferring items between bowls.

Community Helpers and Vehicles - Toddlers find such excitement from fire trucks, school buses, and the helpers associated with them. This is a simple and fun matching activity, and the wooden vehicles roll, providing lots of opportunity for “driving” around the house.

Shape Latch Board - This is a wonderful combination of shape sorter and latch board. Toddlers love locks and latches, so they will enjoy the challenge of opening each door to find the hidden shape. Lots of opportunities for repetition here!

Bath Pipes and Cogs - These are hands down the best bath toys we’ve ever had. As mentioned above, pouring water never gets old. The pipes and cogs stick to the bath tub wall and can be arranged in any number of ways.

Soft Dress-Up Doll - Between the age of two and three, D really got into pretend play with her dolls. These beautiful and plush dolls are perfect for carrying around, pushing in the stroller, and dressing up. They are pricey but a perfect gift for a little one. I also appreciate the diversity of dolls from Hazel Village.

Bead Stringing - Lacing beads was and still is an activity D enjoys on repeat. I especially love this set, with the novel shapes and fun colors. The wooden end makes it easier for toddlers to string on the beads - just be sure to tie a knot on the other end so the beads don’t slide right off!

Second Birthday Gift Ideas - Montessori in Real Life

Fine Motor Tool Set - Sensory bins are a hit with the two-year-olds, and the right tools make all the difference. This simple set from Learning Resources provides tools for transferring a variety of materials, and provide excellent practice for using real scissors, and later, writing.

Farm Nesting Blocks - Djeco is one of my favorite, more whimsical, toy brands for kids. We don’t have this exact one, but it combines a few toddler favorites: stacking, nesting, and hiding objects inside boxes! I love the little farm animals that come with these, which provide opportunities for open-ended play as well.

Toob Figurines - Not a week goes by we don’t use a set a Toob figurines for some sort of activity. From matching to sorting to pretend play, these are well-utilised and loved. You can find Toob figurines for animals, vehicles, flowers, and all kinds of categories!

Pouring Set - Maybe even more popular than locking and latching is pouring water. Once your toddler has mastered pouring water into a cup, this provides a few added challenges with different vessels and a small funnel. This set is also perfect for flower arranging!

Doll Stroller - To go along with a new (or old doll), a stroller is sure to be a hit. I had no idea how many uses it would provide for D. She loves pushing her babies in it, but also her stuffed animals, random objects, and “groceries”. It is in constant use.

First Animal Matching Puzzle - These have been D’s favorite kind of puzzle since her second birthday. With just two pieces each, these are on the easier end, and a great intro to “real” puzzles. I especially like that these are real images of the animals rather than cartoons.

Basic Train Set - This is the perfect first train set. It’s easy enough for toddlers to put together themselves and the colors brighten it up. Even with a minimal amount of pieces, there are a variety of ways to arrange the tracks, with hills and loops. It’s a perfect one to add onto over the years to come!


For birthday book ideas, check out the First Birthday Gift Ideas, as well as our favorite Montessori books. For even more gift inspiration, check out my holiday guide for babies and toddlers!

Note: This post contains affiliate links. If you purchase a product through one of these links, you won’t pay anything extra, but I will get a small commission, which helps keep this blog going. Thanks for supporting Montessori in Real Life!

Montessori-Inspired First Birthday Gift Ideas

Montessori in Real Life

I honestly can’t believe S is almost one. It goes by even faster the second time! To distract myself from feeling sad about how fast he’s growing up, I’m working on birthday gift ideas! Each of these items is something that either D loved at 12-24 months, or something that we are gifting S for his first birthday next month. I hope these serve as inspiration for you or for your relative/friend looking for a gift! At the bottom you will find a few favorite first birthday books as well. Happy Montessori gifting and Happy Birthday to the special little one in your life. :)

Note: If you are looking for more traditional Montessori materials, I recommend checking out The Montessori Guide, which offers month-by-month Montessori toy and activity suggestions from birth to 24 months. You can even buy a gift card for a new mom or mom-to-be!

Gift Ideas

Montessori-Inspired First Birthday Gift Ideas - Montessori in Real Life

Scoot Around Bike - I gave this to my nephew for his first birthday and both him and his brother loved it. I’m hoping we will get the hand-me down for S! It’s nice because it can be ridden both inside and outside.

Washable Doll - Nothing has been more loved than D’s dolls, and I can already see S’ interest in them too. As baby washing has been one of D’s favorite activities, I am getting S his own washable baby doll too. That way the baby can go in the mini pool, get a bath, and just not worry about it getting wet in general!

Sensory Shape Puzzle - This shape sorter/puzzle is a fun variation on the classic, with several themes to choose from. I love the sensory aspect of this, and I am a big fan of Tender Leaf toys in general! They are a favorite of mine to gift.

Toddler Apron - I plan on getting one of these for both my kids for their birthdays this year! I just love the design and the practical nature of them. You can find more designs on this website as well. These aprons are perfect for helping in the kitchen as well as doing art and water play.

Hide and Seek Board - This was one of D’s favorite toys for quite a long time. In the beginning, she enjoyed simply opening the doors and taking the magnets out. As she got clsoer to two, she enjoyed matching the magnets with the correct door. A fun way to fulfill a toddler’s love of opening and closing!

Hammered Flatware Set - This is a beautiful set that I plan to gift S. It is hard to find quality silverware for babies and toddlers, but this one fits the bill. This paired with the sweet plate below would make a lovely gift for the Montessori baby or toddler in your life.

Drum - I already purchased this for S for this birthday, and I know he’s going to love it! This is the best of the baby/toddler drums in quality and sound. I am sure D will want to be stealing this as well!

Grimm’s Nesting Cups - Grimm’s toys are pricey, but like many of our favorite wooden toys, they are enjoyed for years. Young toddlers love to stack, nest, and transfer, and these are great for all of those activities. As they get older, they are perfect for color sorting activities as well.

Family Photo Book - I made one of these for D around S’ age and it’s still on her bookshelf in her room. It’s probably her most loved book ever. In the midst of what we are experiencing in the world right now, this is especially meaningful. love this one because you can update the photos as families grow and change.

Montessori-Inspired First Birthday Gift Ideas - Montessori in Real Life

Natural Wooden Blocks - These have been a staple in our house for a couple of years. The blocks are beautiful, natural, and just the right size and shapes. These were the first blocks D built a giant tower with, and now both kids enjoy building with them (and knocking down of course).

Wooden Animal Plate - These are also very sweet and a fun gift for new(ish) eaters. We have a couple of fun animal plates from TimberChild, and it’s always a special treat when breakfast is served on a bear!

Hammer and Roll - We have a hammering toy, but if I had to buy a different one, this would be it. I just love the look of it, and how the balls roll out on a slant. Plan Toys never disappoints!

Wooden Animals - Though we often give and get an abundance of stuffed animals (which are also loved), these wooden animals are a less common but favorite in our house. They are fun for language activities, open-ended play, and later, pretend play.

Push Wagon - This was one of D’s big presents for her first birthday and it was soloved. I will be bringing it back out for S soon. There are lots of great walker wagons, but this one is sturdy and heavy, and therefore great for new walkers. As D got older, she enjoyed putting her animals and toys inside to push around.

Personalized Name Puzzle - I gifted this to D for her first birthday. It’s as much decor as it is a toy! I love having it out on her shelf in her bedroom. Heirloom Kids is another one of my most loved small shops.

Books

Montessori-Inspired First Birthday Gift Ideas - Montessori in Real Life

The Wonderful Things You Will Be

Everywhere Babies

I Wish You More

I Love You Through and Through

On the Night you were Born

10 Little Fingers and 10 Little Toes

Note: This post contains affiliate links. If you purchase a product through one of these links, you won’t pay anything extra, but I will get a small commission, which helps keep this blog going. Thanks for supporting Montessori in Real Life!

Bird-Themed Activities for Toddlers

Montessori in Real Life

One upside to this shelter-in-place life is a newfound appreciation and connection to nature. While I intended to make birds our theme for a week, it has been our theme for the whole month, because we are both enjoying it so much! Even after spending the month learning about the many types of birds in our region and beyond, and we’ve only touched the surface. Here are some of the activities that my toddler (almost 3 years old) has really enjoyed this month:

Bird-Themed Activities for Toddlers - Montessori in Real Life

Making bird feeders

We tried a few versions, but our favorite and most child-friendly version was making it out of an orange. This is how we made them:

  1. Halve a large orange and juice with a manual juicer (or a spoon) - bonus was D got to drink fresh-squeezed juice!

  2. Measure out 6 pieces of twine, each the same length, to hang the orange feeder.

  3. Poke three holes along the edge of the peel (we used a wooden skewer).

  4. Insert twine into each hole and tie a knot. Then tie the three pieces of twine together.

  5. Mix birdseed and peanut butter (enough PB to make it stick together).

  6. Scoop the seed mixture into each orange half.

  7. Hang outside and wait for the birds to enjoy! The birds have loved this for over a week now.

Bird Themed Activities for Toddlers - Montessori in Real Life

Birdwatching binoculars

As we’ve been seeing so many birds come to our yard via the birdfeeders, we needed some “binoculars” to get a clsoer look! :) I saw a version of these on Pinterest and knew we had to try. To make the binoculars, we used two empty toilet paper rolls, construction paper, tape, coloring supplies, a hole punch, and twine. I used thin strips of construction paper and double sided tape to line the edges of each roll, but washi tape would work great too if you have it! D colored a larger piece of construction paper and then helped me wrap and tape it around the two rolls to keep them together. I then hole punched the edge of each roll and tied on a piece of twine so she could wear them around her neck on walks. She has loved wearing these around for our walks around the neighborhood.

Bird Themed Activities for Toddlers - Montessori in Real Life

Bird Nests

To go with one of our favorite little board books, Nest, we made two kinds of nest. One from coconut fiber and one from homemade playdough. We took a long walk in the forest and found all kinds of treasures to add to our nests. D was really excited when she found something "the birdies will love". She spent a morning and afternoon filling her nests with all her treasures, making them "nice and comfy". She found a spot in one of our trees for the coconut fiber nest, and maybe pieces of it will be used by the birds. The playdough allowed for a fun, indoor version. She helped me make a batch of playdough and she set right to work again, filling it with her forest treasures. She also enjoyed setting up her colorful, counting birds and these artificial eggs in her nest. The playdough version is fun because she could unbuild it and re-build it as much as she wanted.

Bird-Themed Activities for Toddlers - Montessori in Real Life

Bird identification

As I have never been a birder (until now), we both needed some help identifying all the birds we’ve been seeing! It took some trial and error to find resources for the actual birds we are seeing in our region of the world. Our favorite book has been the Woodland bird call book, which allows us to match the picture with the bird call, as well as learn a bit more about each bird. The most useful way to actually visually identify the birds has been a website and app called iNaturalist. Their website also provides a chart of common local birds in your area which we printed out for walks and bird-watches in our backyard. Lastly, I printed and laminated this beautiful print by Birds and Friends of Washington State birds.

Bird-Themed Activities for Toddlers - Montessori in Real Life

Bird Matching

We can’t have a theme without some classic Montessori matching. As usual, our go-to language objects are the toob figurines by Safari Ltd. I found matching bird cards from Montessori Nature. Object to picture matching is an activity she’s enjoyed for over a year, with it being as easy or challenging as the objects we choose. I also love these beautiful bird and egg matching cards from Fiddlesticks Education. While D is too young to match the birds to eggs on her own, it was a fun activity to talk about together, as we compared and contrasted the different birds and eggs and colors.

Bird-Themed Activities for Toddlers - Montessori in Real Life

Bird Parts puzzle matching

This bird puzzle is D’s very favorite puzzle right now. I first just put the puzzle out with the pieces in a small basket for her to complete. Once she mastered that, I printed off the bird body part cards from Montessori Factory. The cards and puzzle are a fun way to learn a bit more about birds, and what makes them unique!

Bird Themed Activities for Toddlers - Montessori in Real Life

Songs (I typically sing these myself or play audio rather than show her youtube video):

Robin in the Rain

Five Little Chickadees

Little Bird, Little Bird

Note: This post contains affiliate links. If you purchase a product through one of these links, you won’t pay anything extra, but I will get a small commission, which helps keep this blog going. Thanks for supporting Montessori in Real Life!

Baby Led Weaning, Montessori Style

Montessori in Real Life

A key element in the introduction of solid foods in a Montessori home is respect. We show the infant respect by providing them with real dishes and utensils. Infants in turn learn to respect and care for their environment early on. It is one of the first opportunities for infants to practice autonomy and feel the pride and satisfaction that comes with our trust and respect.

Baby-Led Weaning, Montessori Style - Montessori in Real Life

Weaning vs. Family Table

One of the first ways we show infants respect is by setting up a lovely place for them to eat. In our home, we have a couple of options for this. We have two Stokke Trip Trapp chairs for the children which are wonderful because they grow with them. S is still in the baby set, but he can sit right at the family table with us. D has been climbing in and out of hers since 20 months or so. We all sit at the family table for breakfast and dinner, and sometimes lunch.

We also have a Sprout Kids weaning table for the kids to sit at. A low table is great for babies becuase it makes the dropping and throwing game less exciting (dishes have less far to fall). It also allows independence once they are more mobile. It is extra special for toddlers when they can begin to set their own table and clear their dishes. Both D and S love sitting together at their small table, and I just sit on the floor next to them. We typically do morning and afternoon snack, and sometimes lunch here. You can get 10% off the Sprout table with the code MRealLife.

Baby-Led Weaning, Montessori Style - Montessori in Real Life

Purees and BLW

When we started S on solids around 6 months, we began with purees. Once he got comfortable with that, we introduced small strips of food, and then bite-sized pieces around 8 or 9 months. Though we didn’t start with traditional baby-led weaning, S has been involved in feeding himself each step of the way. When we began purees, we each held a small espresso spoon. I would dip my small spoon in the bowl and feed him, but he could practice or just play with his spoon as well. Often he would take over and hold it once it was in his mouth. Now, I can load the spoon for him, set it down in his bowl and he feeds himself. He then places it back down for me to scoop again. Soon enough he’ll be dipping, scooping, and feeding himself. (Tip: start with a thick food such as mashed avocado or chia pudding that is sticky and easy to scoop.) Since eight months though, most of his meals are finger food, in baby-led weaning style. He finds a lot of satisfaction chewing and eating what his big sis is, even without teeth! Though we practice with the small fork in the same way, he eats a lot with his hands, which is great too! Infants and toddlers will use utensils when they are ready, if they are available to them.

Baby-Led Weaning, Montessori Style - Montessori in Real Life

Real Dishes

We love our small shallow ramekins as dishes because the food can pressed up against the edges rather than falling off the plate when they reach for it with their fingers or utensil. The small spoon and cocktail forks give them practice with the same kinds of utensils we use, while fitting nicely in their small hands. The cocktail fork has sharp tines, making it easier to actually pierce food with. (Supervision necessary.) We have avoided suction plates because they don’t teach infants how to be careful with their dishes. They also often become a game of trying to “unsuction” and toss.

Baby-Led Weaning, Montessori Style - Montessori in Real Life

Placemats

We place the children’s dishes on these wonderful, outlined placemats by Khadine Deco. While these aren’t necessary, they allow for infants to know dishes have a designated place on the table. The outlines are great for D because she can set the table by herself, knowing exactly where her utensils and cup go. We have cloth and laminated versions (the latter being easier to clean and re-use frequently!) You can use code reallife10 for 10% off either version.

Baby-Led Weaning, Montessori Style - Montessori in Real Life

Glasses

We also prefer to use open glass cups for drinking because they teach children how to properly drink from a cup and allow for natural consequences when the cup is dropped. We use small duralex cups at home because they are much tougher than typical glass, so while they spill, they are unlikely to break/shatter when dropped. The three-ounce version is perfect for S, and the 5 ounce glass is great for D. Clear glass is also preferred because infants and young children can see how much is in the cup before picking it up and drinking from it.

When we first introduced the cup (the same time he started solids), I held it for him as he learned how to sip from it. Once he got used to that, I would let him practice picking it up from the table. There were plenty of spills, but I always keep a small washcloth or napkin and pitcher to refill the water. I also only fill the water cup 1/4 the way full, so it’s not a flood every time. By 10 months he could bring the water cup to his mouth, drink, and set it back down. He doesn’t get it right every time, but he’s learning more every time he tries. If he is just playing or putting food in the water, it’s a sign he’s all done and we remove the cup. He isn’t going thirsty, as he’s still getting plenty of hydration and nourishment from nursing.

Baby-Led Weaning, Montessori Style - Montessori in Real Life

Supervision

As you might imagine, using real dishes means close supervision. It is especially necessary to sit with your infant as they eat, either on the ground at their weaning table, or beside them at the family table. It is much harder for them to dishes or food if you’re right there to catch them, and the best way to prevent them from getting in a throwing habit is to stop it before it happens. If S begins to drop food (e.g. to our dog) or push his dishes around a lot, I say “Food stays on the table”, and if it happens again, “It looks like you’re all done!” and sign “all done” with my hands. I then take away the dishes. It’s often a sign that they aren’t hungry or interested in the food if they are playing rather than eating.

Now that S is used to his dishes staying on the table, I am able to walk away and get my own food or do a few dishes while he finishes up eating. I am always close by though. At 10 months, he already shows respect for his environment, in large part because he has been shown respect and trust at mealtimes. Babies are capable of so much if we give them a chance. It also means practicing patience ourselves and embracing plenty of mess along the way!

Baby-Led Weaning, Montessori Style - Montessori in Real Life

Communication

A big piece of the weaning process has been clear communication. I talk to S as we get ready for eating, and label the different foods for him. I use baby sign as I talk for words like “eat”, “more”, “water”, and “all done”. He is starting to sign “more” and “all done” now. He also very clearly understands what I’m saying, as he reaches for the water as soon as I ask him if he wants water, with my voice and signing. Including babies in the conversation from the very beginning helps them feel empowered and in control at mealtimes, and beyond. By giving S the tools to communicate back via baby sign, he can tell us when he is still hungry or is all done. This can help to prevent throwing and other difficult habits that often come from an inability to communicate their wants and needs.

On the Go

One of the beauties of using real dishes and teaching respect early on is that it is much more pleasant to take your infant or toddler to eat at restaurants. D has always done remarkably well at restaurants, and (when we are allowed to go out of our house again!), I hope S is too. Often we’ll keep a bib as well as a baby spoon and fork in the diaper bag, but just use the plates and cups that they have there. When we take long walks or go out, we typically bring our favorite straw cups. These aren’t leak-proof so they do need to remain upright, but they can’t pull the straw out which is nice. I taught S how to use this around 10 months by sucking a little smoothie up for him, so he could taste it, and know that he has to suck to get more liquid up from the straw. You can also use squeezable take & toss straw cups to better assist your infant in learning how to drink from a straw (you squeeze the cup lightly and liquid goes up the straw for them to suck.)

Baby-Led Weaning, Montessori Style - Montessori in Real Life

The Montessori Kitchen Guide

For a complete and detailed guide to Montessori weaning, challenging behaviors at the table, involving your toddler in the kitchen, and more, check out our 60-page Montessori Kitchen Guide e-Book!

The Montessori Kitchen Guide

Note: This post contains affiliate links. If you purchase a product through one of these links, you won’t pay anything extra, but I will get a small commission, which helps keep this blog going. Thanks for supporting Montessori in Real Life!

The Tiny Seed Theme for Toddlers

Montessori in Real Life

For the foreseeable future, we are homebound and homeschooling. For me, this has meant a lot more planning, structure, and purposeful or themed activities. As I wrote in a recent Instagram post, I don’t believe toddlers need themed or pre-planned activities. They can thrive on open-ended toys, practical life, and DIYS from whatever household items you can find. They thrive on routines and parnets who are present and engaged. But planning these activities keeps things interesting and gives me purpose when we are stuck in the confines of our home. This in turn, makes for a happier mom, and happier kids.

Tiny Seed Theme for Toddlers - Montessori in Real Life

Our theme this week has been The Tiny Seed, based on the classic book by Eric Carle. Our more general theme is learning about how plants grow! As I do NOT have a green thumb, I've learned a bit along the way too! Here are some of the activities along this theme that we have enjoyed this week.

Planting Seeds, Beans, and Bulbs

Toddlers (and children of all ages really) learn best from concrete, hands-on materials. It is much easier to grasp a new concept when they can literally grasp it in their hands.

What the hand does, the mind remembers.
— Maria Montessori

To introduce the theme of seeds and how plants grow, we planted our own seeds and beans. Because it has still been quite cold here, and I am terrible at keeping indoor plants alive, we started with planting a bean in a jar. This has the added bonus of getting to see the growth through the glass, and fast too. Next week we will plant some cosmos or zinnias in our yard as well. We also planted a few garlic cloves in an indoor pot, and are hoping for some garlic greens to grow! D has loved watering her plants and checking on their progress each day.

Seed to Fruit/Veggie Matching

The Tiny Seed Theme for Toddlers - Montessori in Real Life

This is another great hands-on activity that gets all the senses involved! We picked out a few different fruits and vegetables with visible seeds, and opened them up for D to explore. Then she helped pick the seeds out of each one, eating the edible ones and composting the others. She enjoyed learning about the seeds, but also the fine motor work of picking out the small seeds and enjoying the fruits of her labor. :)

Seed Life Cycle

Tiny Seed Theme for Toddlers - Montessori in Real Life

After planting our bean and watching it grow for a few days, we compared the growth to these green bean life cycle manipulatives. 3D objects are always more useful in learning new terminology than pictures, but real live plants are the very best!

Seed/Bean Shakers

The Tiny Seed Theme for Toddlers - Montessori in Real Life

We of course had to include something along the seed theme for baby brother, and this one involved both kids! D sorted five kinds of beans/seeds/pods into small spice jars. She screwed back on the lids and picked out a basket to put them in for S. S loved shaking them and making different noises with the different shaped/weighted seeds. Super simple and fun!

Parts of a Flower Felt Board

Tiny Seed Theme for Toddlers - Montessori in Real Life

To go with our favorite seed songs, I created this felt flower scene to learn parts of a flower (tulip, namely) and what flowers need to grow. This felt board has gotten a lot of use over the last year, and I can create all kinds of felt shapes and animals from this stack of colorful craft felt. D has been enjoying giving “lessons’ to his brother with this flower felt board.

Pea Pod Counting

The Tiny Seed Theme for Toddlers - Montessori in Real Life

I had seen similar counting boards with food on Pinterest before, and thought doing a seed-themed one would be cute. I went with pea pods, as they are a familiar and favorite food for D. I made these by cutting and drawing on construction paper and then laminating. I have attached the scanned copy here if you’d like to print the PDF to use. You can have your child count with real peas, or like we did, use playdough peas that I rolled (and she helped). Just don’t expect those play dough peas to stay peas for long!

Flower Arranging

The Tiny Seed Theme for Toddlers - Montessori in Real Life

This has been a favorite for a year now. She especially enjoys flower arranging with the little wildflowers we pick on our daily walks. Yesterday we found a field full of daisies, and when she insisted on bringing more than a handful home, I knew we’d be in for another afternoon of flower arranging. When she was first doing this activity, I set out just one small vase, but now she divides the water and flowers into three vases or jars. She enjoys displaying them on her windowsill!

Favorite Songs

D loves doing this one called “Be a Seed” from Jbrary as a full body movement song!

Parts of a Plant Song

Favorite (or Recommended) Books

The Tiny Seed by Eric Carle

Up in the Garden and Down in the Dirt by Kate Messner

Planting a Rainbow by Lois Ehlert

We are the Gardeners by Joanna Gaines

Botony for Babies by Jonathon Litton

From Seed to Plant by Gail Gibbons

Note: This post contains affiliate links. If you purchase a product through one of these links, you won’t pay anything extra, but I will get a small commission, which helps keep this blog going. Thanks for supporting Montessori in Real Life!

Infant and Toddler Easter Baskets

Montessori in Real Life

Easter is going to look quite different this year with just our immediate family, but some traditions will remain. Including Easter baskets. I’ve tried to support a few of my favorite smaller toy companies this year in picking out Easter gifts, as well as high quality, open-ended toys that will last years. Rather than use plastic or paper grass to line our baskets, we received a beautiful silk from Sarah’s Silks to line our baskets with. I love that it doubles as eco-friendly grass and is a gift in and of itself. Bonus: when your purchase $50 or more from Sarah’s Silks website, you get a free Silk - a perfect eco-friendly Easter basket grass replacement!

Infant and Toddler Easter Baskets - Montessori in Real Life

We were also gifted these beautiful seagrass Easter baskets from local mama and maker Natural Playbox. I highly recommend checking out her shop for other goodies such as the wooden egg transferring set or magnifying glass. Another small shop full of sweet Easter gifts is Red Barn Toys. My very favorite are the hollow wooden easter eggs that I will fill with a few sweet treats for D. Lastly, D already has a collection of these beautiful Holztiger animals, and we are excited to start S’ collection for each of them to enjoy throughout the years. You will find links to the rest of the items in our Easter baskets below!

Infant and Toddler Easter Baskets - Montessori in Real Life
Baby & Toddler Easter Baskets - Montessori in Real Life

Note: This post contains affiliate links. If you purchase a product through one of these links, you won’t pay anything extra, but I will get a small commission, which helps keep this blog going. Thanks for supporting Montessori in Real Life!

Our "Stuck-at-Home" Daily Rhythm

Montessori in Real Life

Well, for at least the next six weeks, we are home. While D was only in school a few mornings a week to begin with, this has still been a big shift for us. Especially because we are also avoiding playgrounds, restaurants, errands, and group playdates. What are parents to do?! I know many of you are in the same boat, so I figured it could be helpful to share what our days look like during this strange, isolated time. I hope that we can all help each other out, coming up with strategies, activities, and humor to help each other get through some long days.

Our "Stuck-at-Home" Daily Rhythm - Montessori in Real Life

Last week was our first week off of school and activities, and I mostly just winged it. That didn’t work out so well for us. We had a lot of empty time to fill, and everyone felt irritated and even a little bored. While we already follow a daily rhythm, we’ve had to adjust given the circumstances. After our first week homebound, it became apparent that we need a bi more structure and activity to our days! While no day looks or will look exactly the same, and no weekly plan is followed exactly, I am looking forward to having a guideline to follow.

Weekly Rhythm. Here is this week’s plan. As I’ve been home more myself this weekend, I’ve had time to do some activity prep! You will see more details of these on my Instagram account this coming week. :)

Our "Stuck-at-Home" Daily Rhythm - Montessori in Real Life

Daily Rhythm. This is our daily rhythm while we are home for the next six weeks. It may change slightly, but it’s working well so far! I’ll post a few more details and clarifications below the chart.

Our "Stuck-at-Home" Daily Rhythm - Montessori in Real Life

Wakeup. I generally wake up an hour or so before the kids, to get myself ready, drink coffee, and respond to messages/work on my blog or IG. When the kids wake up (generally 7 to 7:30am), I get S up and nurse and change him, and my husband gets D up. We all have breakfast together and my husband leaves for work (these days that is our bedroom/home office).

Our "Stuck-at-Home" Daily Rhythm - Montessori in Real Life

Free Play. You’ll notice a lot of “free play” in our daily schedule. Free play could mean a number of things. It could be each of them playing with their toys at their shelves, together or apart. Other times it means D playing pretend with her dolls, open-ended toys, or vehicles and roads. Much of this time consists of the children leading the play while I am present with them, engaged or observing. This first part of the day is also a good time for me to show D a new activity or give her a lesson on a new work. Other times free play is more independent, and I can work parallel to them, doing dishes, folding laundry, or cooking. If S is extra fussy, I wear him.

Our "Stuck-at-Home" Daily Rhythm - Montessori in Real Life

Rest. The morning is full with play, movement, food, and work. So while D no longer naps, she still enjoys rest time. She can choose to take rest time in her room or downstairs. Lately she’s been choosing her room. It always lasts an hour, and we use her Hatch machine to indicate when rest time is over (it is pink during rest time and turns blue after an hour). She actually often asks to go down for rest time once S goes down for nap. It’s a nice reset for all of us in our days.

Our "Stuck-at-Home" Daily Rhythm - Montessori in Real Life

Independent Play. When D has independent play time (often in morning and sometimes in the afternoon when S is napping), we are both working. She knows I’m not available and she chooses activities that don’t require my help. Sometimes I set her up with some art or sensory play, or she just reads books or plays by herself. While we limited TV to a couple times a week prior to the CV situation, I’ve been more lenient now and letting her watch an episode or two (usually Daniel Tiger) most afternoons.

Our "Stuck-at-Home" Daily Rhythm - Montessori in Real Life

Movement. We try to get outside once a day, which usually just means walking or exploring from our house, but sometimes we drive to a different park or meet up with a close friend. We are avoiding playgrounds and groups right now, so our options are more limited, but we are lucky to be living in such a beautiful area, with forests, water, and a lot of green space. We generally get out rain or shine, but if it’s terrible weather, we might do an obstacle course, dancing, or Pikler climbing and sliding.

Our "Stuck-at-Home" Daily Rhythm - Montessori in Real Life

Naps. As for S, he takes two naps at this point. His morning nap is an hour or less and his afternoon nap is usually two plus hours. I still nurse him before and after each sleep, and he eats three meals a day with us. He has been putting himself to sleep since he was a baby (thanks Taking Cara Babies!) so naptime sequences are pretty short and sweet (nurse, sleepsack, sing songs, kiss goodnight). D usually joins us (she loves to mimic the sequence with her own baby doll).

Our "Stuck-at-Home" Daily Rhythm - Montessori in Real Life

Food Prep. Another big part of our day is food prep and eating. D loves to help me cook, and she always prepares her own afternoon snack which I set up in her small functional kitchen during her rest time. We are usually in the kitchen together before lunch and dinner with her as my “sous chef”. The kids typically eat dinner pretty early, and while I might sit and have a bite with them, my husband and I usually eat our real dinner after the kids have gone to bed. We just find it’s a nice time for the two of us to catch up and enjoy a more relaxed meal. When the kids start staying up a bit later than 6:30/7, we’ll definitely do family dinners.

Our "Stuck-at-Home" Daily Rhythm - Montessori in Real Life

Bedtimes. One nice thing about my husband working from home is that I can often escape for a run or walk by myself in the early evening. So sometimes my husband will take over dinner with the kids, and then I’ll come home in time for the kids’ bedtime. He is also home to help out with bedtime now! The kids now take a bath together, and then we cuddle and read stories in the nook. My husband gets D ready (brush teeth, jammies, songs) and I nurse S and sing him bedtime songs. They both fall asleep independently and quickly these days!

Our "Stuck-at-Home" Daily Rhythm - Montessori in Real Life

Note: This post contains affiliate links. If you purchase a product through one of these links, you won’t pay anything extra, but I will get a small commission, which helps keep this blog going. Thanks for supporting Montessori in Real Life!

A Montessori Toddler Kitchen Part II

Montessori in Real Life

It’s been over a year since we first set up D’s functional kitchen. Reading over my original blog post on it, I realized it’s time for an update on how it’s set up, and how she uses it. For details about why we don’t have a play kitchen and how we first converted the IKEA play kitchen to a functional kitchen, see the original post. This little kitchen is D’s favorite spot in the house. This is where she washes hands. It’s where she finds and serves her own snack and beverage. It’s where she finds her placemat and dishes to set her and S’ small table. It is also where she helps prepare her own snacks, such as peeling and slicing carrots, juicing oranges, peeling eggs, or transferring crackers to her plate with tongs. She takes such pride in all that she does here.

A Montessori Toddler Kitchen Part II - Montessori in Real Life

Over the course of the past year, D has grown a lot in what she can do at this kitchen. The water dispenser is mostly used for hand-washing at this point. Occasionally she also washes dishes here too. Though it can be used for drinking water, she more often pours from a pitcher with water or milk that stays on her kitchen counter. Setting up a shelf beside the IKEA kitchen has given her more space for this, as well as food prep and serving snack. I also added a mini fridge where we mostly keep veggies and hummus or something similar for her snacktime. She can self-serve, but tends to only do so in the afternoons.

A Montessori Toddler Kitchen Part II - Montessori in Real Life

As she helps put dishes away, I placed some colored dot stickers in her kitchen cabinet to help her remember where the dishes belong. We also added a utensil divider for the same reason. Hand towels, placemats, and napkins are now stored in the low drawer of the new cabinet, next to the small laundry bin. As all things in our home, it’s a constant work in progress and it will continue to evolve as she gets older, and as S becomes a toddler himself. I guarantee there will be a Part III next year. :) But for now, it’s pretty close to perfect for D. Links are all below!

A Montessori Toddler Kitchen Part II - Montessori in Real Life


I know setting up the kitchen and giving your child freedom in the kitchen can be intimidating, which is why Bridget (of Montessori in Motion) and I created The Montessori Kitchen Guide eBook! Check it out for all your questions regarding introducing food and real dishes to babies, weaning tables vs high chairs, functional kitchens in any space, kitchen helpers, tricky behaviors at the table, toddler food prep ideas, and more!

Water dispenser disclaimer: This water dispenser set-up is not perfect. It requires your toddler to turn the knob rather than push a button to release water, which takes practice and getting used to. The dispenser can also tip if not careful, but D learned early on to hold the dispenser with one hand and turn on the water with the other. The lid may also rust, which is natural with metal, but good to be aware of. We did not put a hole in our sink to let it drain, but I’ve seen others do that with a bucket underneath. I just fill the dispenser partway so that it never overfills the sink, and only empty the sink and refill the dispenser up to 3 times a day. That sets a nice limit for D and prevents her from wasting a bunch of water.

A Montessori Toddler Kitchen Part II - Montessori In Real Life

Note: This post contains affiliate links. If you purchase a product through one of these links, you won’t pay anything extra, but I will get a small commission, which helps keep this blog going. Thanks for supporting Montessori in Real Life!

How to Build a Pikler Triangle

Montessori in Real Life

This post goes out to my husband! He has spent countless hours learning how to woodwork and building shelves, kitchen helpers, floor beds, and Pikler triangles for our family and others. Now he has so kindly spent many more hours putting together these step-by-step, incredibly detailed plans for those who are brave enough to build one too. Now that he’s built one for D, and one for a school auction, he’s learned a lot along the way, and shares all his tips and tricks in these plans. We hope you find these useful!

DIY Pikler Triangle Plans - Montessori in Real Life

The Pikler Triangle may look like a simple climbing frame, but it is so much more. It allows for natural gross motor development, freedom of movement, and learning one’s own boundaries. Older babies can pull themselves up on it, toddlers can gradually find their way over the top and slide down, and children as old as 5 or 6 can use it to climb, build forts, and for other imaginative play. Though some toddlers as young as 12 months are climbing up this Pikler, D didn’t go over the top until 21 months. Even before that, she enjoyed climbing it up to her limit, climbing up and down the ramp, and using it as a tunnel. These days (at 32 months), she climbs and slides on repeat, and in new, creative and challenging ways. It is always a hit when friends come over to play, and she even has her dolls and animals sliding with her. We’ve also used Sarah’s Silks to make forts, and included it in our indoor obstacle courses on rainy days. The possibilities are endless!

DIY Pikler Triangle Plans - Montessori in Real Life

The Pikler pictured above is made of Oak, but the one we have in our home is made of Pine (less expensive). Both work great! The Pikler is completely foldable, making it easy to store away when not in use. The ramp is also optional, but is a really fun addition if your little one likes to slide! You can even add hand-holds on the other side for a “rock-climbing” experience. There are so many ways to customize this beautiful climber.

DIY Pikler Triangle Plans - Montessori in Real Life

DISCLAIMER: This is the DIY approach Montessori in Real Life’s husband took to building a Pikler Triangle.  He made it up as he went along. The plans below are the product of building two Piklers and learning along the way.  These are not intended to be perfect and are not in any way tested for structural integrity or safety standards. Proceed at your own risk: (1) because we can’t be held liable for the resulting work product and (2) because building one of these takes more time than it seems like it should.  There is very little magic in these plans. Modify as needed. Have fun, and happy climbing!

DIY Pikler Triangle Plans - Montessori in Real Life

Freedom within Limits

Montessori in Real Life

Often in Montessori, we hear the phrase "follow the child”. This means we follow each child’s development, interests, needs, and abilities. Though we follow the child in many regards, we are ultimately their guide and not the other way around. Rather than give young children free rein, we give them freedom within limits.

To let the child do as he likes when he has not yet developed any powers of control is to betray the idea of freedom.
— Maria Montessori, The Absorbent Mind
Freedom Within Limits - Montessori in Real Life

Freedom Within Limits

Offering freedom within limits provides a comfortable balance between an overly structured environment and a chaotic one. What does freedom within limits mean? It means setting clear expectations and ground rules ahead of time, and following through. It means making and sticking to (flexible) routines. It means a secure, loving, and trusting relationship between child and adult. It also means providing age-appropriate choices and opportunities for self-mastery and independence.

Freedom Within Limits - Montessori in Real Life

Choices for our toddler in our Montessori home include:

  • Limited but carefully selected toys and materials on her shelf

  • A low cabinet (or now fridge!) with two snack options

  • A dinner plate with several foods but no alternatives after the fact

  • Two pairs of shoes or coats to choose from

  • Options to choose sequence of events rather than event itself (e.g. brush teeth or bathtime first, but both are happening either way)

  • Option to clean up a mess independently or together

Freedom within limits is especially relevant when we talk about letting children work in the kitchen, use real dishes, play with sensory materials, and have access to water. I receive many questions such as “Aren’t your floors covered in water?” “How do they keep their plates on the table?” “How do I get my kid to stop dumping out all their toys?” The short answer is freedom within limits.

Freedom Within Limits - Montessori in Real Life

Expectations / House Rules

The first step of freedom within limits is setting very clear expectations ahead of time. In our home, there are some “house rules” that we discuss often. This is something to think about ahead of time and talk to your partner about. What are the limits we want to set and what are the things we can just let go? I focus on safety of ourselves, each other, and the environment. I try to phrase things in the positive, and focus on what we can do rather than what we can’t. For example:

  1. Water stays in the sink or the cup. If it spills, we clean it up. We can splash in the bath tub or water table.

  2. Couches and chairs are for sitting. The Pikler triangle is for climbing.

  3. We keep our plate on the table when we are eating. We can carry our plate to the compost or the counter when we are done.

  4. Materials and books are handled with care and put back where they belong. If we want to throw, we can throw bean bags or balls.

  5. We are kind to one another. We can offer gentle pats and hugs.

Freedom Within Limits - Montessori in Real Life

Preventing Unwanted Behavior

The second step of freedom within limits is prevention. It is much easier to stop a behavior from happening in the first place than dealing with it after. This often means staying close. I allow my children freedom and access around the house because I have made it a safe place and because I am there to supervise. I am not hovering, but I am usually available to stop D from walking away with her snack, or to stop S from dropping his plate on the floor before it happens. Sometimes though, prevention doesn’t work, or we miss the opportunity.

Freedom Within Limits - Montessori in Real Life

Consistency and Follow-Through

The third step in freedom within limits is consistent follow through and offering natural consequences. Once a house rule has been broken, I usually give one “try again” opportunity and then follow through with a natural consequence. For example, if D dumps water on the floor, I remind her that it stays in the sink. If it happens for the second time, she is all done at the sink and I remove the water source for the time being. If D pushes her brother, I first check on him and invite her to do the same. I remind her of gentle ways we can interact with each other. If she continues to push or try to push, I create separation and help her body move away from him, or pick him up.

I often use the words “I can’t let you _______. I need to keep you (and S) safe. We can _______ instead.” For example, “I see you want to jump on the couch. I can’t let you jump there. I need to keep you safe. Let’s jump on your stepping stones instead.” If she doesn’t respond or change her behavior, then I have to physically help her. I acknowledge her frustration and desire, but don’t budge on the house rules. We don’t have a lot of rules to begin with, but the ones we have are set up for our safety and sanity, and those we follow through on.

Freedom Within Limits - Montessori in Real Life

Freedom within Limits for Babies

Though much of this is related to toddlers, freedom within limits applies to babies as well. S can already make choices about which items he wants to play with from his shelf, or even within a basket of several teethers. He can choose which food he wants to pick up and eat from his plate. As he begins to cover more ground, he can access certain drawers and cabinets in our kitchen, while the unsafe ones are locked. He also has a big sister who is more than happy to remind him of our “house rules” as he begins to explore and test his limits. :)

What does freedom within limits look like in your home?

Traveling with a Toddler and a Baby

Montessori in Real Life

Now that we’ve taken several trips with a toddler and a baby, I thought I’d share some lessons we’ve learned along the way! Remember that although traveling can be stressful in this phase of life, you won’t regret the adventures you made as a family. :) The mind also does a great job at remembering the good times over the bad, so don’t forget to relax and have a little fun. For gear-junkies like me, I have also aggregrated our few essentials of baby and toddler travel gear at the end of this post. Although I am a big fan of packing light, I am a bigger fan of being prepared when traveling with kids!

Traveling with a Toddler and a Baby - Montessori in Real Life

Before Your Trip:

Make a packing list early- I have a few saved Google doc packing lists (summer vs. winter, car vs. plane) that I can start going through a few days to a week ahead of time. Start packing early so that when you inevitably realize you are missing something, you have time to run to a store or Amazon prime last minute items.

“Must-do’s” and “Maybe-do’s” - Come up with a list of activities you definitely want to do while you are on your trip, and ones that could go either way. That way, you can schedule your days to have one main activity planned, with room for others depending on how the kids are doing and how you all are feeling. I have learned the hard way not to overschedule! Getting in and out of the car a dozen times in one day does not lead to happy kids, or happy parents.

Prioritize Sleep - There is a good chance your sleep on the trip won’t be great, so try to get a good night’s sleep the couple of nights leading up to the trip. Better to start on a full battery than already drained! Packing early prevents the night-before stressing too! Make sure to pack any sleep essentials, like lovies, sleep sacks, favorite book, or whatever will maximize your chance of sleep success while away.

Baby D getting a snooze in on the plane

Baby D getting a snooze in on the plane

Travel during optimal hours - Some people swear by red-eyes, so that their child will just sleep the whole plane ride. That can definitely work with babies - both our kids were easy to fly with when they nursed and slept (pre-walking)! Since D has become a toddler, she does not sleep on the plane or even the car, so I couldn’t stand the pressure of keeping our kids quiet while others are sleeping on a dark plane. We always leave in the morning, so that if and when our toddler doesn’t sleep, we still do okay, and make it to our destination by bedtime. Think about your child’s sleep patterns, and plan accordingly.

Condos/Homes over Hotels - If you are staying with family, great! If not, consider an AirBnB or condo that will make meals and sleep easier for your family. We almost never sleep in a hotel because it’s just too hard with two little kids. We need a kitchen, space to play, and bedrooms with closed doors. We’ve found the best situation to maximize baby sleep is a master closet or bathroom that can fit a pack-n-play or Lotus crib and can be dark and quiet when the rest of the house is’t. Some AirBnBs come with baby or toddler gear, which is a huge bonus! There are also baby/child gear rental companies for that kind of thing.

Traveling with a Toddler and a Baby - Montessori in Real Life

During the trip:

Fill that diaper bag - This is so important. Always have a few healthy snacks, a full water bottle, and a couple changes of clothes on hand. Have lots of wipes. Don’t forget all three of these things for yourself and your partner too! It is also useful to keep a couple of activity/coloring books in your bag for long waits or restaurants.

Rules can be different - Although this trip may not feel like a vacation for you with kids, let it be a vacation for the kids. It’s okay if your baby is eating squeeze packs every day and your toddler is getting to play tiny dictator with the relatives. What happens on vacation stays on vacation. It really is easier than you think to get back to your normal routines and rules once you get back home, so try to let a few things go!

Keep up Routines - That being said, keep a few routines the same. This is especially important with sleep. Although schedules might be thrown off with time changes and long travel days, keep the bedtime sequence the same (e.g. bath, pjs, stories, white noise, songs). Try to bring as much as you can to recreate their normal bedtime/sleep routine, so they feel safe and able to rest.

We usually take a crib or twin mattress from the house and put it on the floor for her to sleep on, with all her favorite things!

We usually take a crib or twin mattress from the house and put it on the floor for her to sleep on, with all her favorite things!

Flexible Naps - It can be hard for toddlers to nap on vacation, so try not to get too worked up about it (I’m guilty of this). It’s okay if the only nap happens in the car or stroller. As D has gotten older, she phased out naps on trips before phasing them out at home. With babies, try to focus on wake windows and sleepy cues rather than the clock when it comes to naps. It can help to plan for one good nap at home and one short on on the go. We always make sure we are “home” by their bedtime in the evening and keep the nighttime sleep consistent.

Make time for yourself - If possible, plan something fun on this trip for just you. Maybe that’s yoga or a run by yourself, maybe it’s a date night, or maybe it’s a fun adventure to some place you really want to see with the whole family. Even if it seems difficult to get you or everyone out, you don’t want to feel bummed that you missed out on a little adventure once you get back home. If you have help from family, embrace that and take some “me time”!

Traveling with a Toddler and a Baby - Montessori in Real Life

It’s okay to say no - That being said, there are times when everyone, including yourself, has reached their limit and you just need to stay “home” and recharge. There are also times when your toddler says no, and you should respect that too. It’s about finding that balance of adventure and fun while still staying sane and making this enjoyable for all.

Be Montessori-ish - Though Montessori is a big part of our home life, travel is a little different. Most of our time is spent outside anyway, playing in nature! We try to come up with small ways to allow for toddler independence when we travel, like setting up a spot for D to put her shoes and coat by the door, or letting her help cook when we have a kitchen (she can stand on a chair with supervision). We bring a few natural rubber or wooden teethers for S, but he is usually just happy to be held by family when we travel.

Expect Less - Lastly, I recommend going into trips expecting the littles to sleep less, have big emotional ups and downs, and probably some kind of sickness. If not, you can feel pleasantly surprised! 😉

Traveling with a Toddler and a Baby - Montessori in Real Life
S sleeping in his Lotus Crib

S sleeping in his Lotus Crib

Traveling with a Toddler and a Baby - Montessori in Real Life

Choosing a Montessori School

Montessori in Real Life

I get asked about this a lot, and understandably so. Choosing the “right” Montessori school for your toddler or preschooler can be a real challenge! “Montessori” isn’t trademarked, so anyone can use the name in their school title, and thousands of schools do. Montessori in the name alone does not mean it is a Montessori school in the traditional sense. That may not matter to you, but if you’re looking for a more authentic Montessori experience, it’s important to know.

Simone Davies’ (The Montessori Notebook) Toddler Classroom

Simone Davies’ (The Montessori Notebook) Toddler Classroom

Although you can’t choose a school based on the name alone, there are various other Montessori trademarks and qualifications you can look for. There is of course no one size fits all, but in general, here are the attributes or factors that I look for when choosing or recommending a Montessori toddler or primary program:

How to Choose a Montessori School - Montessori in Real Life

Parents’ Instincts - This is the most important when it comes to childcare in general. Do you get a good feel for the place and from the teacher(s)? Do you sense a positive energy, happy children, and peaceful adults? Is the school clean and orderly? Montessori or not, you need to feel comfortable and safe leaving your child here.

Teaching Style - How does the teacher talk to the children? Montessori teachers are typically wonderful at communicating with the age group they are working with. Do they get down to the child’s level and speak to them with respect? Do they pause and listen to what the child has to say? Conversely, I would avoid schools and teachers that use rewards or punishments, or label children good or bad.

Montessori Trained Teachers - If you want a true Montessori experience, this is very important. The two trainings I look for are AMI or AMS certifications. (I have my AMS infant-toddler certification). The AMI training is a bit more traditional/rigid while the AMS training is a little more flexible, but in my opinion, the similarities outweigh the differences. Other teachers are trained through NAMC, which I’ve also heard good things about but don’t know as well myself. Assistants are not typically Montessori certified. An added bonus is if the school itself is affiliated with AMI or AMS.

Mixed-Age Classroom - Montessori classrooms have a wider age range in each class than is typical in other schools. A toddler class usually goes from 18 months to 2.5 or 3 years. A primary class goes from 3 to 6 years (includes kindergarten year). One of the wonderful things about mixed-age classrooms is that the younger students learn from the older ones, and the older students learn to teach the younger ones. It is so valuable for young children to have this experience, as well as consistency that spans across years.

Layout - Take a look at the classroom, or a few, and note how the room is organized. Is it clean, orderly, and spatious? Montessori classrooms should be inviting for the child, with shelves of organized trays and baskets and plenty of floor space and tables to work at. The furniture should be made of wood, with plenty of natural materials on the shelves. Montessori classrooms are typically not as bright, loud, and overstimulating as many other kinds of preschools.

Self-directed Play - If you are able, observe in the prospective classroom. Watch how the children interact with the materials, each other, and the teachers. Children in a Montessori classroom should be allowed to choose their own work, focus on it, and seek help when needed. Other children might be playing with friends or working alongside one another. Teachers come over to children one-by-one rather than talking over them. There should be a fairly long work cycle for self-directed play, in addition to time outdoors and time together for songs and meals.

Teacher Turnover Rate - Not specific to Montessori, but I always like to look at how long teachers have worked at the school. It’s normal and common for there to be some turnover, and for teachers to leave (like I did after a baby!) but it may be a red flag if there is frequent teacher turnover at the school, especially mid-year. Children do best at schools that teachers enjoy teaching at, and turnover rate is a pretty good indication of that.

Montessori Children’s House of Valley Forge - Primary Classroom

Montessori Children’s House of Valley Forge - Primary Classroom

Note: most Montessori schools do not offer super part-time schedules. This is because children thrive on consistency and routine. However, they do exist and some schools offer flexibility. We were lucky to find a program where D can go a few mornings a week, as that works best for our family right now. She does well with part-time because we model our home in such a similar way, so routines aren’t constantly changing between home and school. It can be really challening for toddlers who have different rules and routines at home to then have to “re-learn” the routine at school each week for the two days they attend. It can also be difficult for a Montessori program to afford such part-time options. I hope that helps you understand why Montessori schools often insist on 4-5 day programs, as well as the importance of consistency for small children. Good luck in your search, and feel free to reach out with questions.

Valentine's Day Activities for Toddlers

Montessori in Real Life

Valentine’s Day may be a Hallmark holiday, but we enjoy it as an excellent excuse to express love and gratitude, and a reason to talk about kindness and friendship. Not to mention the sweet activities for children that go along with it. You can check out my post last year for some ideas and board books for young toddlers. The following activities and books are best for 2-year-olds and up!

Valentine's Activities for Toddlers - Montessori in Real Life

Mailbox Valentine’s - This has been D’s favorite Valentine’s activity. She absolutely loves collecting our mail, seeing the mail delivery person, and going to the post office with me. I gave her a simple set of Valentine’s cards, envelopes, “stamps” (stickers), and a marker. The little mailbox came from Target Dollar Spot. She was so intentional about writing on each of her cards and sealing it up to put in her mailbox. Next week we will make some real valentine’s cards to send to friends and family too!

Valentine's Activities for Toddlers - Montessori in Real Life

Heart Beading - Beading and lacing has become a favorite of D’s, and this was no exception. I love these heart beads by Melissa and Doug. The set comes with 5 laces that are easier for small hands to use to thread on the beads. I cut the strings to make them easier for her to work with, and set out a smaller set of the beads too. She was much more interested in beading as many beads as possible than actually wearing her jewelry!

Valentine's Activities for Toddlers - Montessori in Real Life

Pom Pom Sorting - I like that this activity combines practice with tongs as well as sorting. D mastered this one quickly, so I’ll have to find ways to make it a bit more challenging with different size pom poms! This sorting tray can be used for all kinds of activities as well. The small tongs are also a favorite for serving snack with.

Valentine%27s+Activities+for+Toddlers+-+Montessori+in+Real+Life

Tea Time - This is an afternoon ritual for us, to sit down and sip tea, golden milk, or some other beverage together. She serves up our plates and pours us each our “tea”. (I set it up for her at her kitchen beforehand.) She loves taking ownership over this and always makes sure my cup is refilled! :) You can find a simliar tea set here!

Valentine's Activities for Toddlers - Montessori in Real Life

Heart Matching - I saw something similar on Pinterest, and had to try it with these foam hearts I already had on hand. All I did was cut each heart in half in a different pattern. This would be trickier if you used the same color hearts, but this was still a nice little challenge for D. She had the idea of adding these little wooden hearts on top of each one! ;)

Valentine%27s+Activities+for+Toddlers+-+Montessori+in+Real+Life

Heart Stamp Playdough - This playdough recipe from I Heart Naptime is just the best - oh-so-soft. I make a batch of playdough at least once a month and it stays fresh in containers or ziplocks. With some fun new tools from Target Dollar spot, D has had a lot of fun making heart “cookies” with stamps. It’s so fun to see how she finds new ways to play with playdough each time!

Valentine's Activities for Toddlers - Montessori in Real Life

Love to Pieces Gluing - This was another Pinterest-inspired art activity, and the template is from Little Learning Club. D helped me rip up some colored construction paper and then used a paintbrush and Elmer’s glue to cover the heart. Super simple and fun, and what toddler doesn’t love glue?

Valentine's Activities for Toddlers - Montessori in Real Life

Love and Friendship Books - If you have a baby or younger toddler, check out last year’s blog post for board book ideas. This year, I focused on some picture books with the theme of friendship, love, and kindness towards others. In My Heart (as with all the Jo Witek books) is just beautiful. D loves the rainbow of layered hearts, and I love the vivid descriptions of all the ways a heart can feel. It’s great for giving toddlers more words to express themselves. Love is is D’s current favorite. It tells the story of a little girl who finds a lost duckling and takes it in, but also realizing when it’s time to let it go free. As parents, you’ll love the familiar story of raising your own baby. I purchased I Am Love because we’ve really enjoyed I Am Yoga but I will say it’s a bit advanced for the toddler age. I think preschoolers and older would get more out of it. Lastly, A Book of Love is a brand new book that is all about making, keeping, and mending friendships. D loves talking about the emotions of the children, the interactions between friends, and the beautiful and bright illustrations!

Valentine's Activities for Toddlers - Montessori in Real Life

Note: This post contains affiliate links. If you purchase a product through one of these links, you won’t pay anything extra, but I will get a small commission, which helps keep this blog going. Thanks for supporting Montessori in Real Life!

Our Montessori Bedrooms Tour

Montessori in Real Life

In continuation of our Montessori Home Tour part I, here is part II - the kids’ bedrooms and bathroom! As all of the playing happens in our common areas, their bedrooms are really just for reading together and sleeping. Therefore we try to keep their rooms pretty minimal in terms of toys and distractions, and completely safe for exploring. They have both been sleeping on floor beds since 6 months old, and it’s worked wonderfully for our family. (Scroll to the bottom or read thorugh my previous sleep posts to learn a bit more about our sleep journey.)

Our Montesssori Bedrooms Tour - Montessori in Real Life

D’s Bedroom

Our Montessori Bedrooms Tour - Montessori in Real Life

D's room mostly stores her many stuffed animals, baby dolls, and their accessories. We keep them in baskets on her cube shelf, though they often all end up on her bed with her! Though she hardly naps these days, she has up to an hour of rest time in her room each afternoon when she “reads” her books and plays with her dolls and animals. Her Sprout floor bed (twin size) has allowed for this freedom since she was crawling, but at night, she’s (almsot) always stayed in bed and just slept. (Now that she isn’t napping, she falls asleep immediately upon lying down and sleeps at least 12 hours straight!) Before bed, we read books together in her teepee. In her closet, we keep her Sprout wardrobe with her clothes. We keep the doors to her closet closed, but she can pick out her own outfit each morning, hang up clean clothes, and put dirty clothes in her hamper. Here are links to her bedding, sheets, fox rug, tassle garland, tassle wall hanging, and animal prints.

Our Montessori Bedrooms Tour - Montessori in Real Life

S’ Bedroom

IMG_20200120_125818 (1).jpg

S’ room is bigger and we are hoping that once he is a little older and more capable, the two can share a room. He sleeps on a crib-size floor bed my husband made for D when she was his age. At this point he usually has one morning nap on the go, a long afternoon nap here, and sleeps soundly here through the night. Both of them love to curl up in the reading nook together before bed, and D LOVES to come in here and greet him upon wakeup. The cozy floor cushion is made by Nursling, and pillows and art are from Target. Here are links to his crib sheet, woodland prints, woodland quilt, cube shelf, and floating bookshelves. If you’d like to see more of how his room was set up as a younger infant, or for more links, check out this blog post! Once he is crawling, we will remove the changing station, rocking chair, and maybe the pull-up bar, depending on how active he is!

Both kids have a Hatch sound machine/night light, cordless blackout blinds (D’s are open during her rest time), and a video monitor.

Our Montesssori Bedrooms Tour - Montessori in Real Life

Kids’ Bathroom

Our Montessori Home Tour - Montessori in Real Life

This is the bathroom where D has a little self-care area. If we had more room, I’d love for it to be at her level, but for now it works to have it at the big sink with this adjustable step stool. For teeth brushing, we take turns, so my husband or I brush and floss her teeth first, and then she gets a turn. She also likes to comb her own hair and put on some lotion after her bath. In this bathroom, we have a toilet insert, but she prefers her small potty. S is very excited to be sitting in the big tub with his sister now! Once he’s standing, we will do stand-up diaper changing in here as well.

Our Montessori Bedrooms Tour - Montessori in Real Life

Note: This post contains affiliate links. If you purchase a product through one of these links, you won’t pay anything extra, but I will get a small commission, which helps keep this blog going. Thanks for supporting Montessori in Real Life!

A note about sleep: First off, I want to preface with the fact that I am not a certified sleep coach or sleep expert, so please consult your pediatrician or a sleep consultant if you or your child are really struggling with sleep. Sleep is SO important for happy and healthy children and parents. Neither of our babies were great sleepers from the get-go. We did learn from our sleep journey with D, that we could implement healthy sleep habits at birth, which made sleep much easier the second time around, with S. You can check out a couple of great sleep books in my parenting book list.) With tips from sleep experts, we helped instill good sleep habits early on by following consistent routines (NOT rigid schedules), paying attention to wake windows, helping them gradually shift from falling asleep nursing to falling asleep on their own, and setting up cozy, conducive places for rest. With the floor bed, they never feel “trapped”, and I love that it offers the benefit of extra snuggles at their level when needed. :)

Montessori from Scratch

Montessori in Real Life

I often get the question, “I want to incorporate Montessori at home but how do I start?” There is so much out there about Montessori these days that it can be overwhelming to even know where to begin. My hope is that this blog post gives you a few ideas of how to incorporate Montessori at home, beyond the fancy Montessori materials.

Montessori from Scratch - Montessori in Real Life

Allow for Free Movement

Set up your home or a room(s) in your home where your baby or child is free to explore without constant supervision, saying “No!”, or fear of getting into something unsafe. Janet Lansbury calls this a “yes space”. This could be a playroom, your living room, or most of the house. I find it’s easiest to baby or child-proof the whole living area as well as the kitchen/dining area, as that’s where we spend the time as a family. Keep unsafe items out of reach or in baby-proofed cabinets, while leaving other shelves and drawers open with toys or safe household items for them to explore. If they need to climb, provide safe furniture, cushions, or climbing toys that you can redirect them to. We want our children to feel like a part of the family, so we typically avoid confined play pens and instead, allow (limited) free range.

Montessori from Scratch - Montessori in Real Life

Observe and Rotate

Giant bins of toys or sheer number of toys can be overstimulating for many babies and children. Rather than put out all your toys at once, observe what your child uses and ignores, and rotate materials accordingly. Rotating also makes old toys new again, which helps to keep your child engaged. While some materials may always stay available, such as blocks, vehicles, and/or dolls, most can be rotated in and out. Find a closet where you can store materials and toys not currently being used, and place 8-12 materials on a low shelf or bookcase for your child to explore. By observing your child with materials, you can learn a lot about their development, abilities, and interests. How often you rotate depends on your child’s interest in the materials and how often you are home, but I tend to rotate about half the materials every 2-3 weeks.

Montessori from Scratch - Montessori in Real Life

Provide Opportunities for Independence

Try to imagine you are your child's size. What would you need to be able to accomplish a task yourself? Does your child have a way to reach the sink to wash their hands? Can they pick out their own socks and shoes? Is there a mirror at their level to see themselves when they dress? Do they have access to washcloths to wipe up spills? Any small task to you is an important and meaningful task to a toddler. They feel so empowered when we give them these small opportunities for independence. For babies, think about ways they can freely move, access their own toys, or feed themselves.

Montessori From Scratch - Montessori in Real Life

Be Your Child’s Guide

There is a reason Montessori teachers are called Guides. The child is in charge of their own learning, and the adult is there to help guide and support the child. Rather than always telling your child what to do, give them a chance to work through tasks and problems themselves. Only step in when they ask for your help. When they do need help, offer prompting questions such as "Where do you think that goes?" or "What comes next?" rather than automatically doing it for them. When modeling something new, slow way down and emphasize your actions while using few words, so they are able to watch and learn from you. Guiding also means getting down to the child's level and speaking to them gently in a way they understand. It helps to remember that the way we talk to our children is the way they will talk to others.

Montessori from Scratch - Montessori in Real Life

Offer Real Tasks and Tools

While toys are wonderful (and just so beautiful!), often babies’ and toddlers’ favorite activities are regular household items and activities. Babies love kitchen utensils, brushes, keys, and cords more than anything. Toddlers love washing windows, making snack, doing dishes, and sorting laundry way more than we do. Involve them in household tasks with you, or let them try by themselves. The more “real” the task and the tools we give them, the more capable, confident, and joyful they are. We show them respect and belonging in our family when we give them glasses and dishes rather than sippy cups and plastic. They may not be as careful or complete as we are, but the effort and enthusiasm they put in is admirable and worth celebrating. Mastery comes with a lot of practice and patience.

Montessori from Scratch - Montessori in Real Life

It may also help to read my posts, What is Montessori for infants and toddlers?, Praise vs. Acknowledgment, Montessori for Grandparents and Caregivers, and Montessori on a Budget for more broad overviews. If you have an infant or toddler, you might also find the monthly Montessori Guides helpful, for Montessori materials and activity suggestions month by month.

Montessori from Scratch - Montessori in Real Life